This user guide is for the Interneuron openEPMA module, a module of the Interneuron Modular Care Record. It will guide you though using openEPMA to (among other things) safely prescribe and administer medicines.
To use the openEPMA module you must first launch the Interneuron Modular Care Record. The Modular Care Record is a web based application and the link will be provided to you by your organization (it may also appear as an icon on your organization desktop or device home screen).
Launching the Interneuron Modular Care Record takes you to the patient specific view. This will (by default) take you to one of the Modules. If it is not the openEPMA module you will need to select it from the drop down module selector:
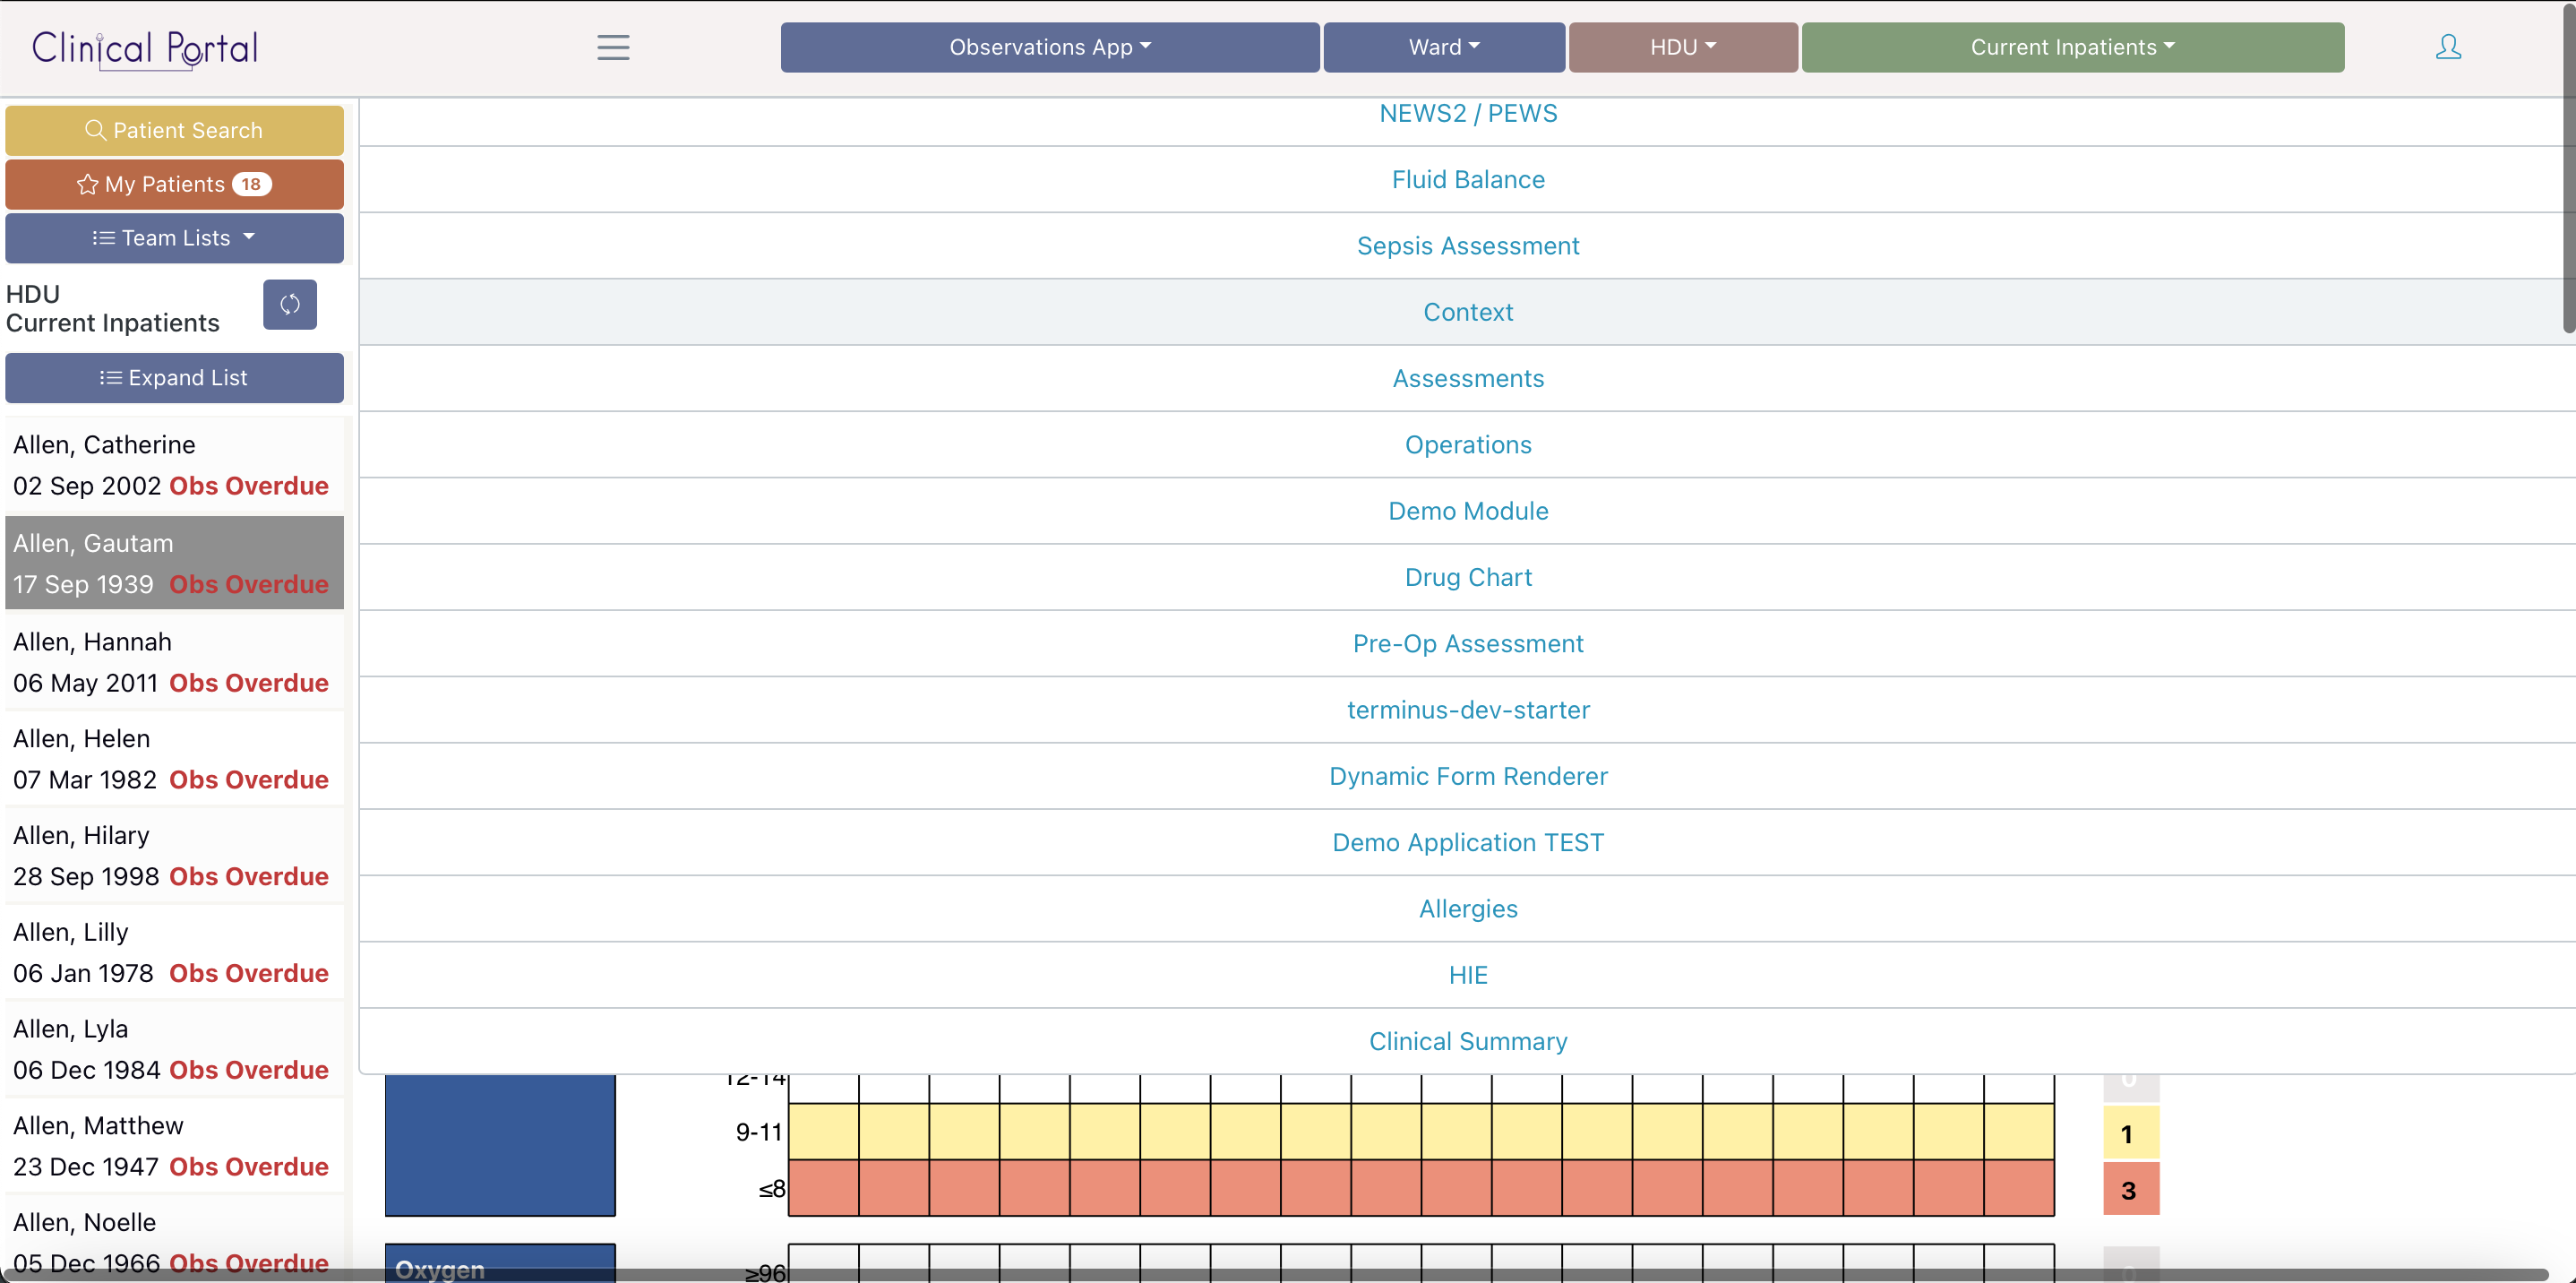
Select the openEPMA module from the module selector.
The application has three main sections. The patient banner, the patient list and the module itself.
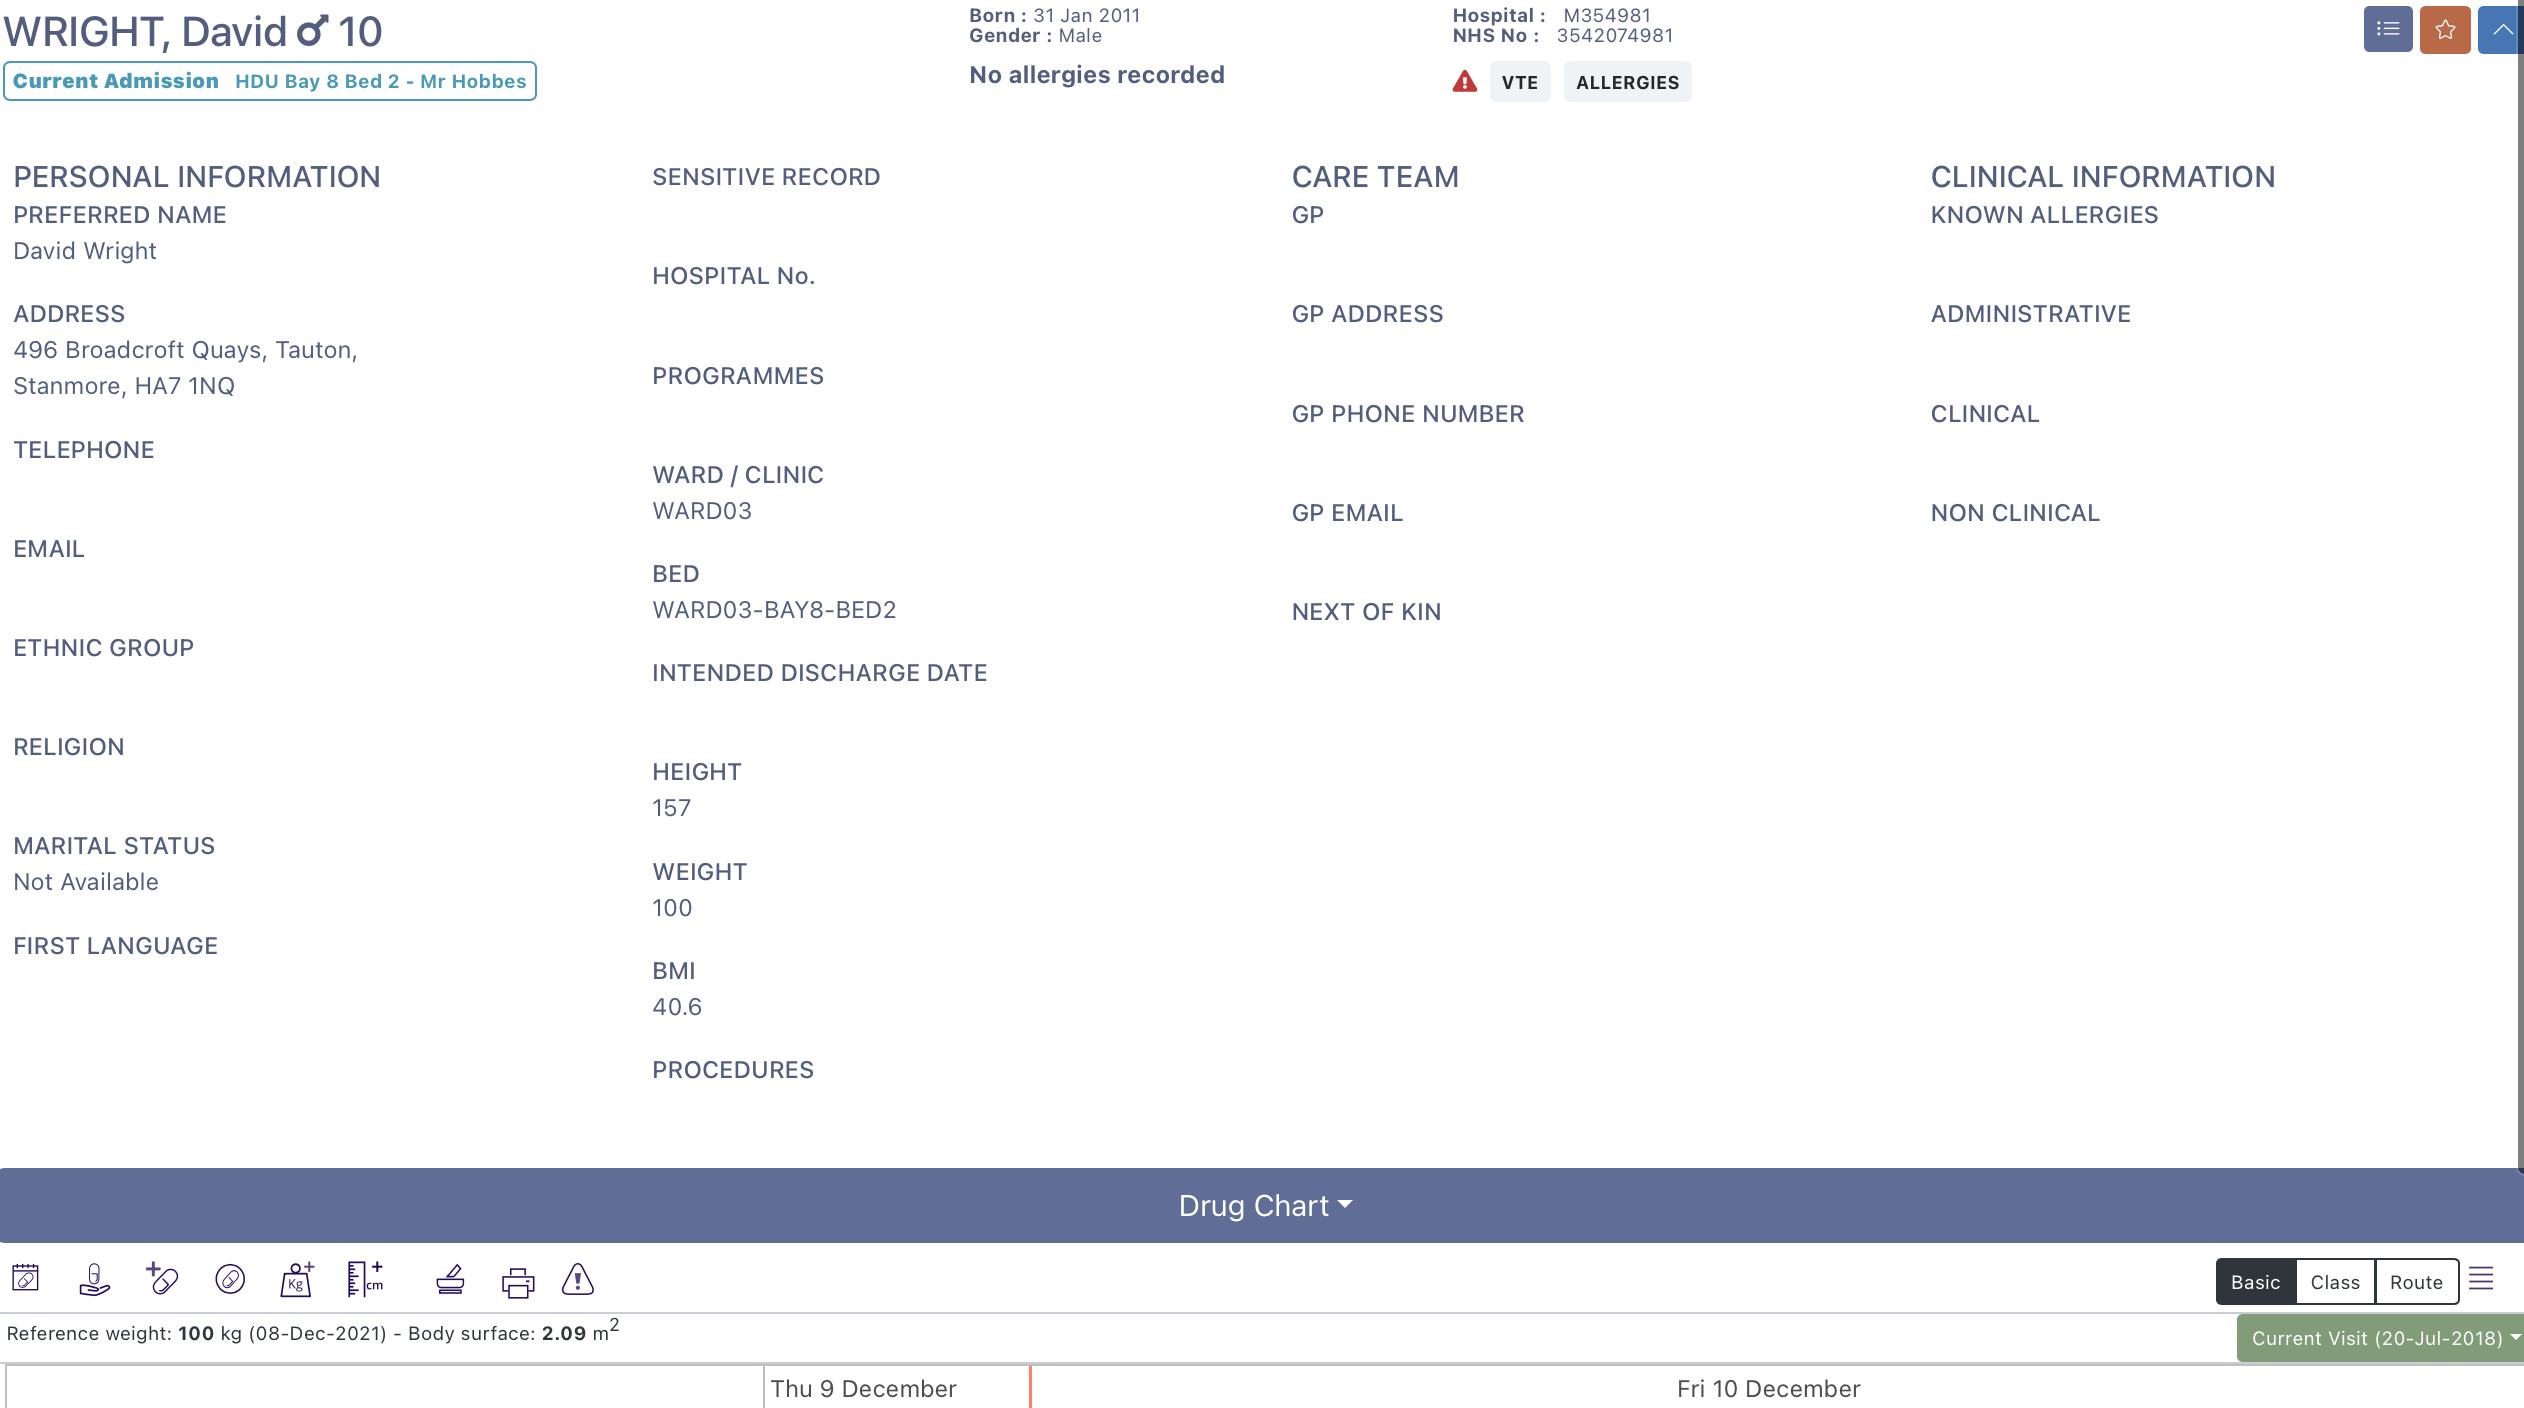
The patient banner is always displayed - regardless of which module is being used. This is intended to ensure that you are always aware of which patient you have selected.
The banner shows:
The banner can be expanded by using the icon on the far right of the banner:  this will display any additional information that is available, such as GP details.
The patient list displays all the patients for a specific team, ward or clinic. This list can be configured to display the group of patient you need to see, but will default to a group (e.g. ward) that will be set up for you in advance.

The module displays the list of prescribed medicines at the centre:
At the top are the navigation icons:
To the right of the screen are the medicine grouping preferences:
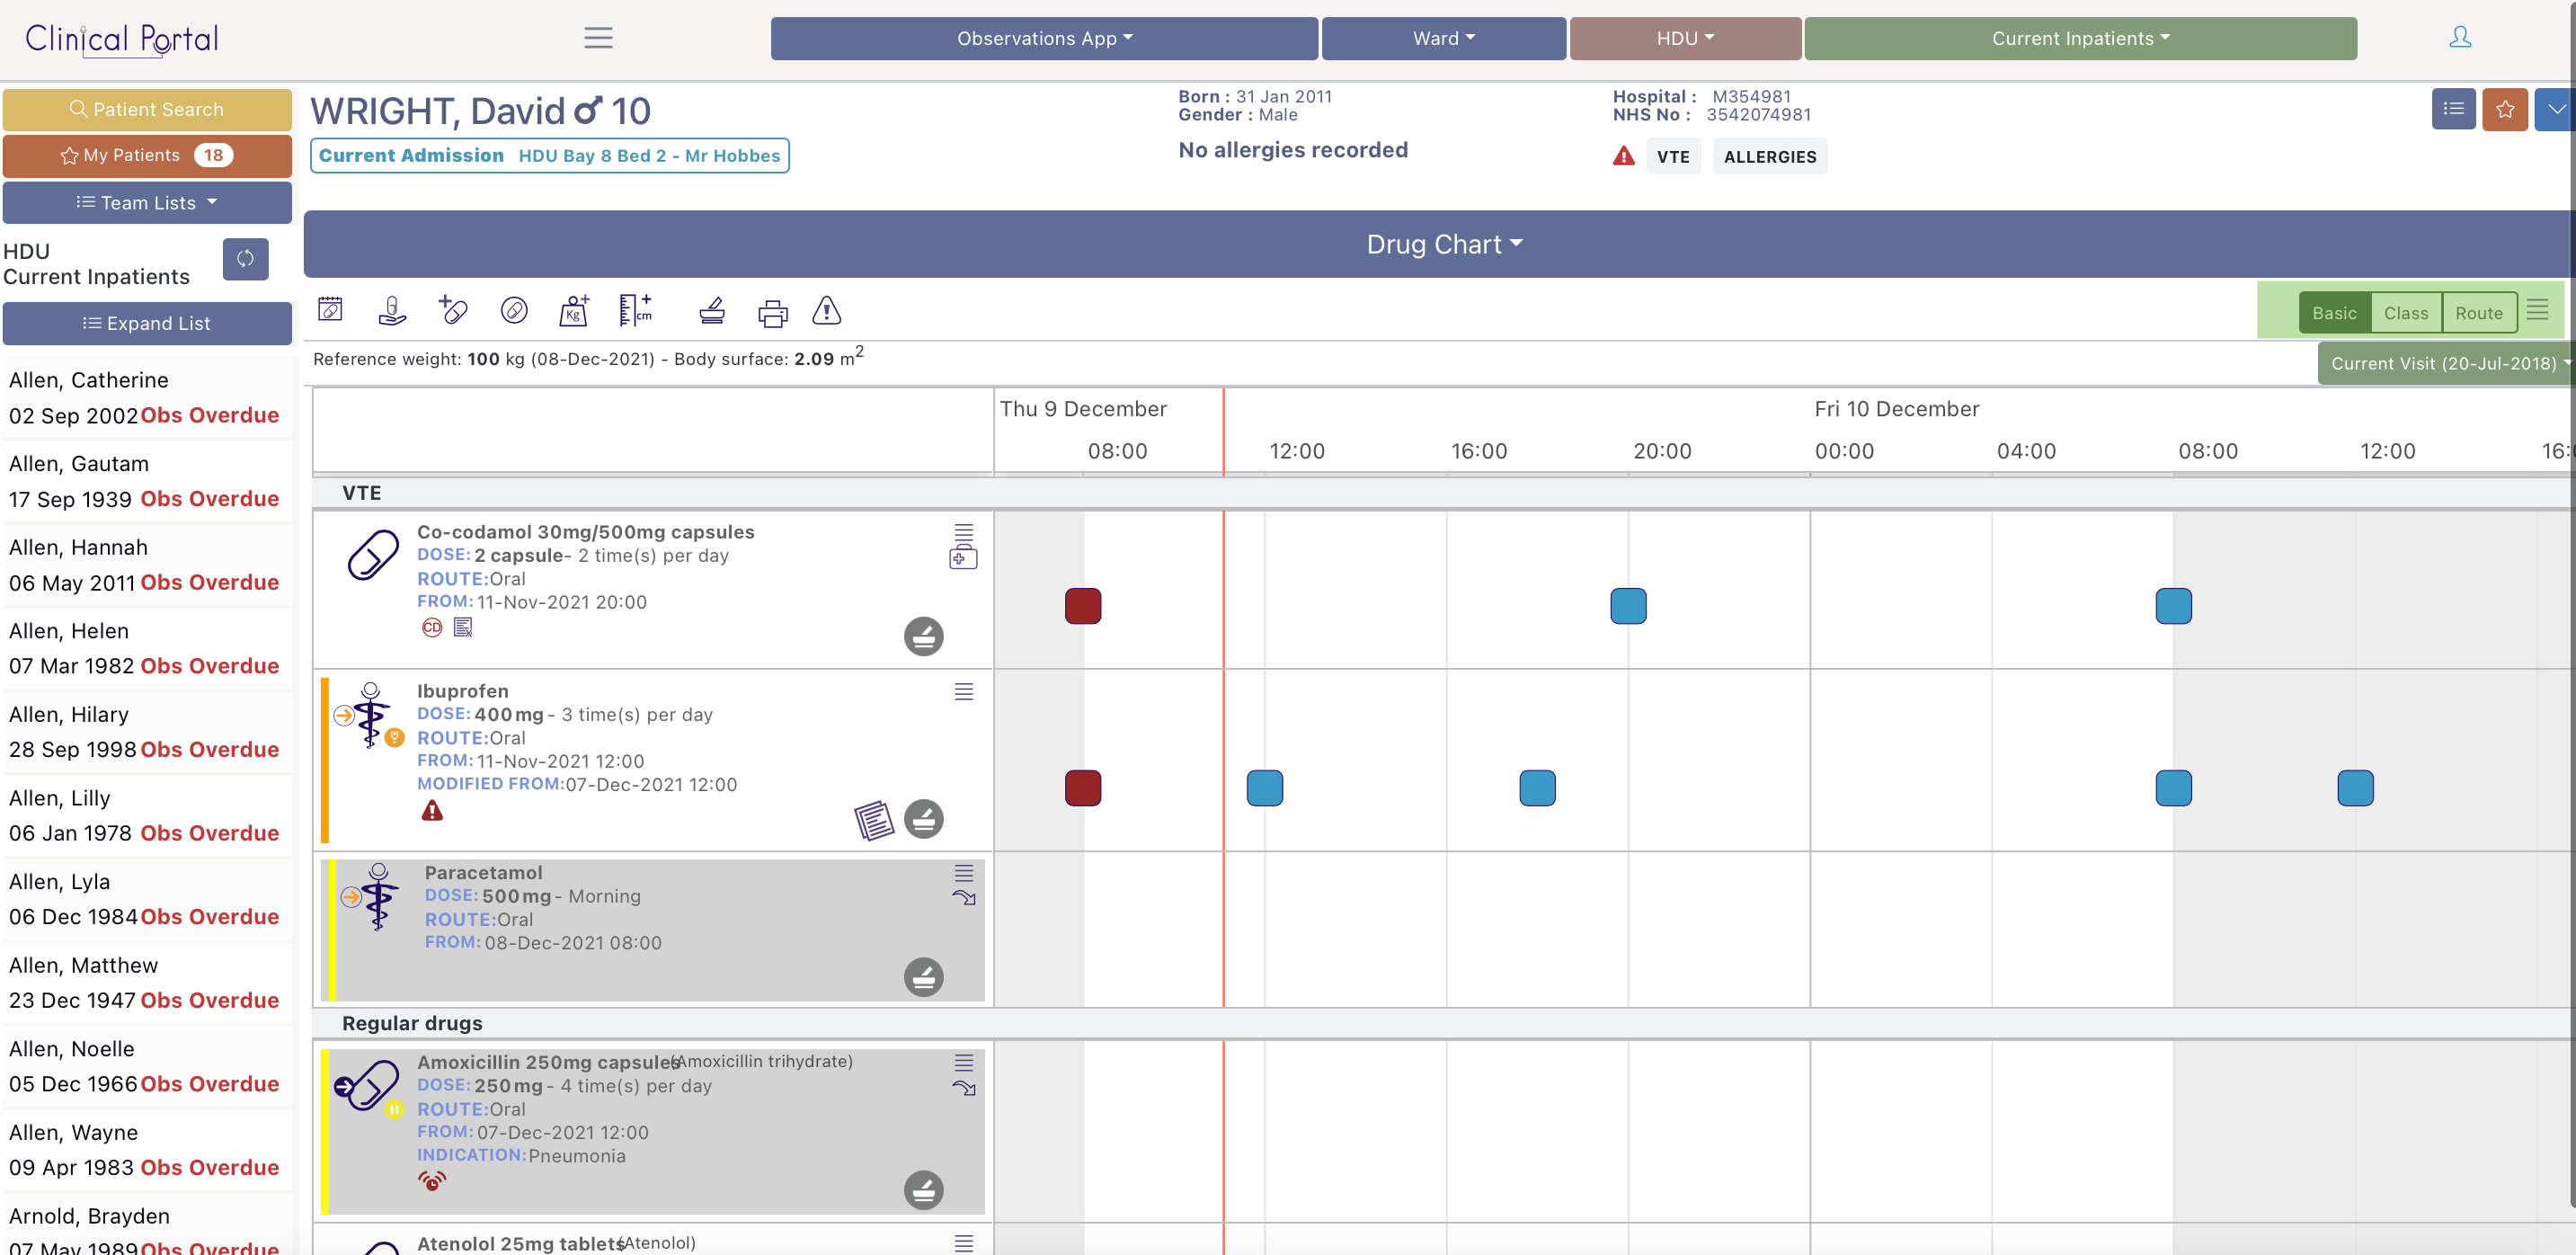
And the encounter selector is below the grouping preferences:
To document the medicines a patient is currently taking we add medicines to the Medicines On Admission (MOA) list. To be clear, the MOA list is not a prescription, it's just a list of medicines that the patient is currently taking that can be referred to and used when prescribing and in generating the discharge summary.
We get to the medicines on admission list by selecting the 'Medicines on Admission & Discharge' icon within the navigation icons: ![]()
The MOA list is on the left:
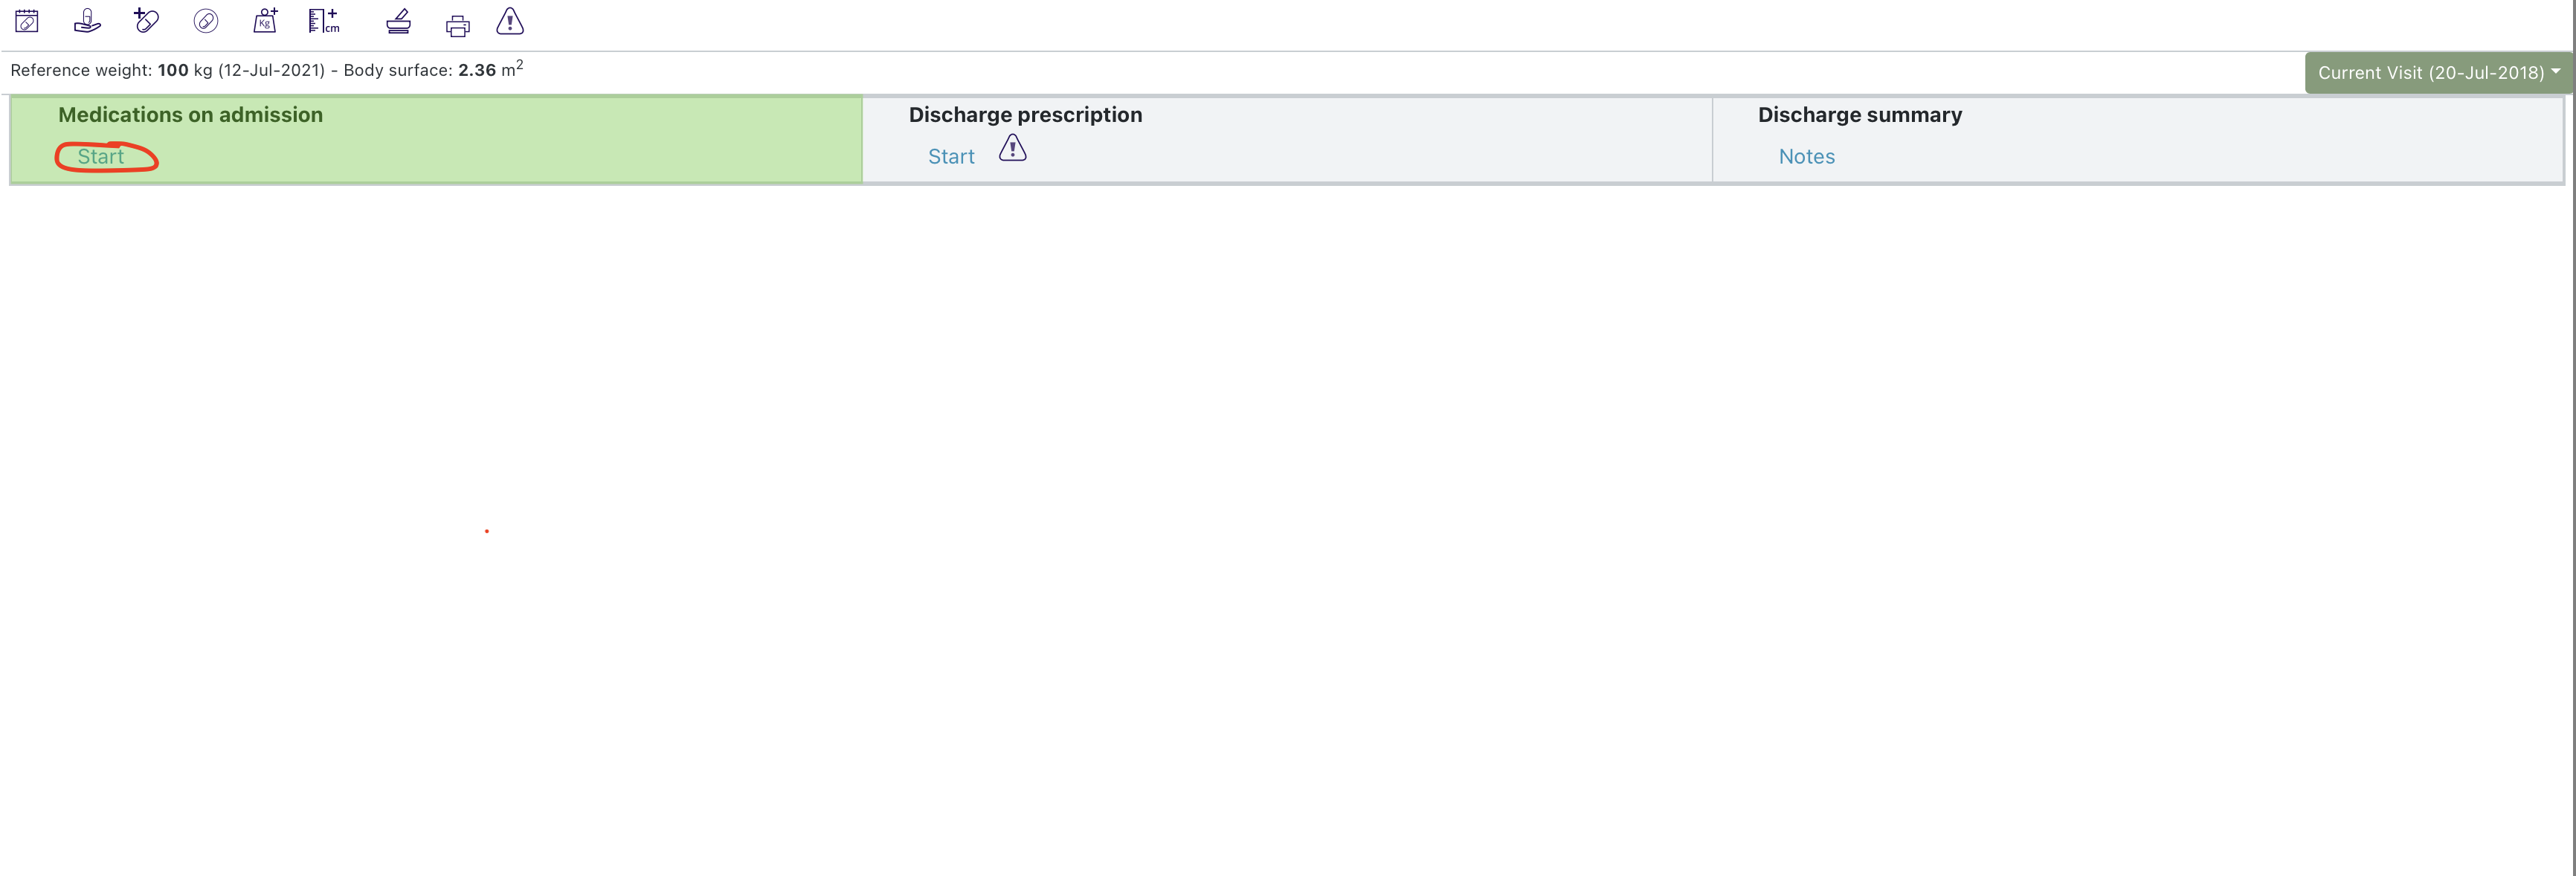
Select 'Start'.
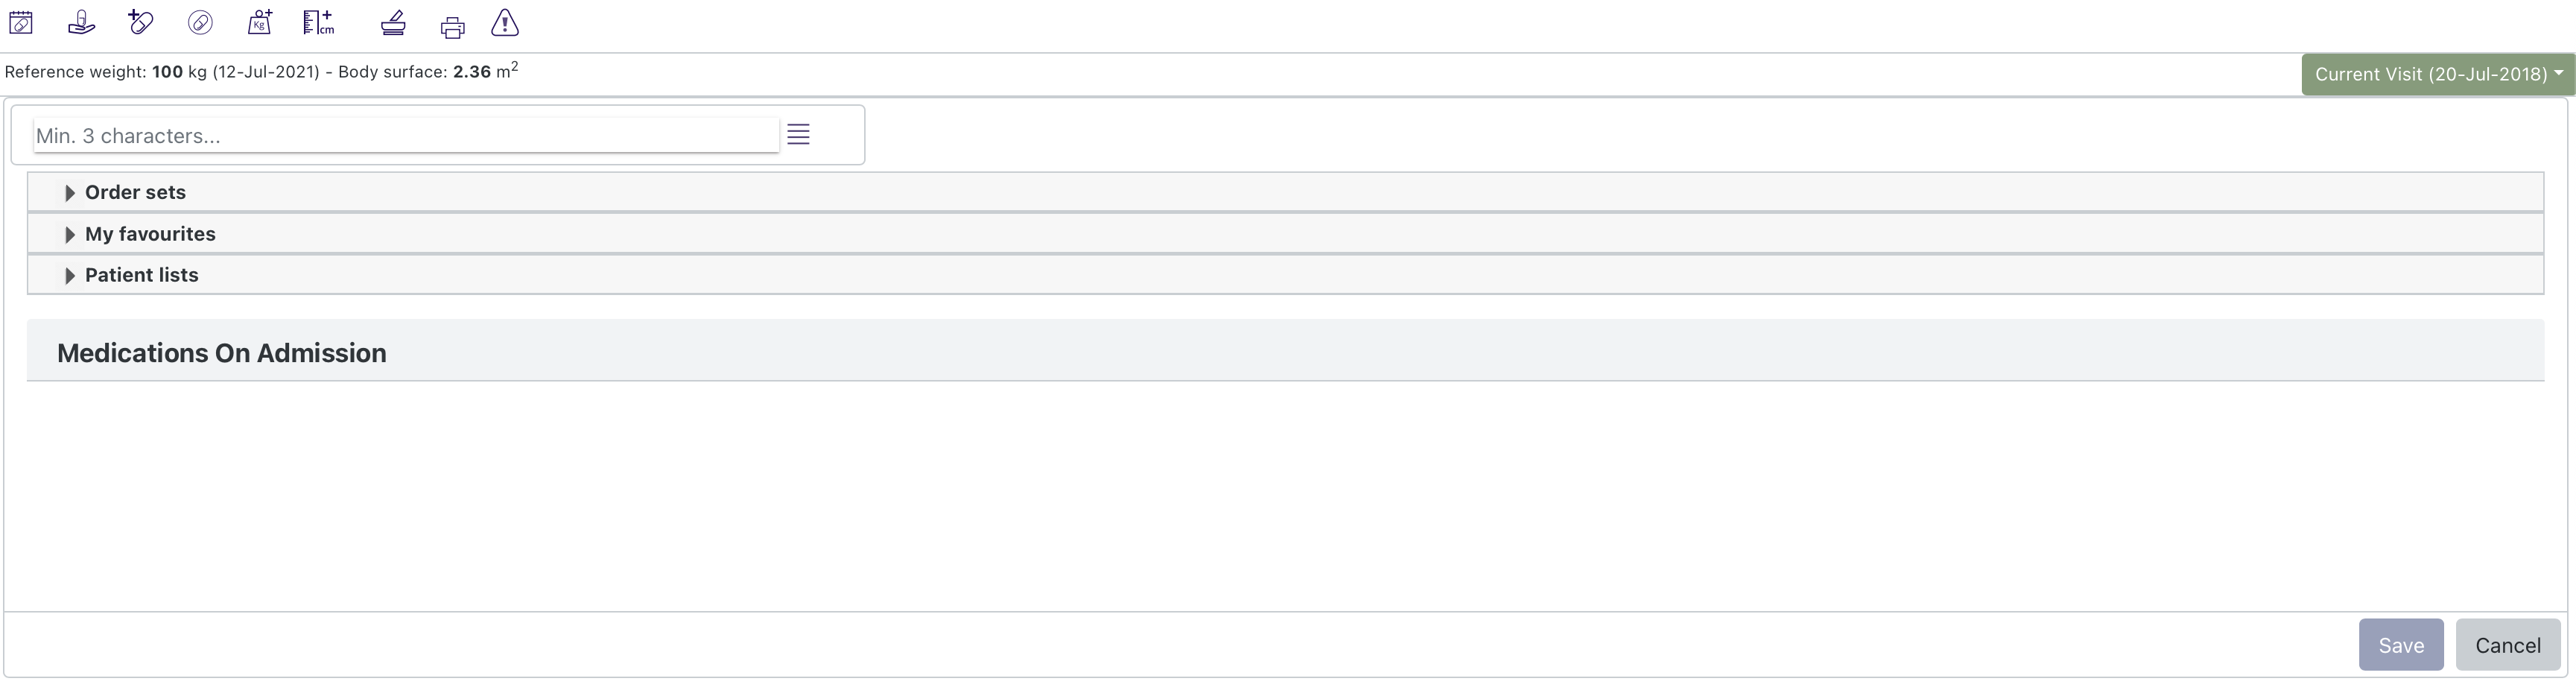
Once you have confirmed you are sure - you will be able to enter medicines onto the MOA list. New medicines can be entered from the search bar or from a predefined list.
The search bar is displayed underneath the navigation icons and the patients reference weight. To search you need to enter at lest the first three letters of the medicine you are looking for:
If you enter 'Amoxi' the system will return all the medicines that contain those characters:
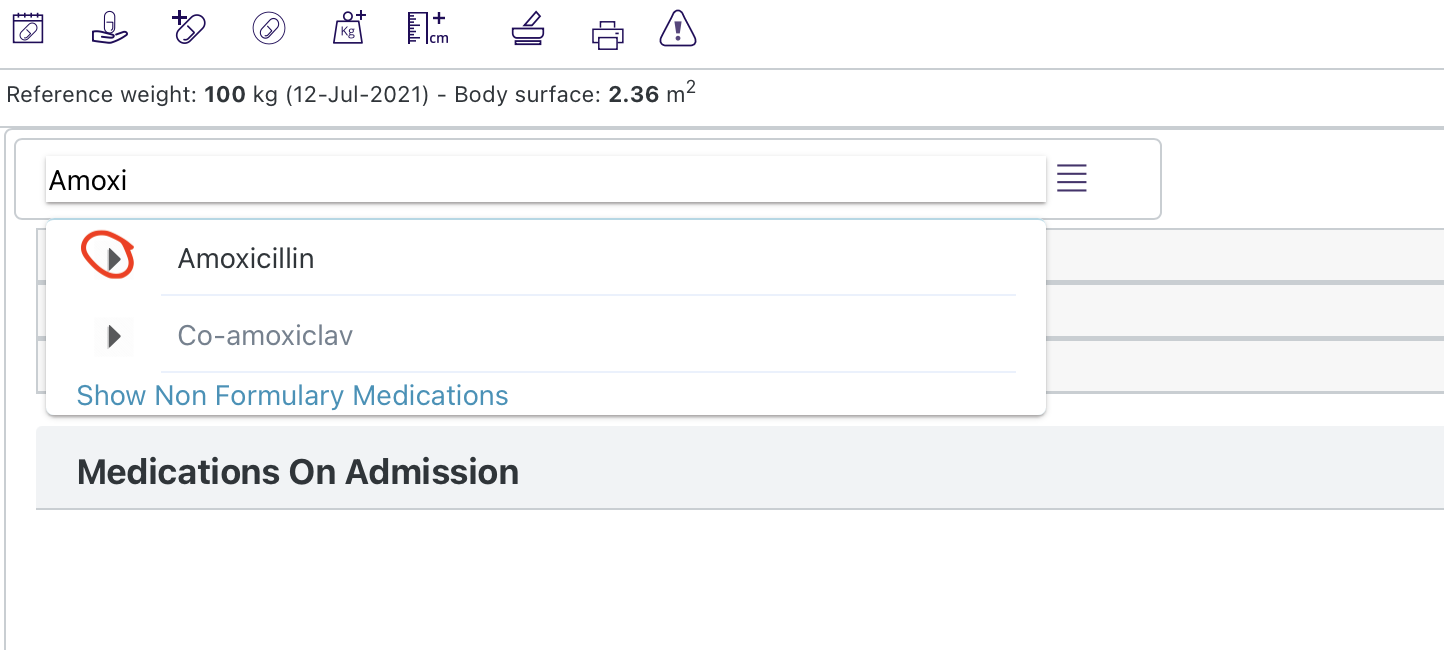
The results are displayed in the VTM, VMP, AMP hierarchy (please refer to the latest NHS documentation for more details: https://simplifier.net/guide/DigitalMedicines/Medications).
Selecting the arrow icon to the left expands the hierarchy:
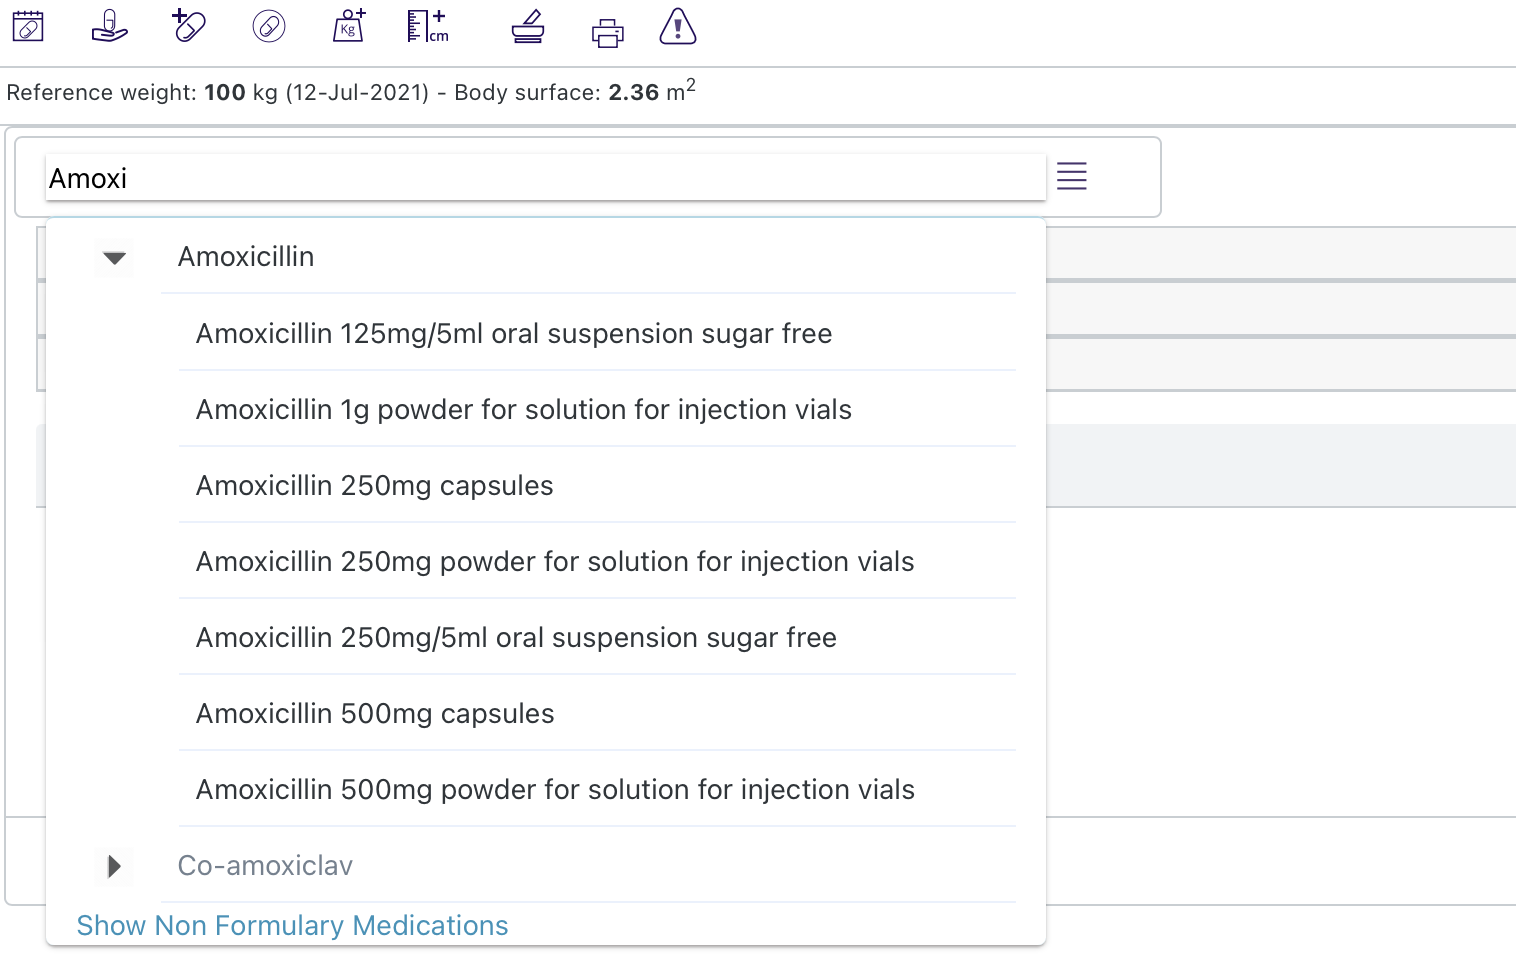
In the example above only the VTM and VMPs are displayed. For this medicine the system been configured to make the AMPs non-prescribable and so they will not appear in the search results.
The user can select either the VTM or one of the VMPs to add more details:
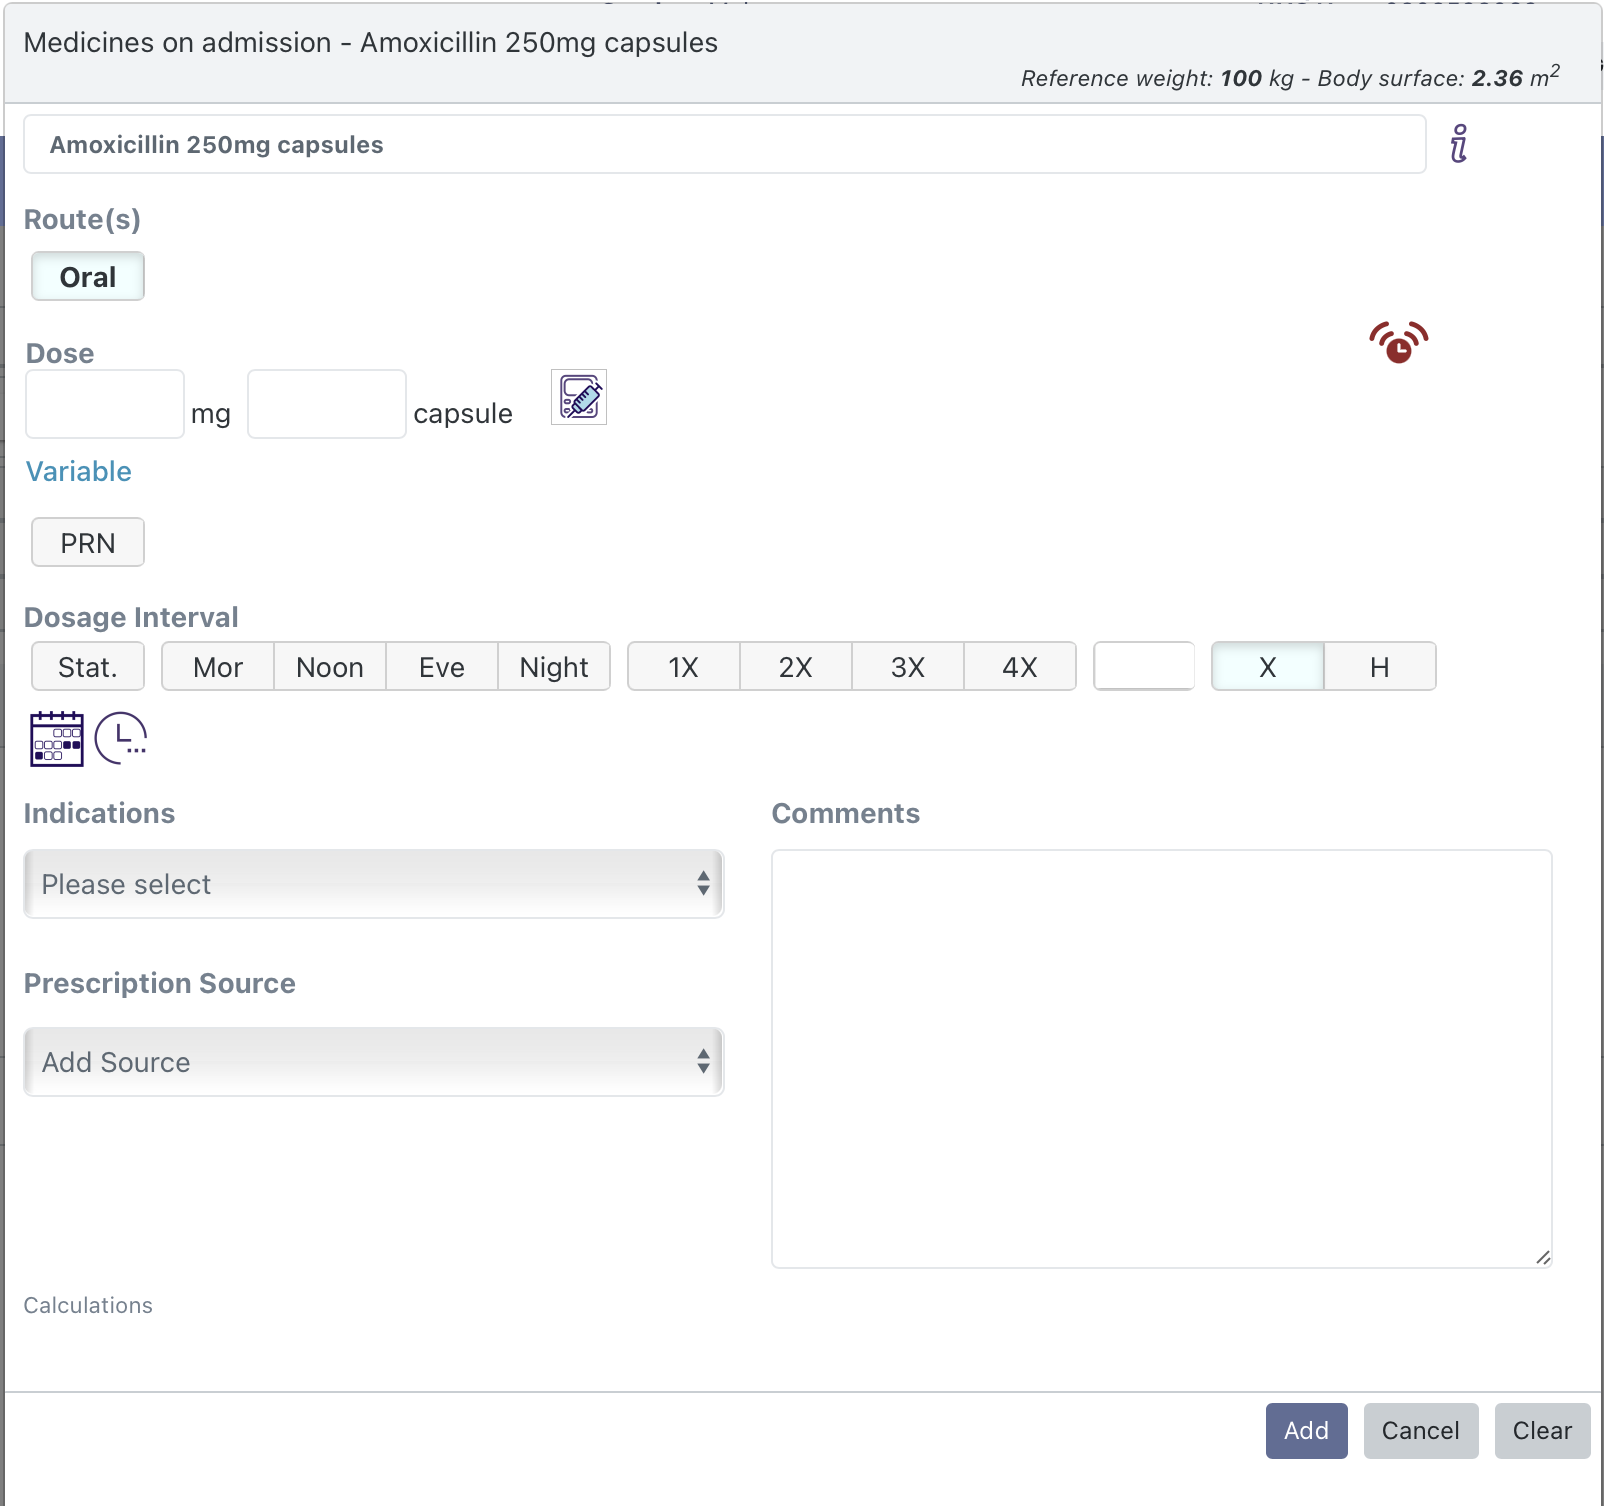
Here the route, dose, dosage interval, indications, prescription source and comments can be added.

Select 'Add' to add the medicine to the MOA list:
Below the search bar there are three different predefined lists:
Order sets are groups of medicines that have been predefined by your organization. These will be group around commonly prescribed medicines and indications. These will typically be used for prescribing medicines and not for adding medicines to the MOA list.
If there are medicines that you prescribe on a regular basis - you can save them to the 'My favourites' folder. Again these would typically be used for prescribing medicines and not for adding medicines to the MOA list.
The patient lists folder provides lists of medicines that have been created for the patient in the past, including previous MOA lists and Discharge Prescriptions. This list may also show lists of medicines from other connected systems (e.g. primary care, or from pre-operative assessment) if they are available. These lists may prove very helpful in creating the MOA lists.
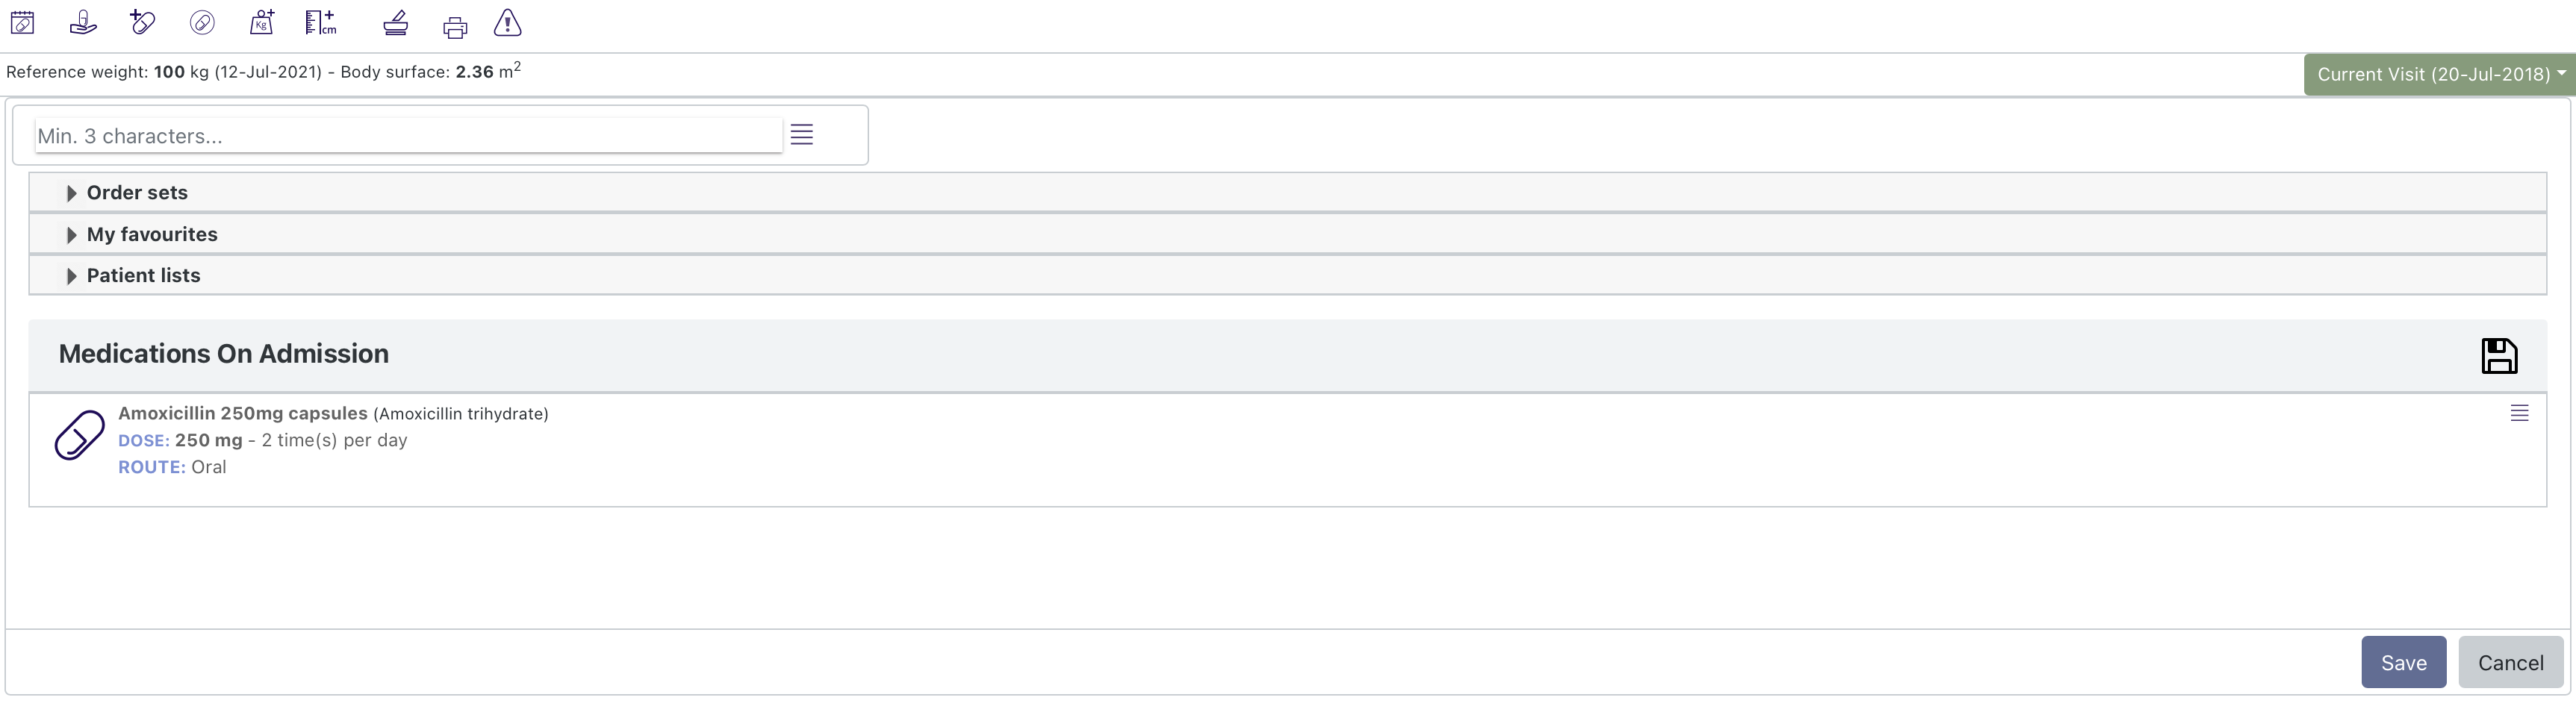
Once all the medicines have been added select the 'Save' button to save the MOA list.

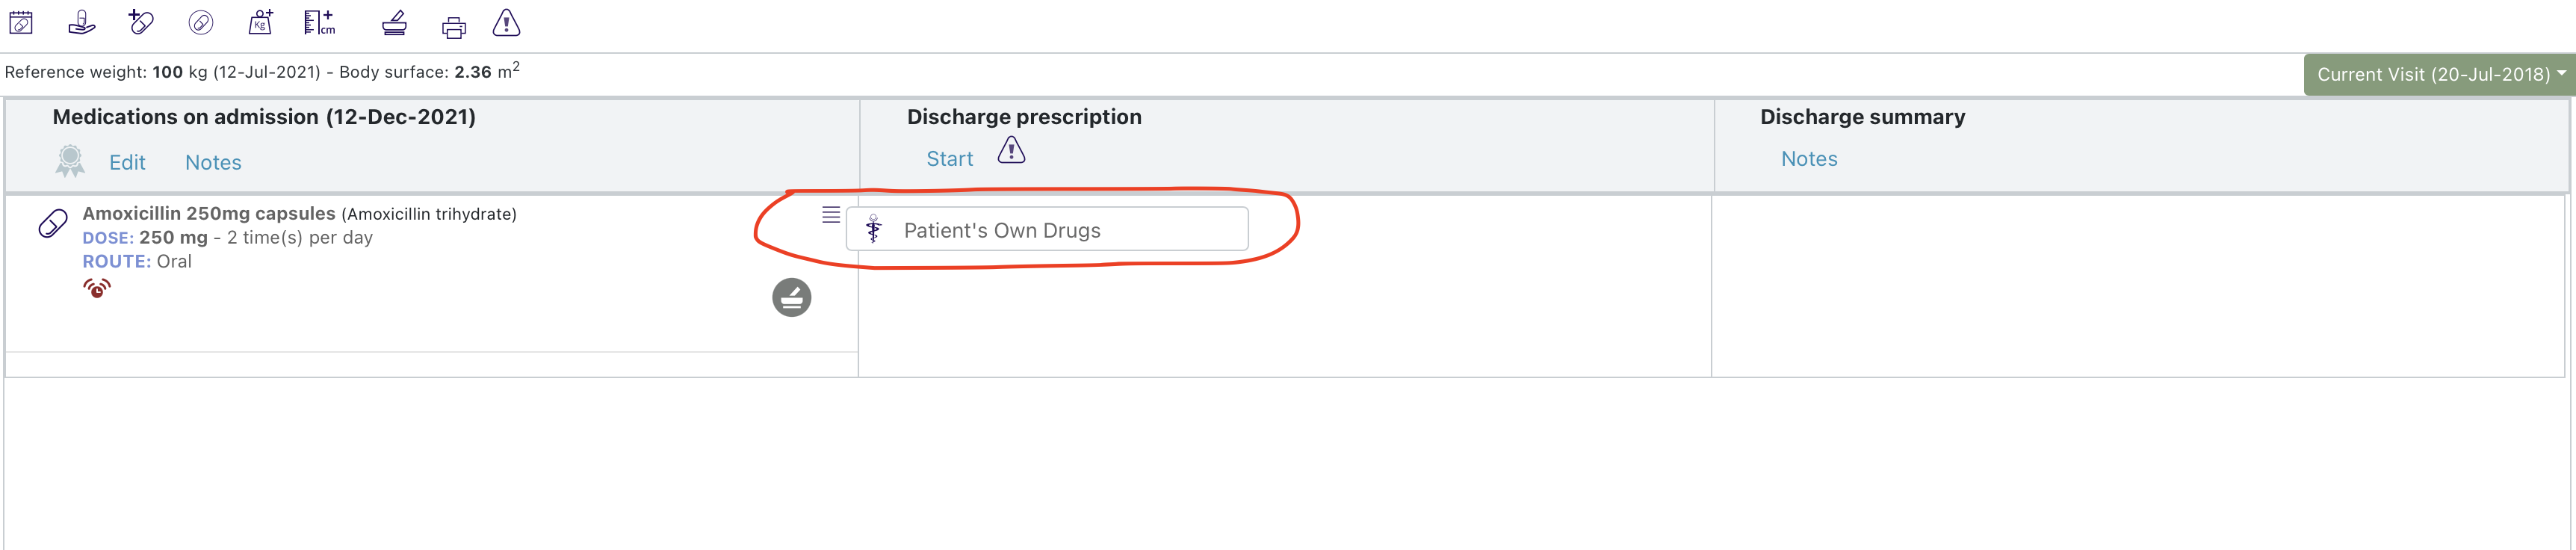
The MOA list is now displayed on the left of the 'Medicines on Admission and Discharge' view. More medicines can be added by selecting "Edit" that has now replaced "Start".
If the patient has brought in a supply of medicine that has been added to the MOA list - this information can be added in the "Patient Drugs" view. To bring this up, select the "Patient Own Drugs" menu option for that medicine in the MOA list:
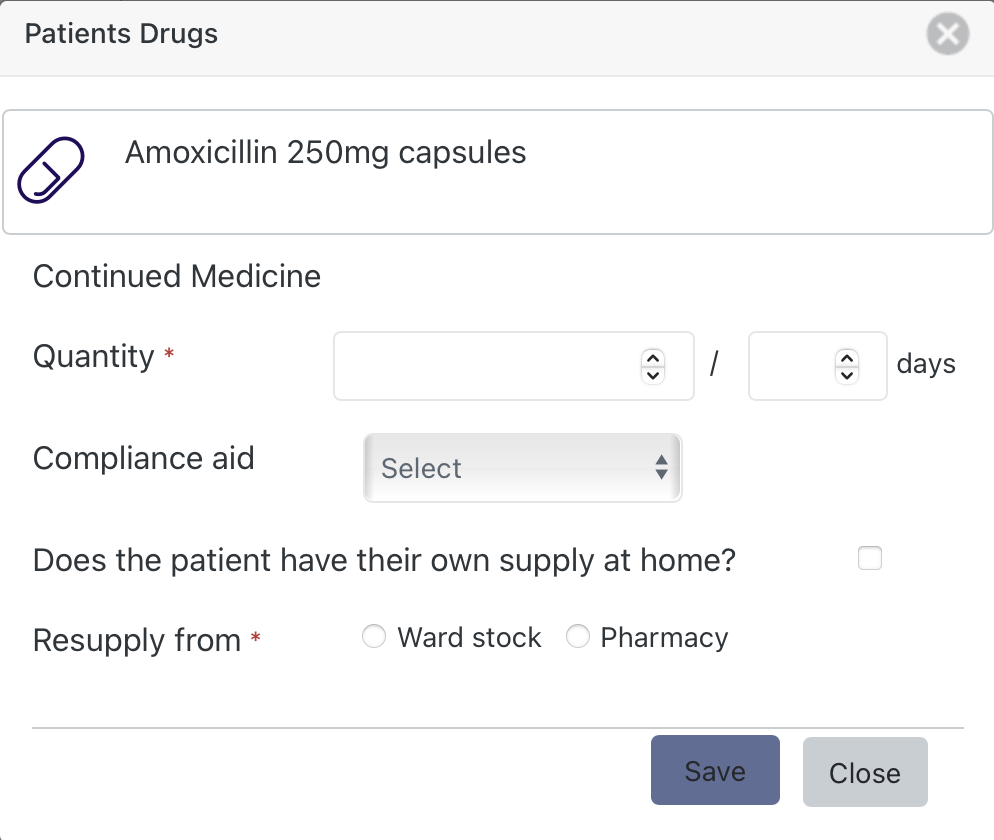
The Patient drugs view allows you to enter the quantity of medicine, if the patient has a compliance aid, if the patient has their own supply at home and where the medicine should be resupplied from should that be required.
Additional comments about any MOA medicine can be added via the comments and review icon: ![]()
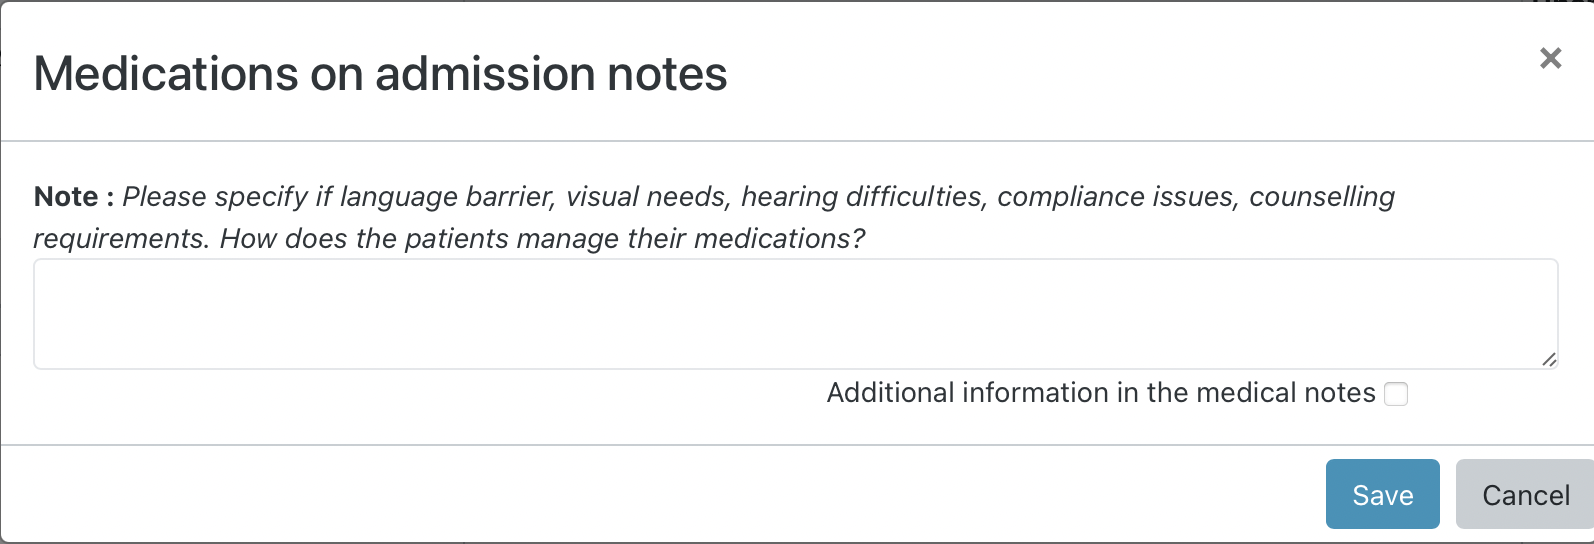
Selecting "Notes" in the MOA list allows the addition of free text notes.
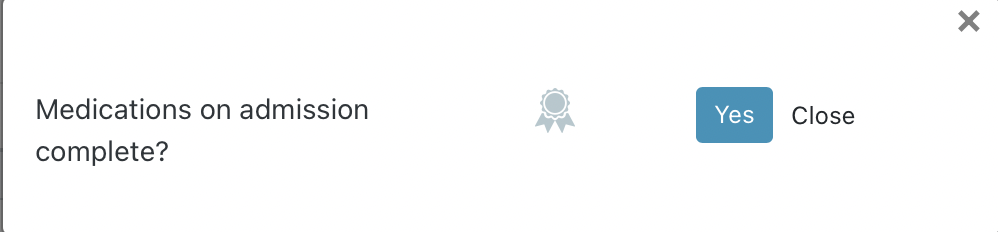
Users with appropriate permissions are able to mark the Medicines on Admission list as complete by selecting the rosette icon at the top of the Medicines on Admission list: ![]()
This brings up a dialogue that needs to be confirmed:
Once confirmed the rosette icon turns green: ![]()
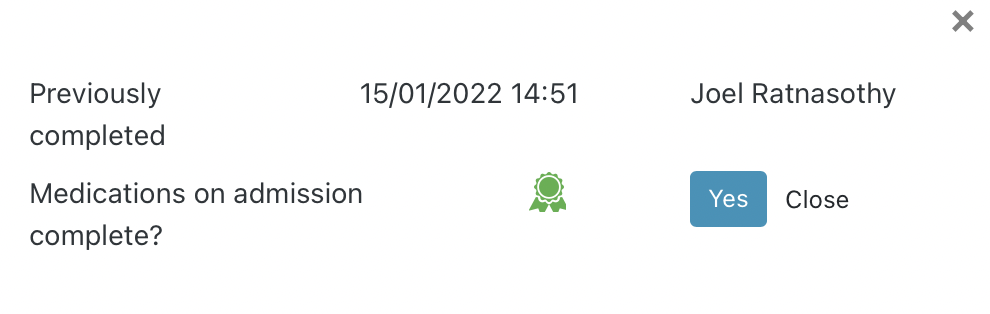
Selecting the rosette again brings up the confirm dialogue and also a list of when the medicines on admission list was previously completed and by whom:
To prescribe a medicine in openEPMA select the prescribe icon from navigation icon menu :
![]()
This bring up the medicines search screen:
The screen consists of three horizontal sections. At the top the user is required to enter the medicine they wish to prescribe. The middle section lists the medicines that have been selected as 'draft' prescriptions. The lower section displays any prescription warnings such as drug interactions or contraindications (see Warnings).
A medicine can be selected to be prescribed in three different ways:
The medicine search bar requires a minimum of three letters on which to search.

For example if the user searches for "Parace" the system returns Paracetamol from the search:
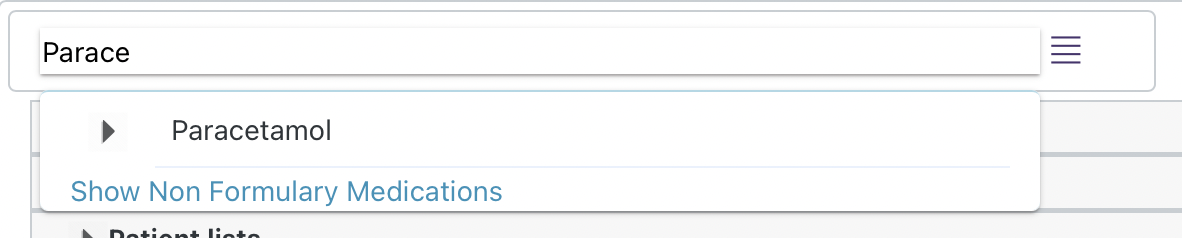
By default, the system will only return medicines that have been marked as 'Formulary' (see Medicines Management Console). To see Non Formulary Medicines the user must select the 'Show Non Formulary Medications' option below the search results.
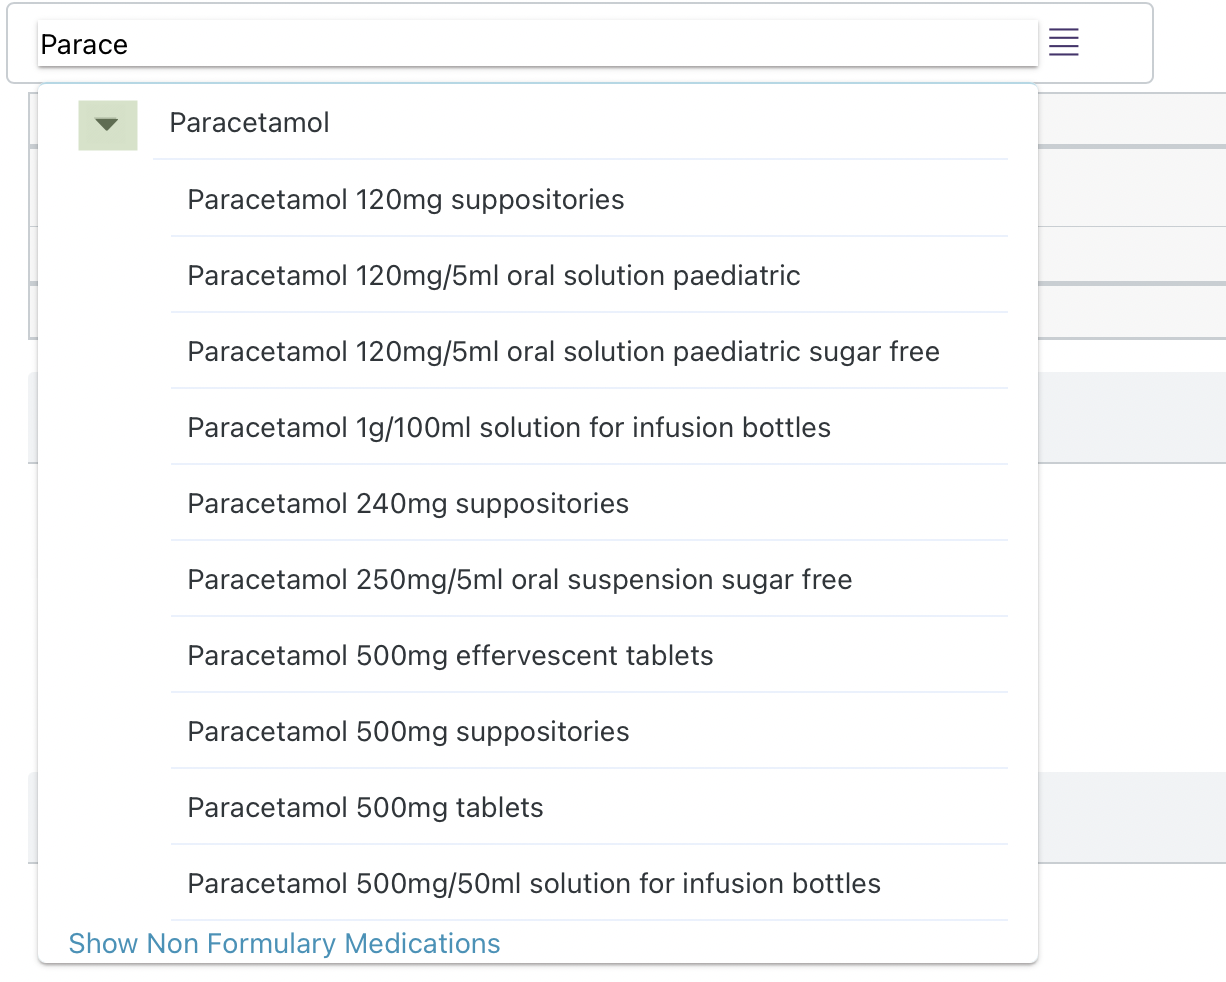
The results from the search are returned in three levels. The Virtual Therapeutic Moiety (VTM) at the top, then the Virtual Medicinal Product (VMP) and finally the Actual Medicinal Product (AMP). To expand or collapse the search results the user must select the arrow icon to the left of the medicine:
To user must select the medicine they wish to prescribe from the search results to open the prescribing form.
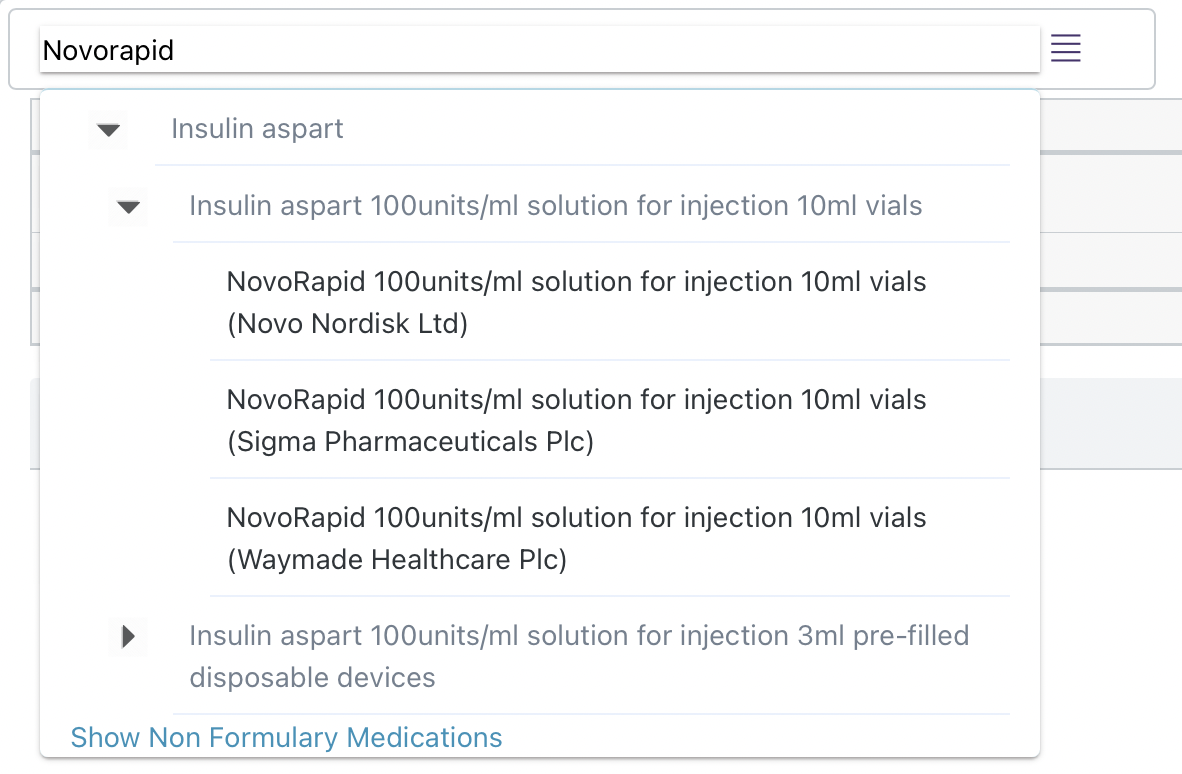
Depending on how the system has been configured certain medicine will not be 'prescribable' at all the VTM/VMP/AMP levels. Where an AMP has been marked as not prescribable (see MMC) it will not appear in the search results. Where an AMP has been marked as prescribable and either the VTM or VMP or both have been marked as not prescribable, they will appear in the search results but will appear faded and the user will not be able to select them:
Below the search bar are the medicines lists. There are three types: Order sets, My Favorites and Patient lists:

These lists can be expanded by selecting the arrow icon to the left of the list.
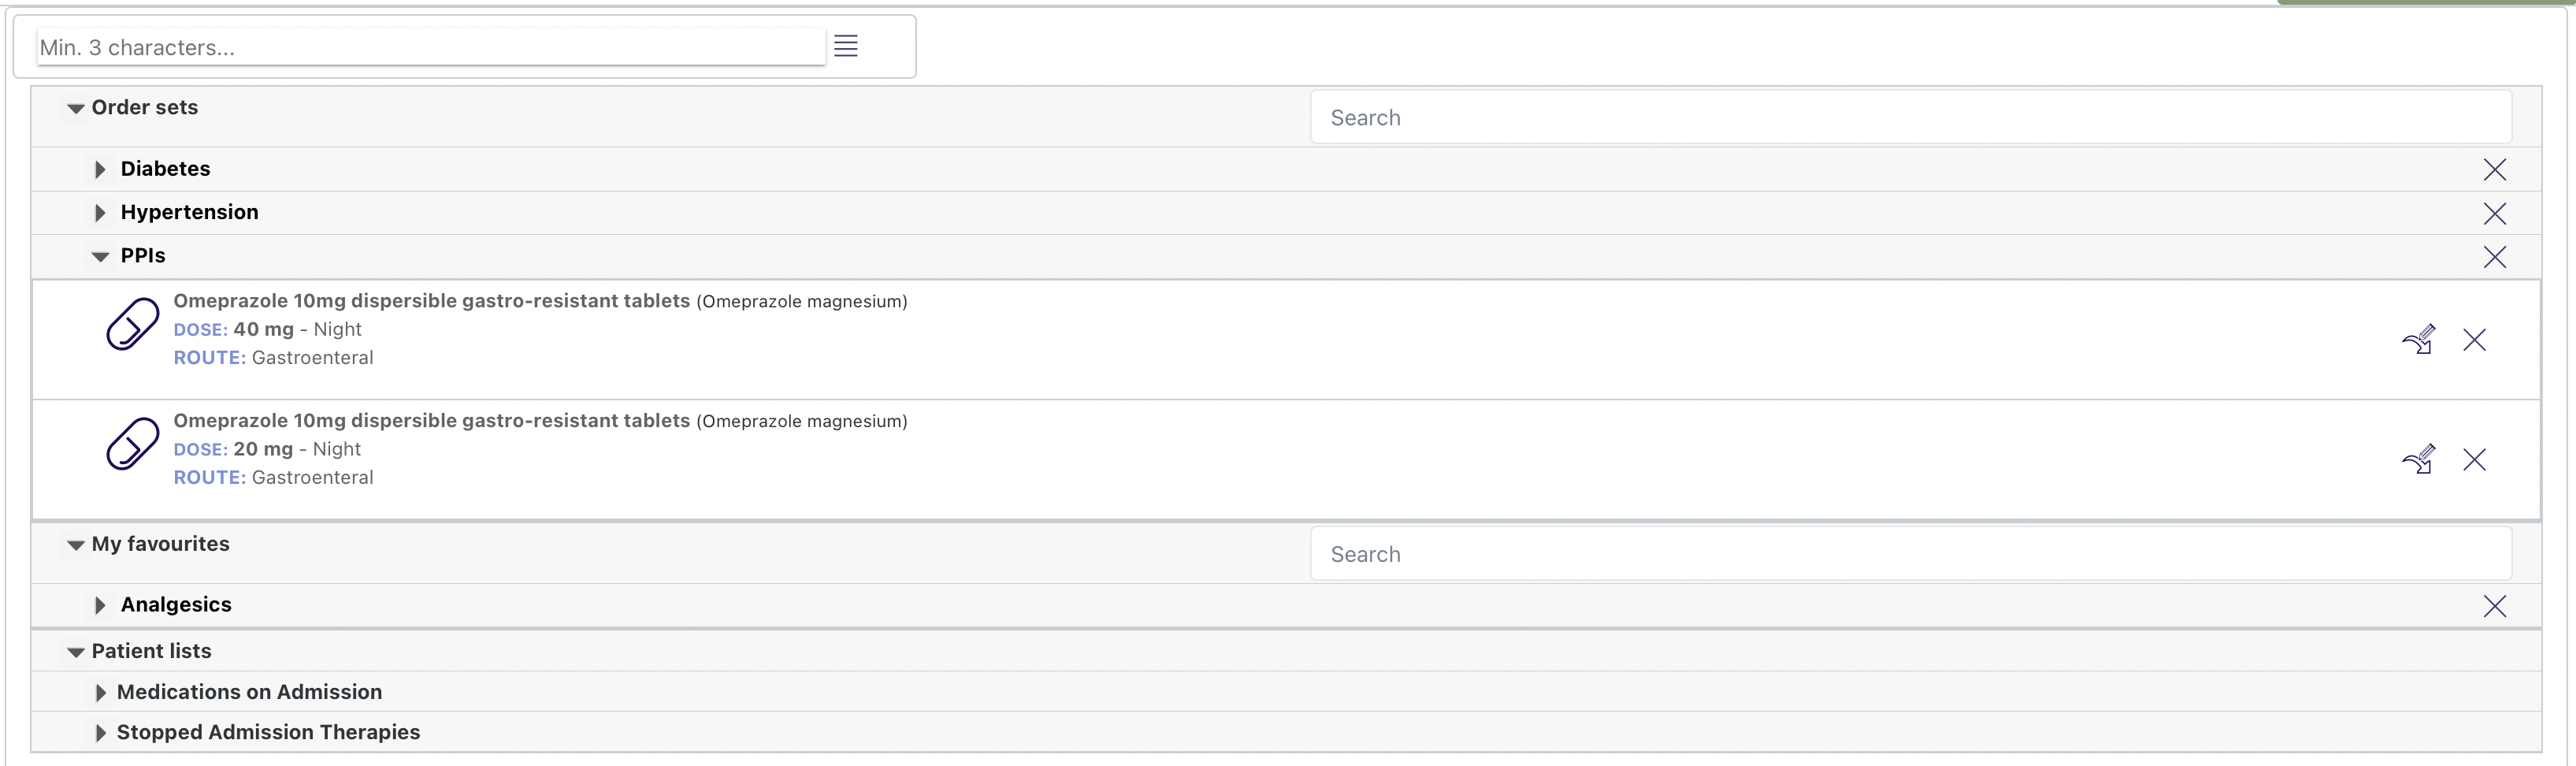
You can browse though the different ordersets by expanding each folder or you can search for a specific order set or medicine in the respective search bar.
Order sets are lists of medicines that have been pre-configured by your organization. The ordersets available will change depending on the patients age and weight. Only an administrator can create, edit and delete an orderset.
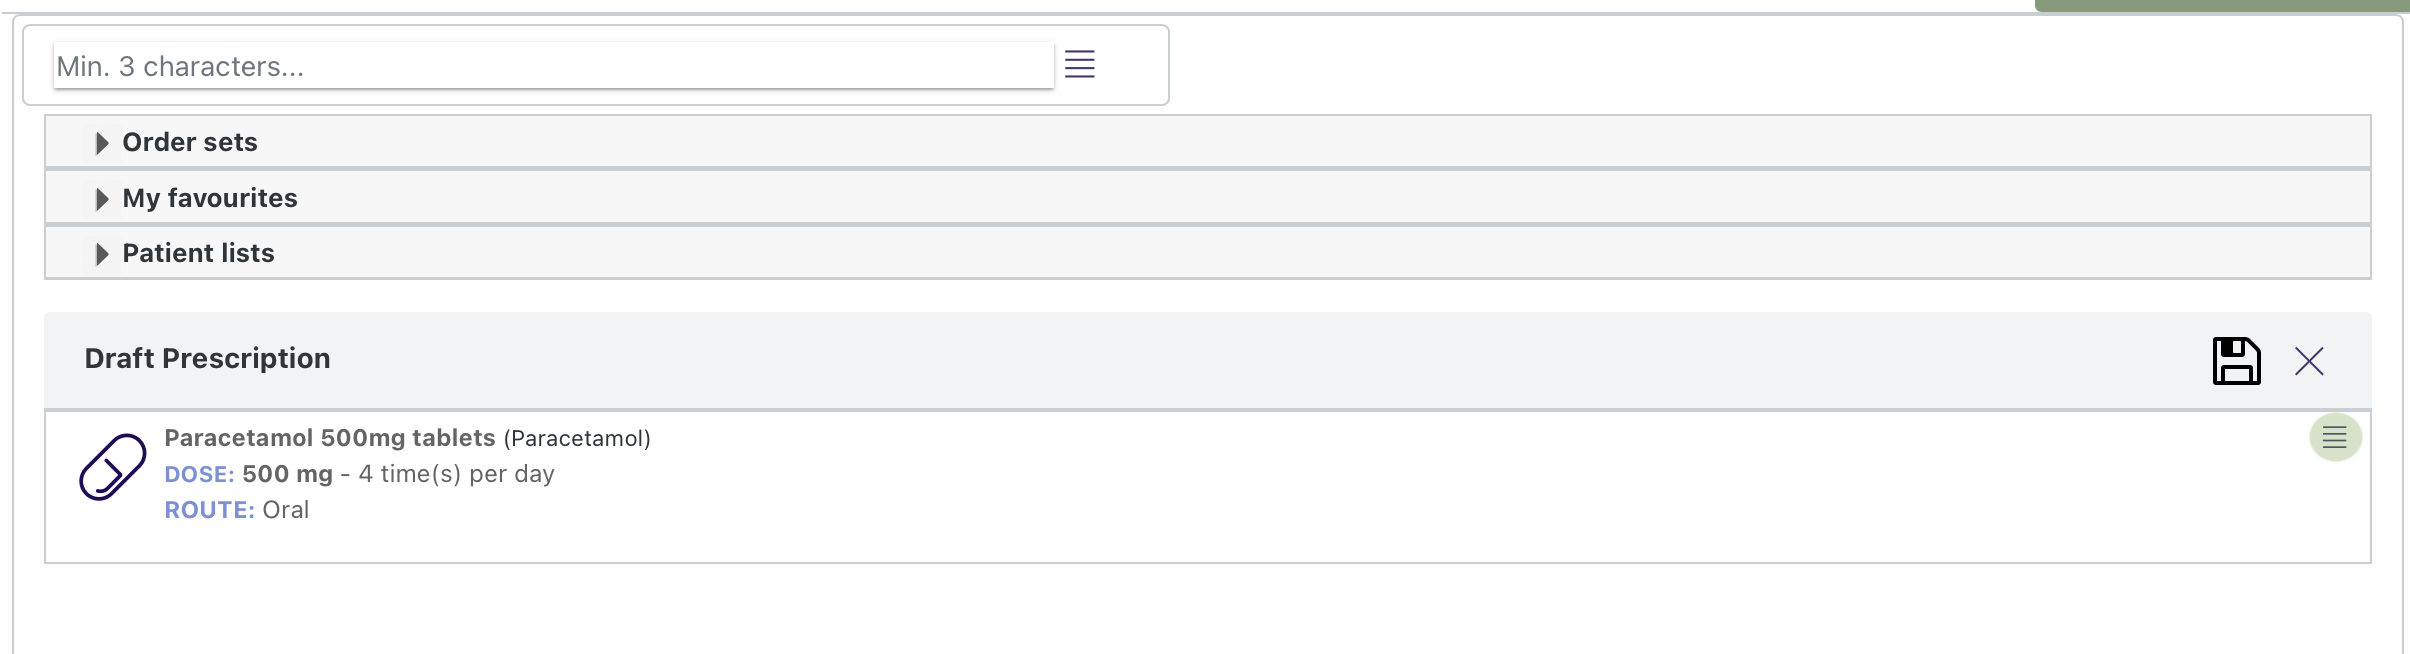
If you want to save a medicine that you frequently prescribe to your own list you can save it to the My Favorites list. You can save a medicine to the My Favorites list from the 'Draft Prescription' section of the medicines search screen by selecting the hamburger icon of the specific medicine on the far right:
Select 'add to my favourites' to bring up the Therapy Lists. You can add to an existing folder or create a new one:

The defined criteria allows you to set upper and lower limits for age, weight and body surface area. Setting these criteria will hide the medicine for in patients that do no meet the criteria.
The patient lists section shows lists of medicines that may be useful in prescribing. Expand the folder to see the different lists available:

Depending on when you are prescribing, you may see the following lists:
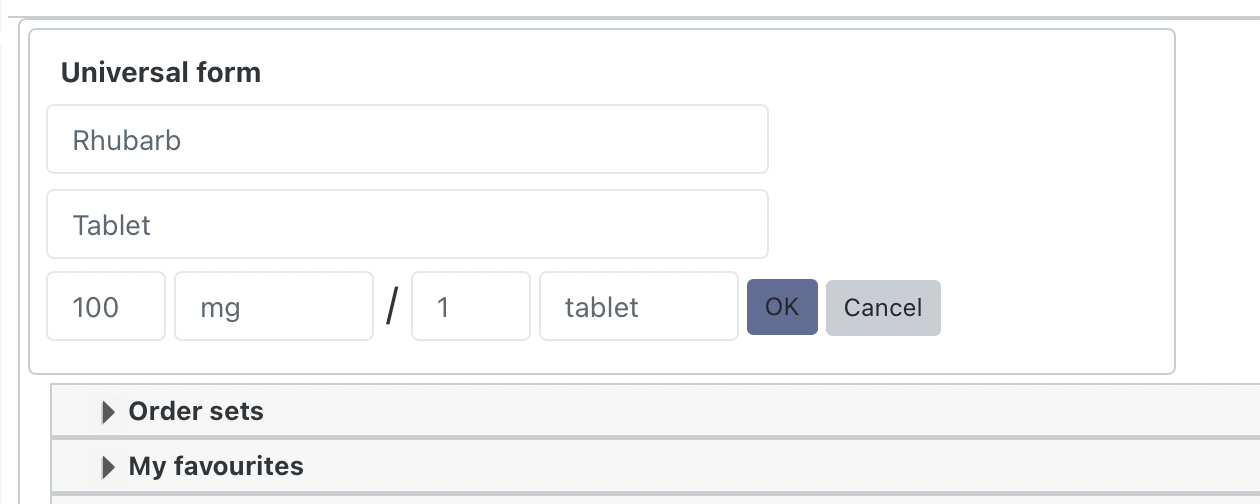
If the therapy you require is not standard and you are not able to find it by searching or browsing, you are able to define you own therapy using the Universal Therapy Form.
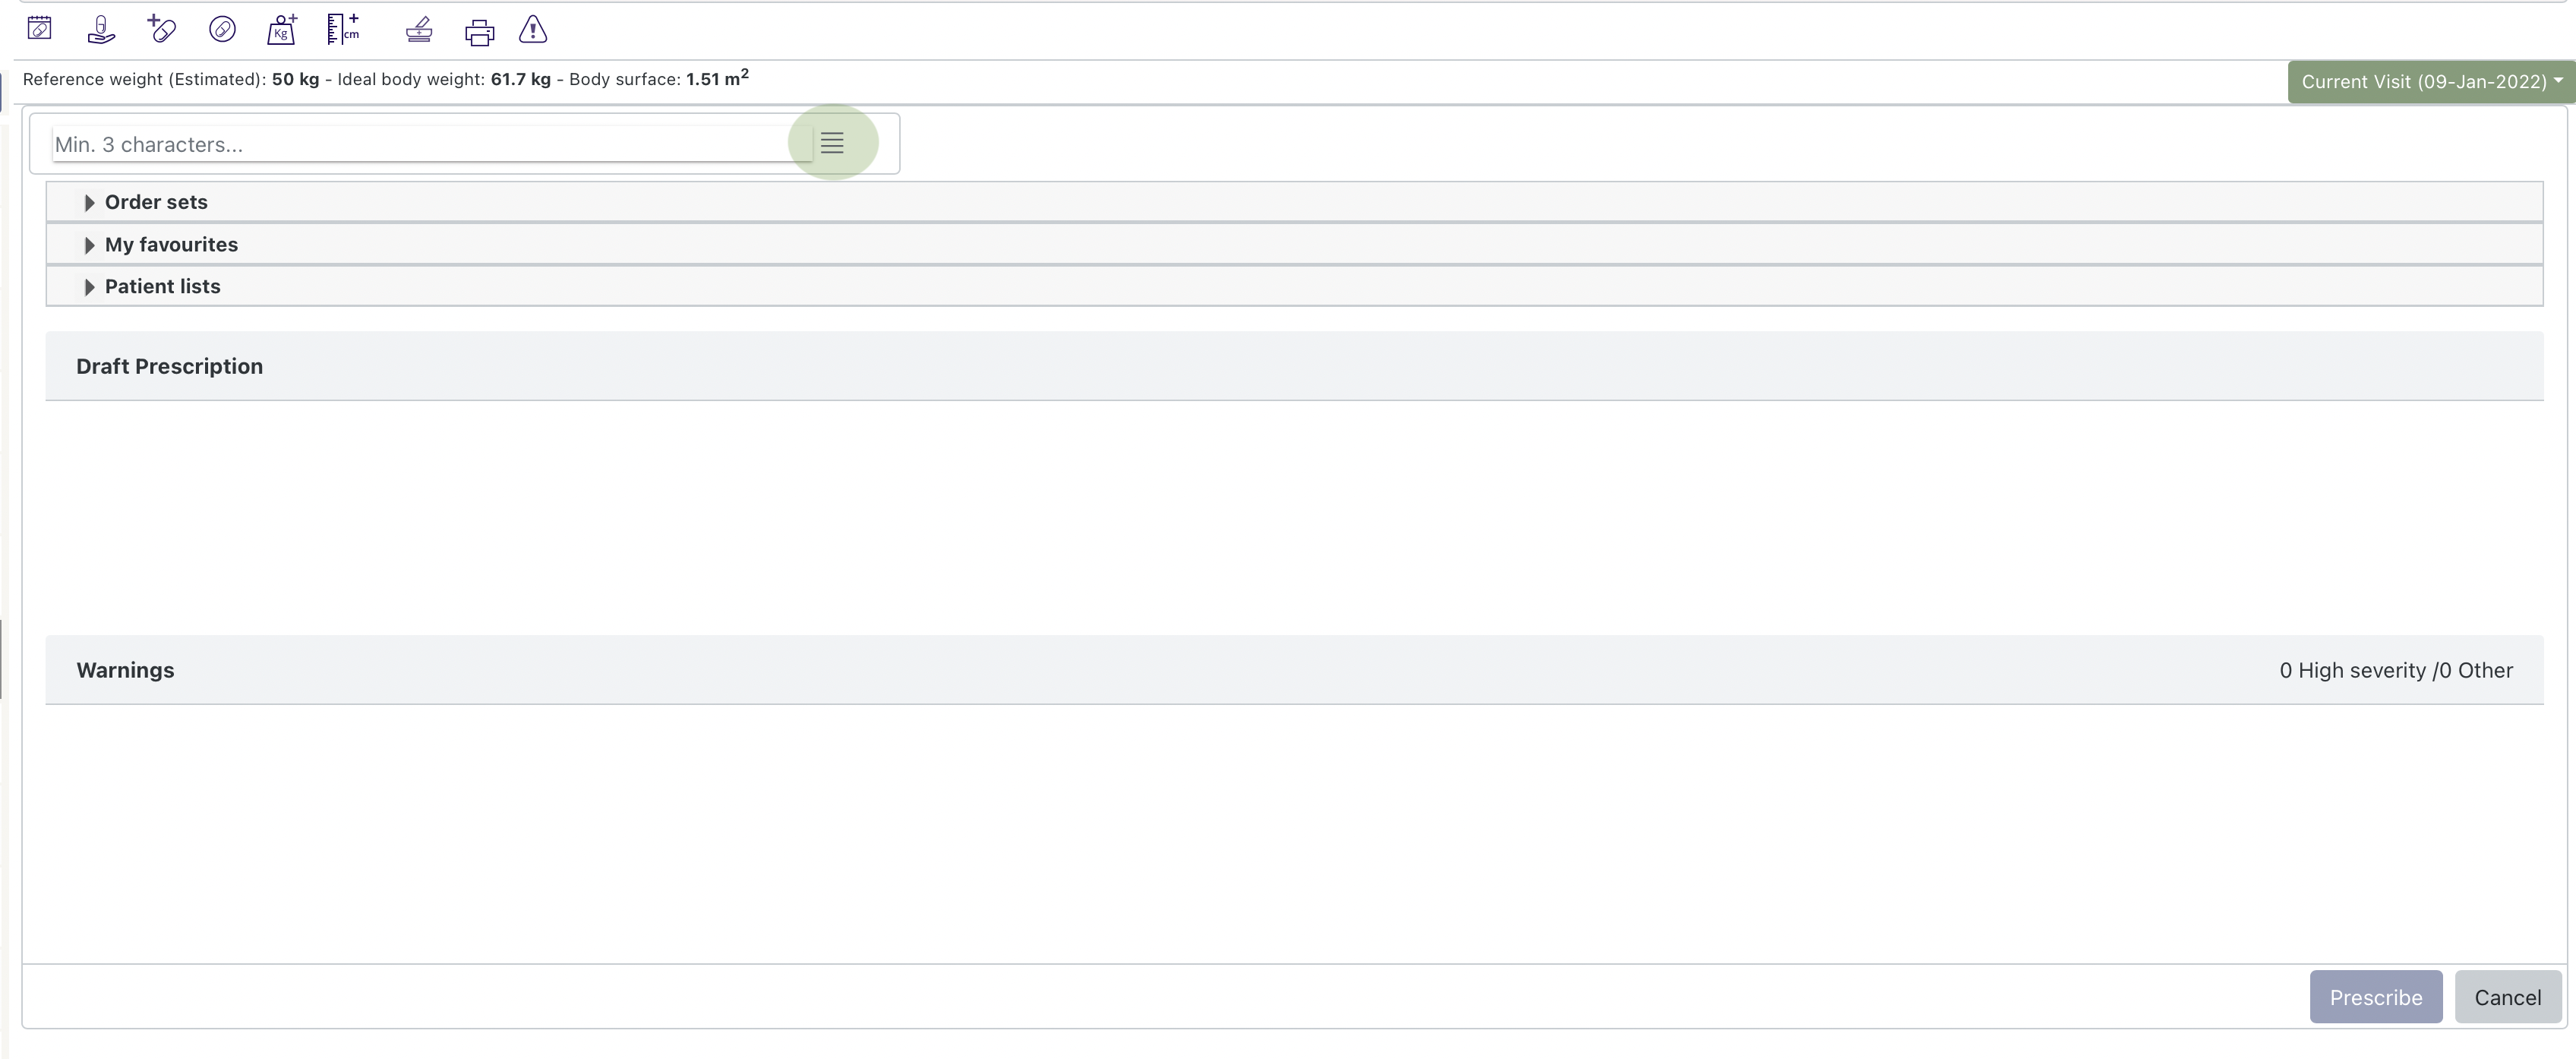
To open the form select the hamburger icon to the right of the medicines search bar:
The Universal Therapy Form requires you to enter the following information to create a therapy:
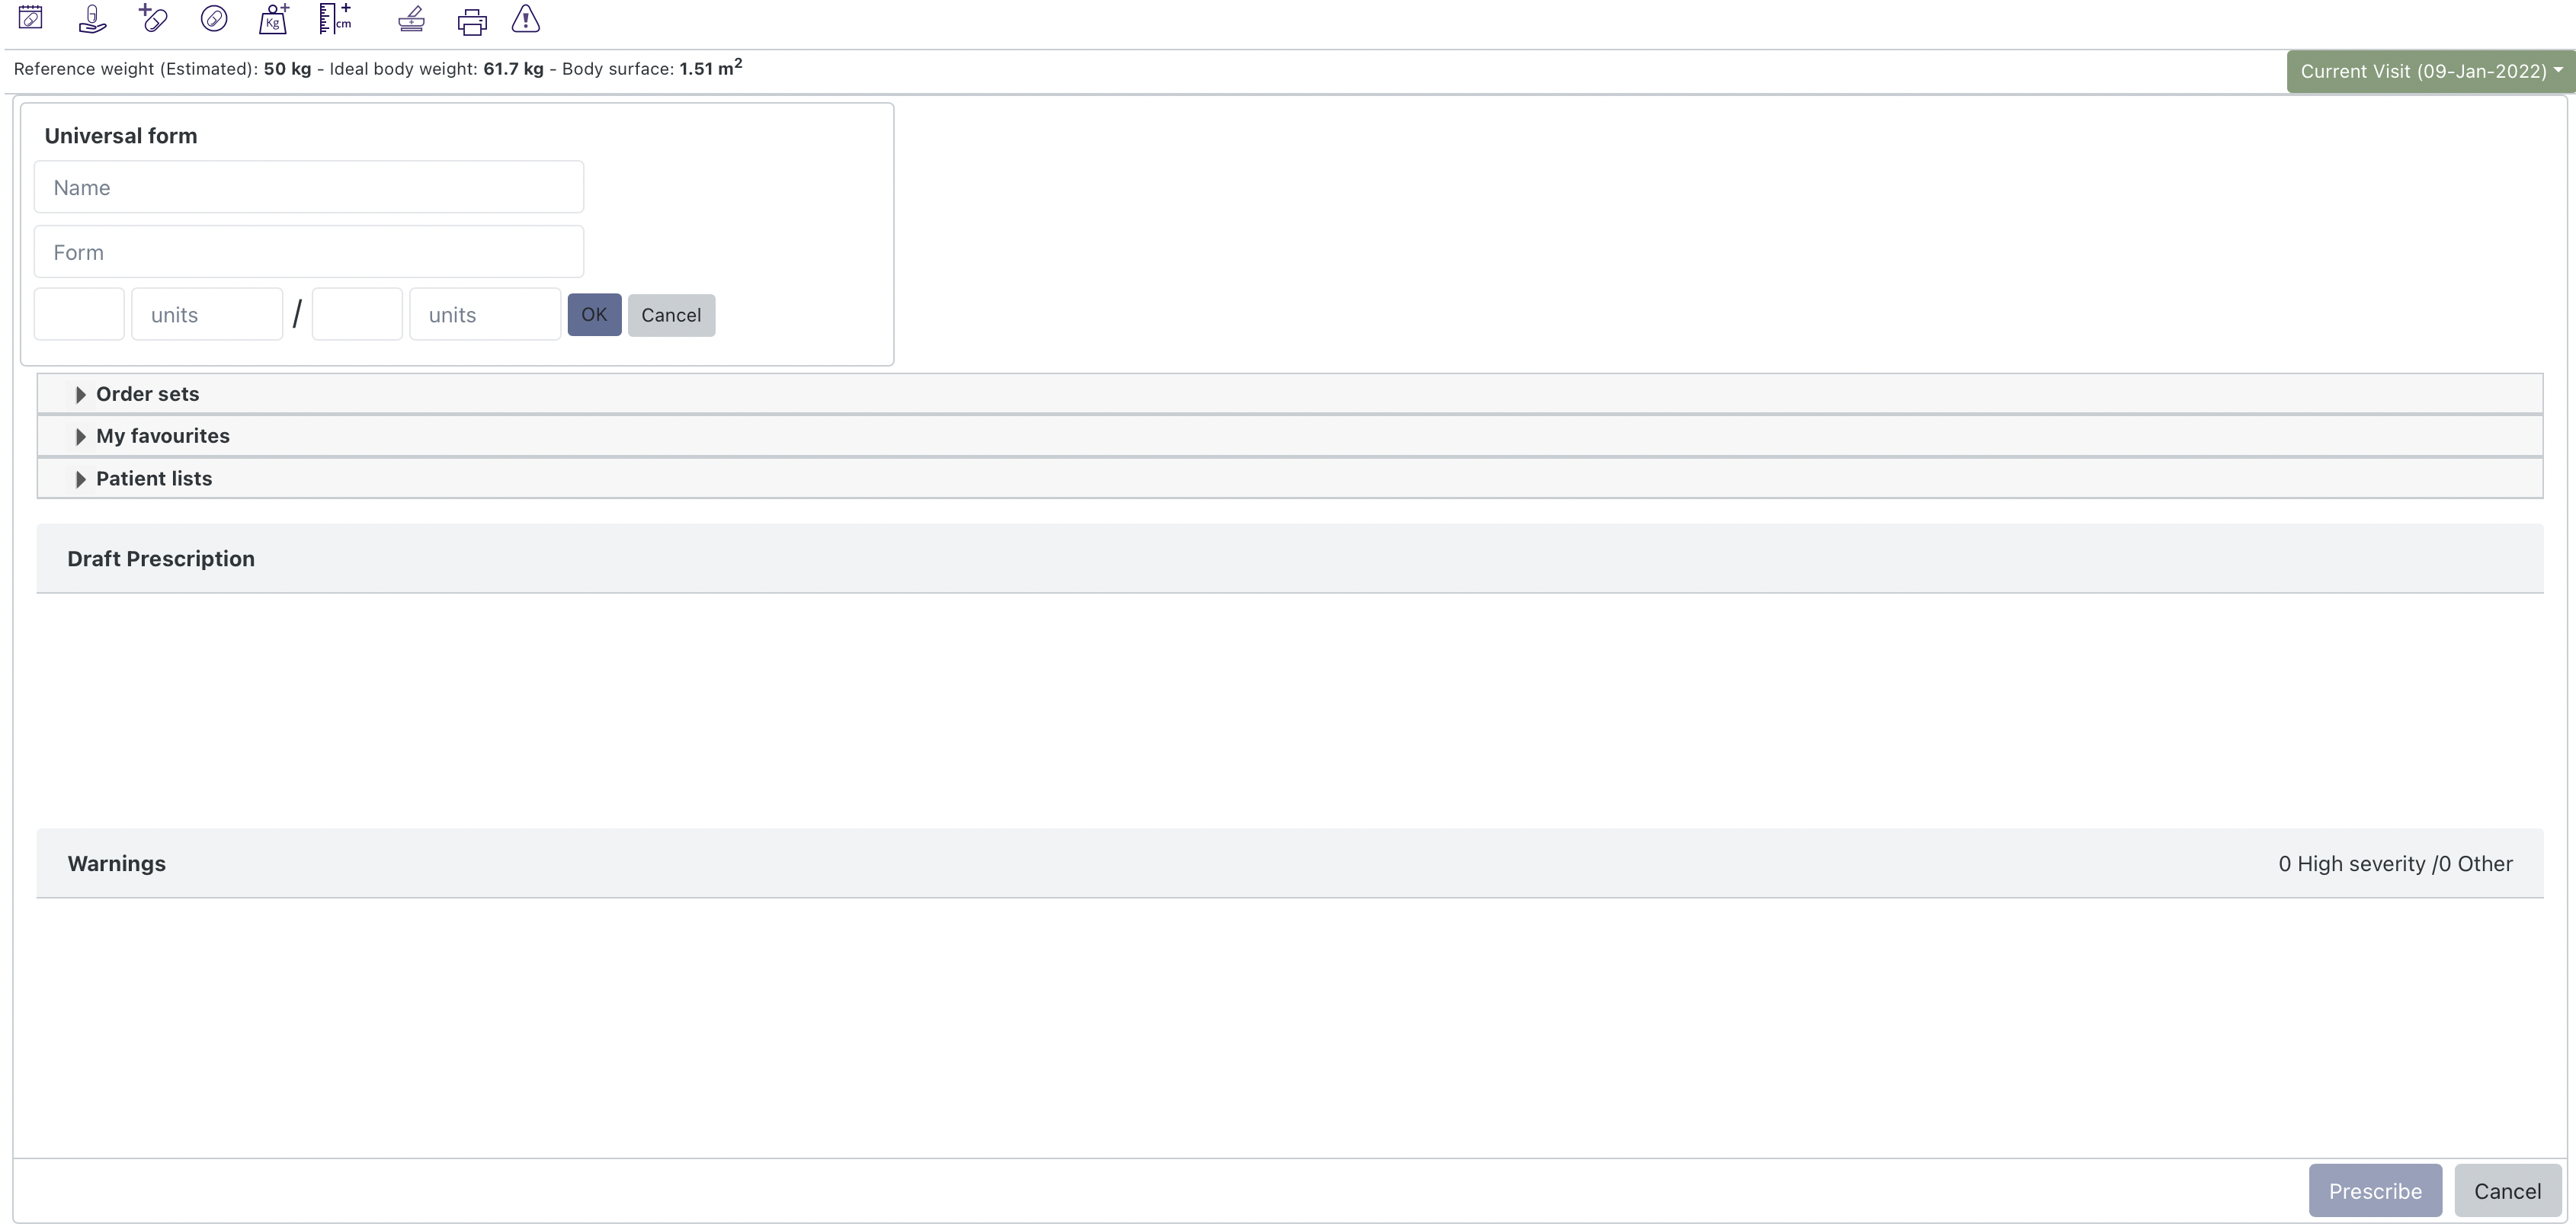
For example if you wanted to prescribe 100mg Rhubarb Tablets you would need to enter:
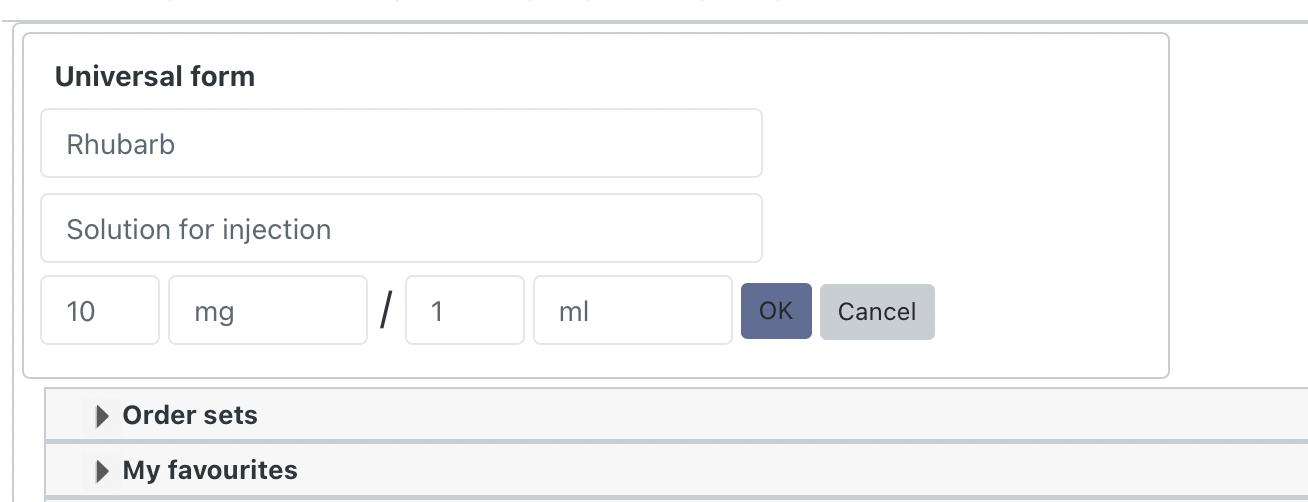
If you wanted to prescribe Rhubarb as an intravenous injection that had 10mg/ml:
Selecting the therapy that you have found opens up the prescribing form:
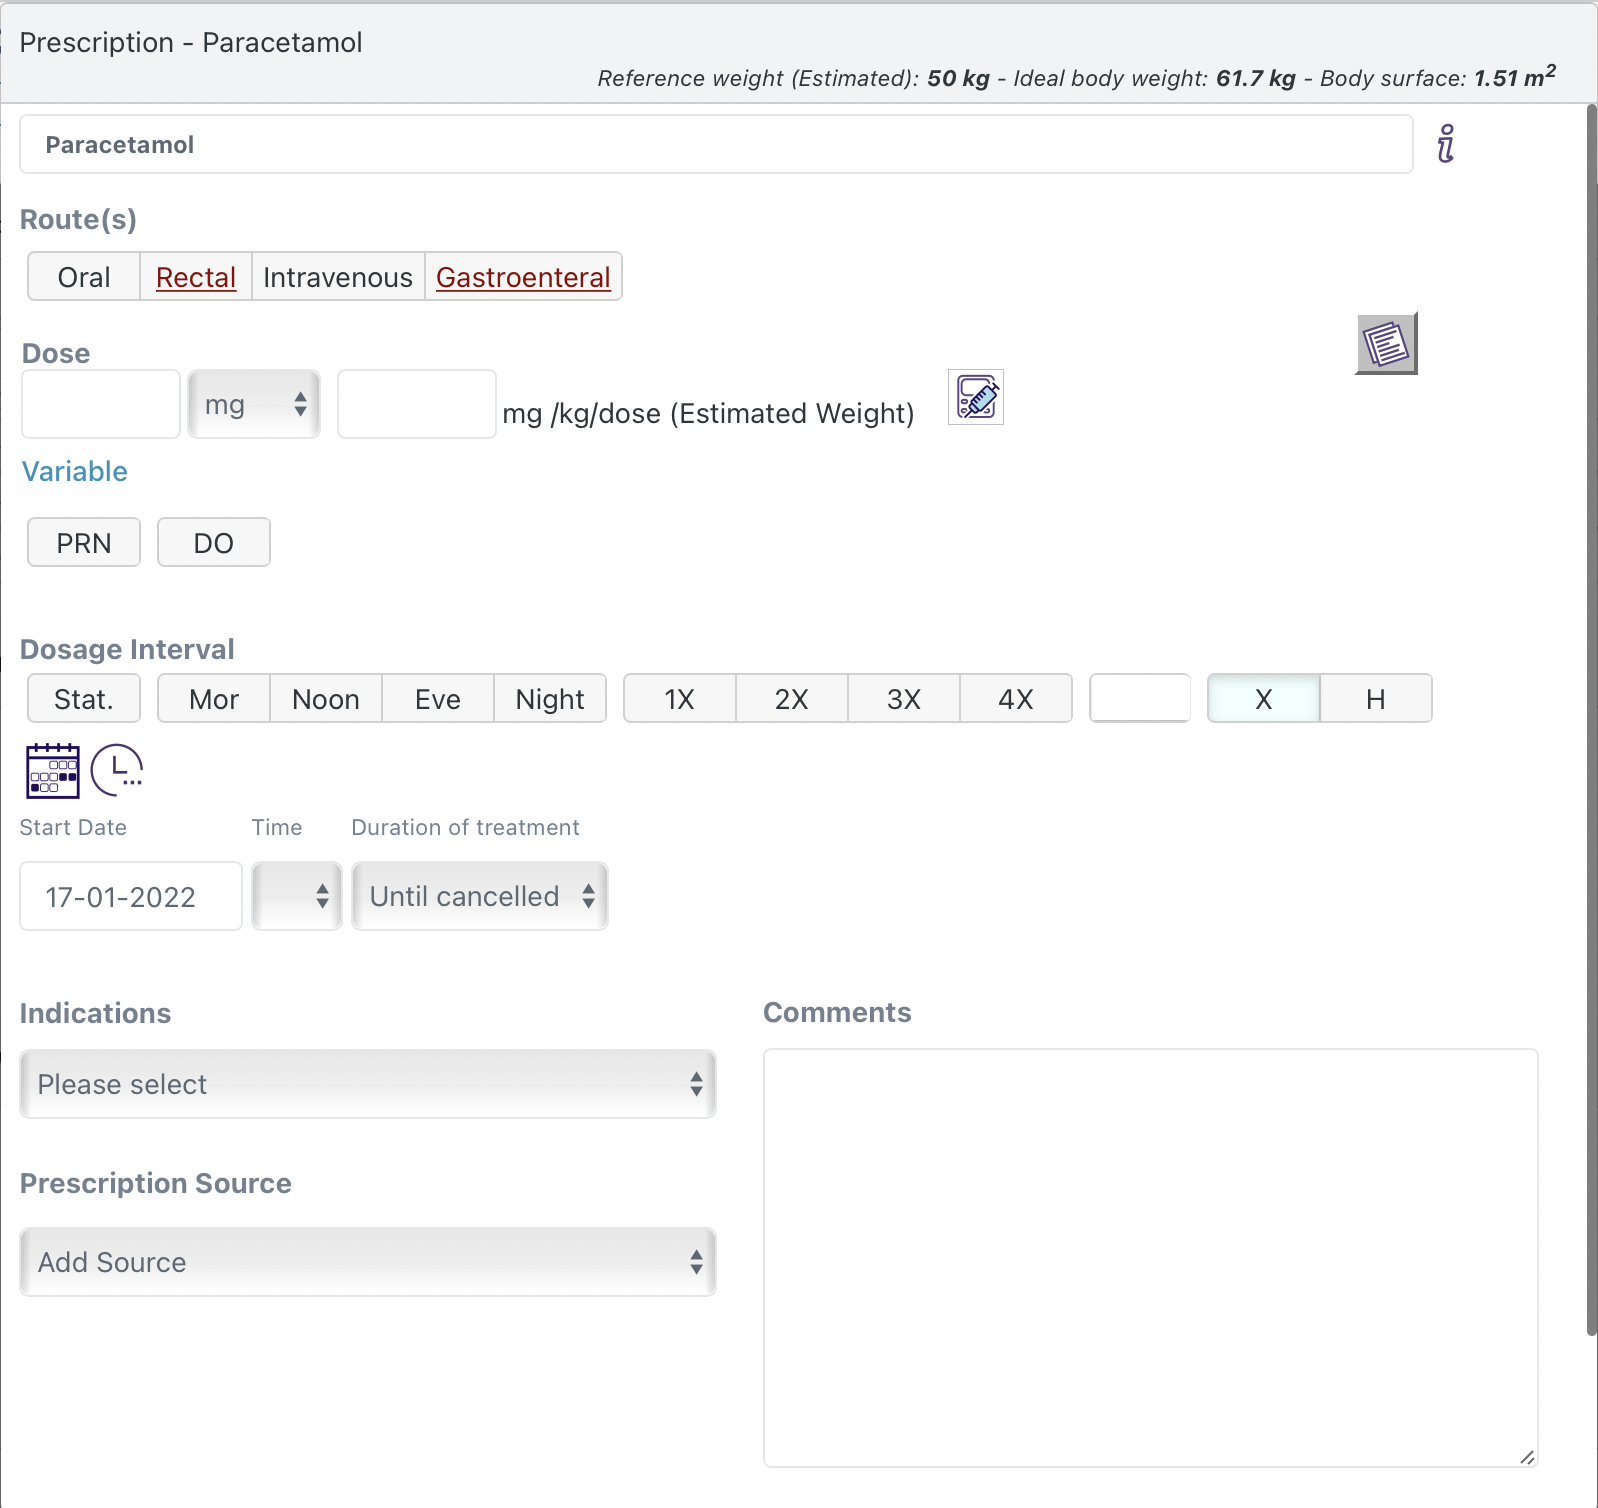
Once a therapy has been selected it is loaded into the prescribing form:

The form first requires you to select a route. You are able to select a primary route and additional discretionary routes as required. Unlicensed routes if present, are underlined.
Please note: It is the responsibility of the prescriber to ensure that any dose entered is appropriate for both the primary and all discretionary routes.
The dose is entered for the units displayed. Some medicines can be prescribed in more than one unit (e.g. mg or grams) and you are able to select the unit you wish the prescribe in from the drop down unit selector.
For certain VMP/AMP prescriptions the dose per unit form is displayed e.g mg/tablet or mg/ml. In this way you are able to choose how you would like to enter the dose (tablets or mg). For tablets and other specific formulations the system can be configured to support rounding factors that will, for example, correct a prescription to the nearest 1/2 tablet.
The dose calculator allows you to calculate the dose form a patients weight or body surface are. Selecting the calculator icon displays the options available:

The reference weight (which is entered elsewhere) can be estimated or actual. Ideal body weight and body surface areas are calculated based on the formulas defined by your organization but by default:
Body surface area is calculated by
√ (weight kg * height cms) / 60 = m2
The Devine formula for calculating ideal body weight in adults is as follows:
Male ideal body weight = 50 kilograms (110 lb) + 0.9 kilograms (2.0 lb) × (height (cm) − 152)
Female ideal body weight = 45.5 kilograms (100 lb) + 0.9 kilograms (2.0 lb) × (height (cm) − 152)
Example: a Male with height = 162cm:
50kg + (0.9kg)x(169-152)
= 50kg + (0.9kg)x(17)
= 50kg + 15.3kg
= 65.3Kg
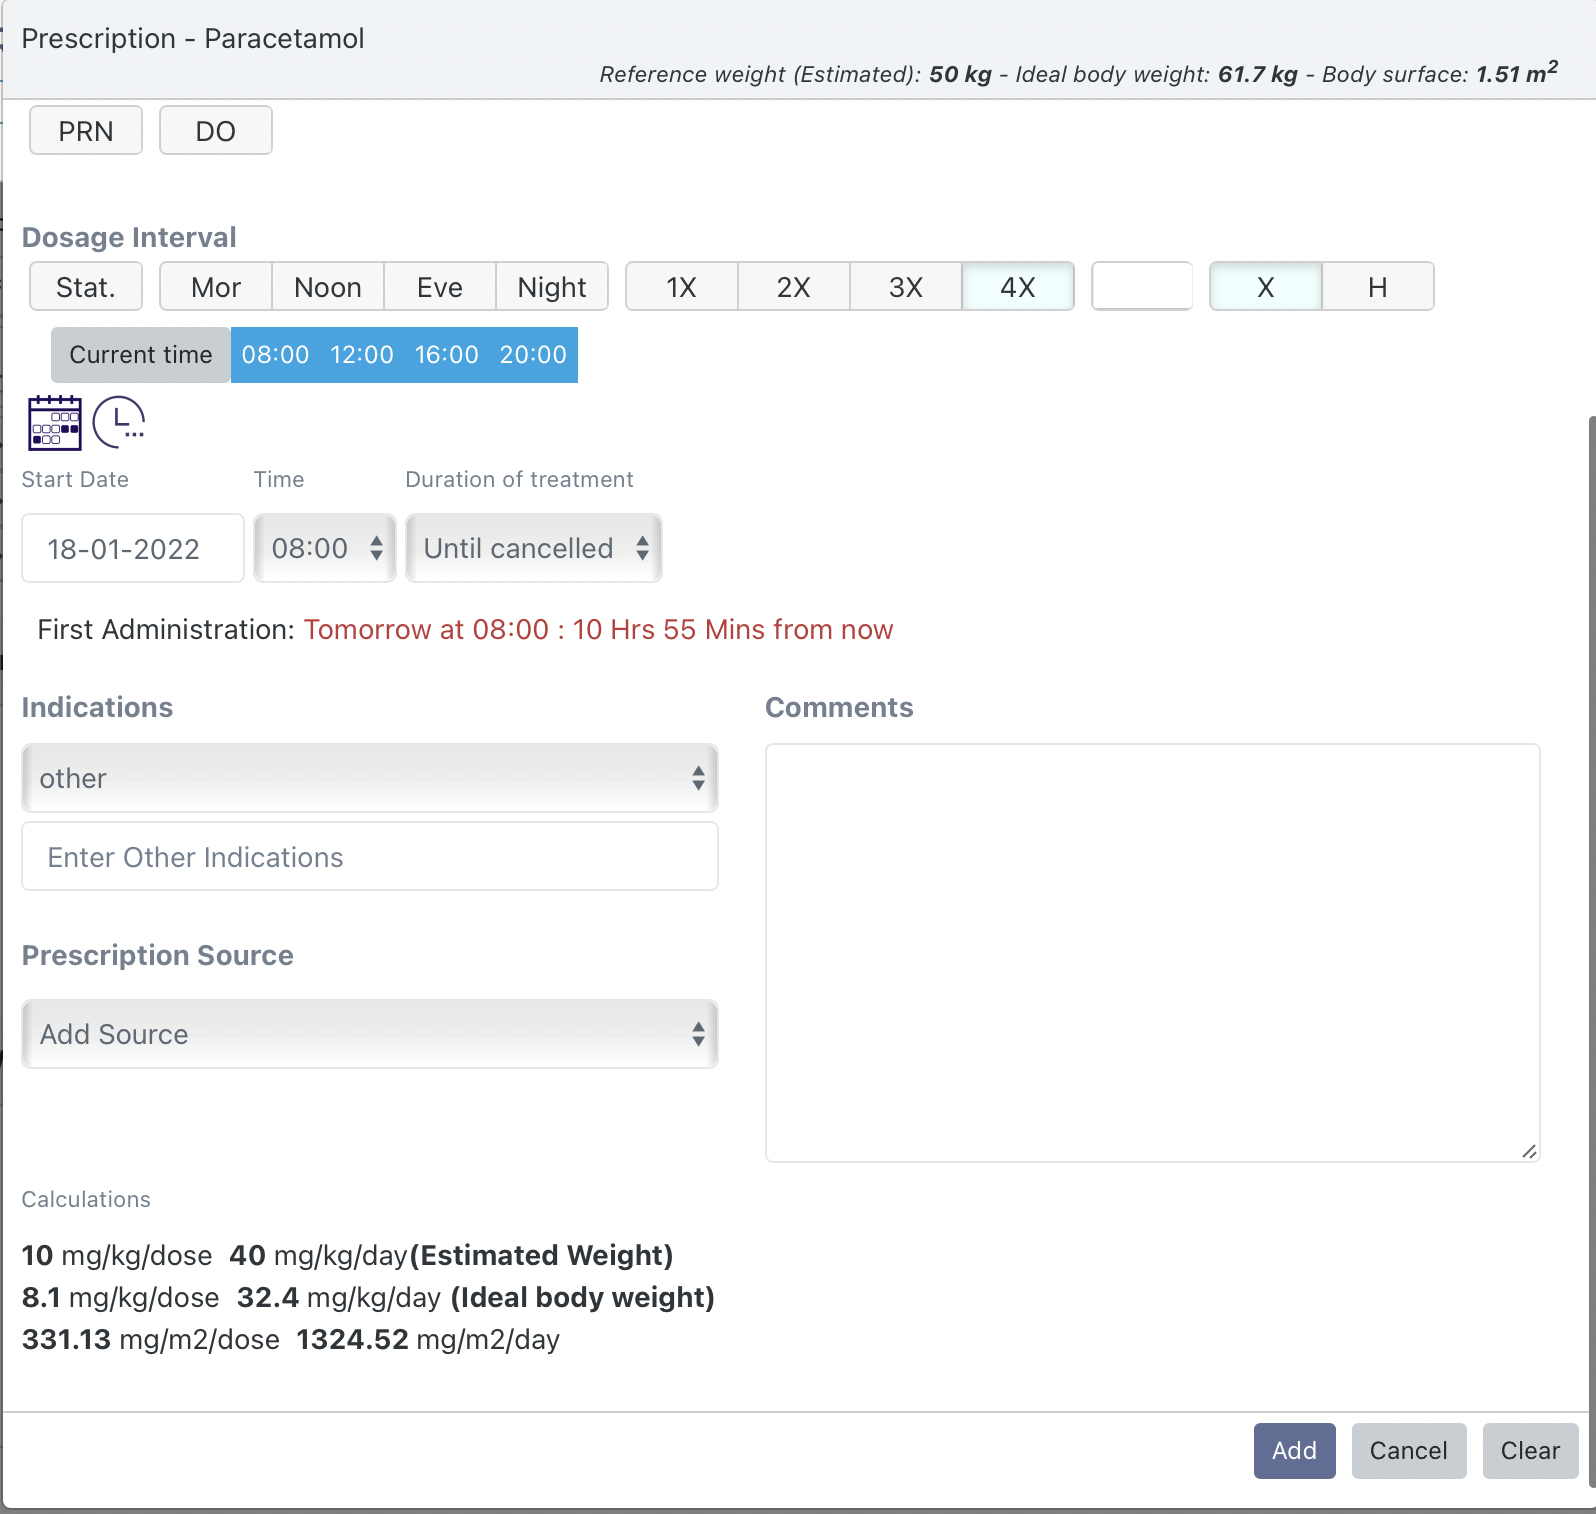
Selecting a calculator allows you to enter a value that will calculate the dose:
Entering a value of 10 for the mg/kg/dose calculator will multiply the patient's reference weight by 10mg and populate the dose field:
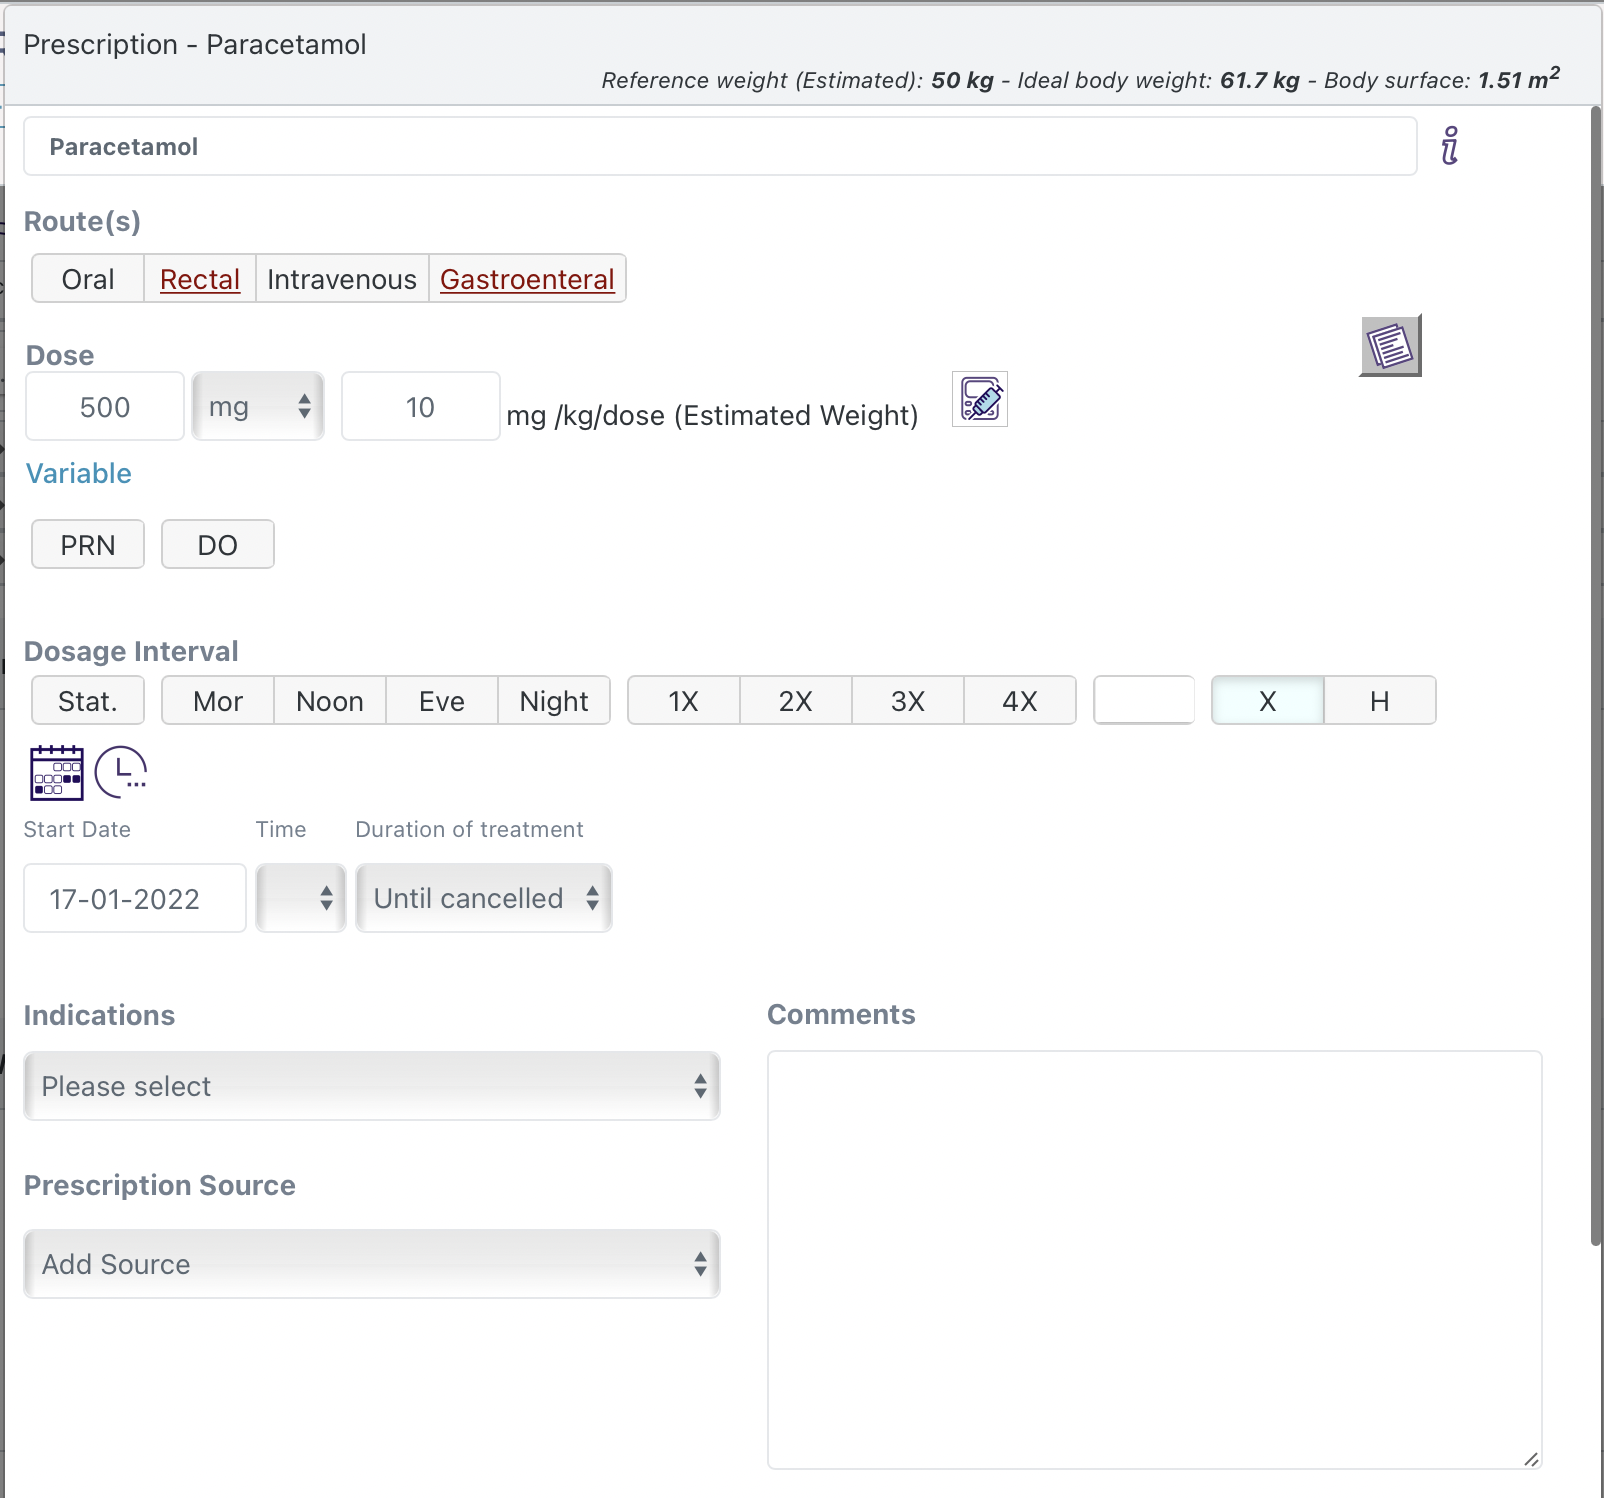
Please note: it is the responsibility of the prescriber to ensure that any dose selected is correct for your patient. The calculator does not provide any dose range checking, it simply performs the calculation as it is defined.
Selecting "Variable" allows you to specify a variable dosing regimen with different doses for each day at different times.
If you want to prescribe Pro Re Nata (as required) select the PRN button:
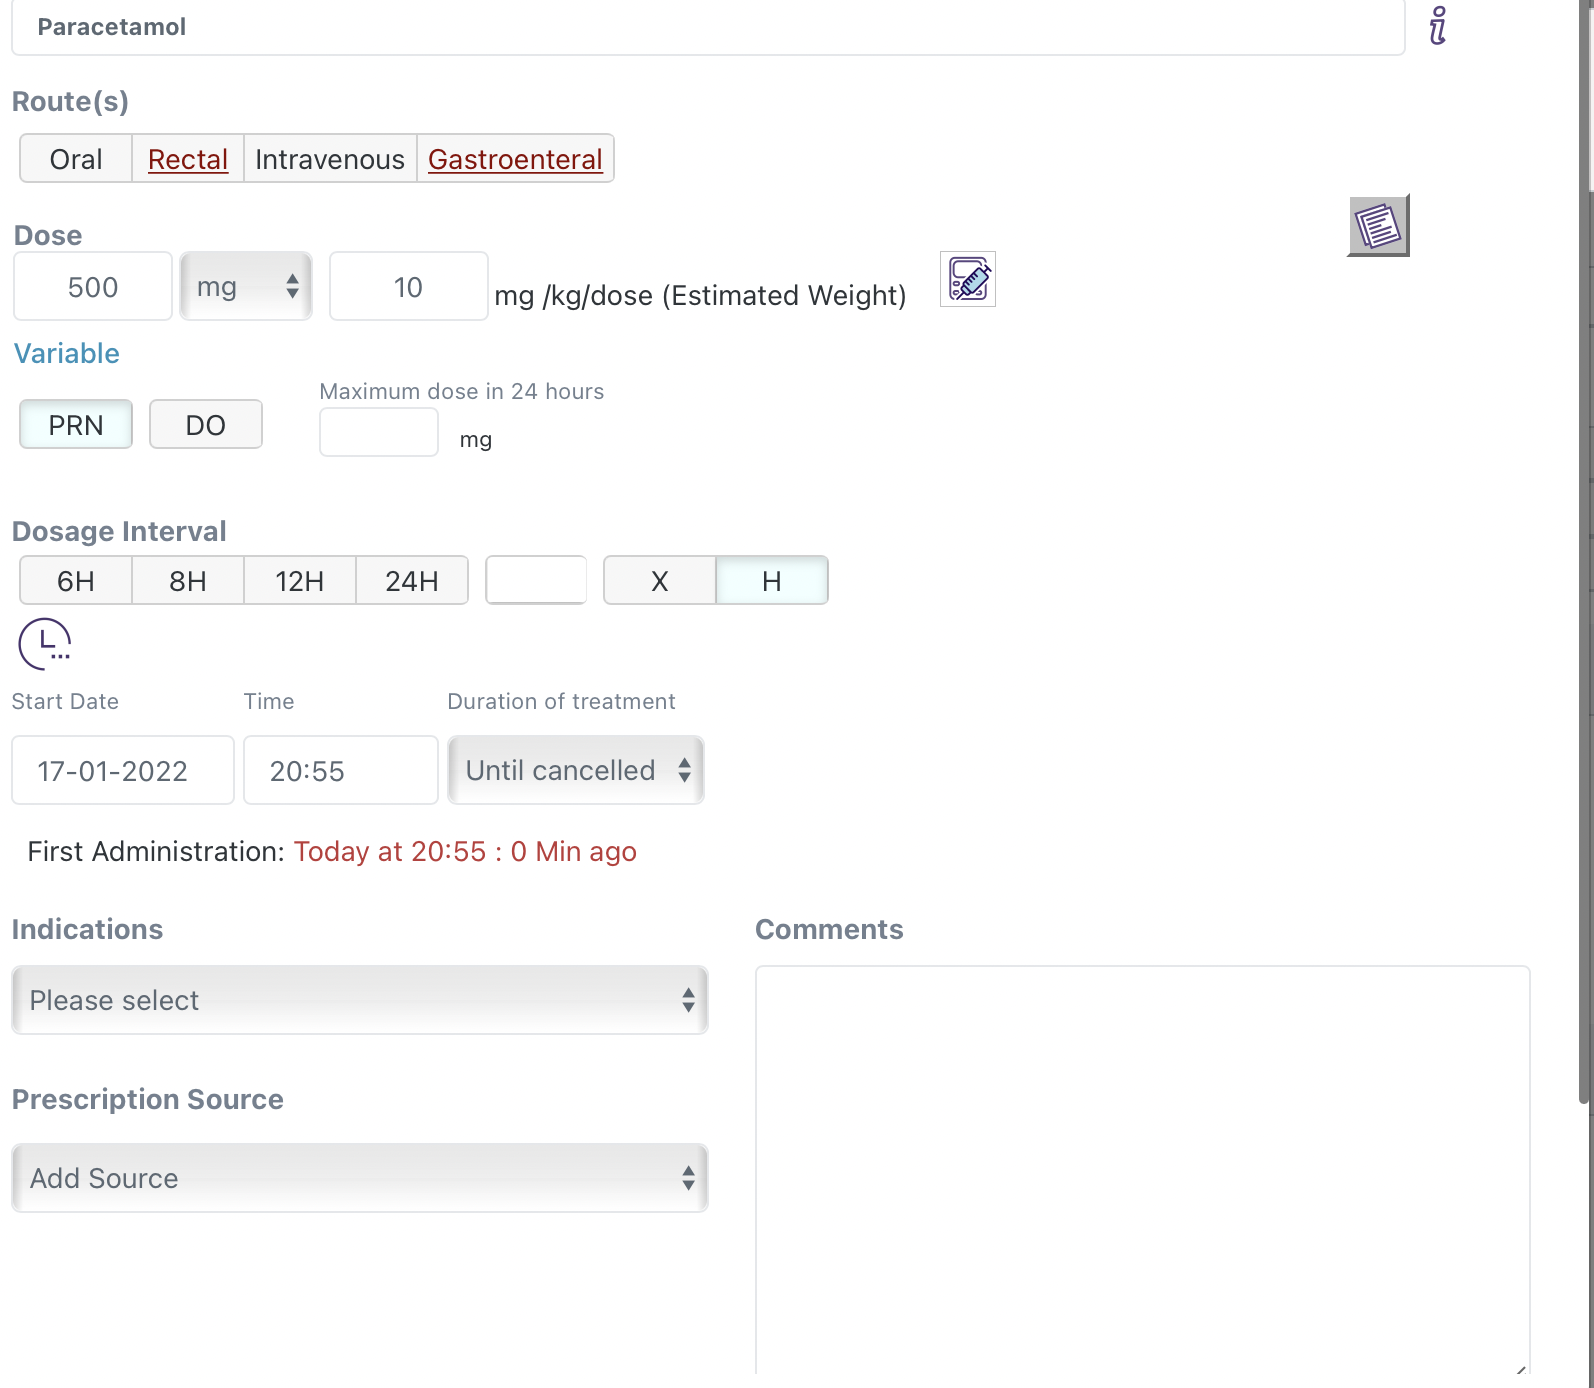
You must then enter the maximum dose that should not be exceeded in a 24 hour period as well as the minimum dosage hourly interval between administrations:

Doctors Orders (DO) means each dose must be confirmed by a prescriber before it can be administered.
Some medicines can be configured to be prescribed against a blood result or nursing observation. For example Insulin products can be titrated against blood glucose, Warfarin against INR and Oxygen against % Oxygen saturation. These options, if configured, will be presented and you will be required to enter a target value or value range.
A standard dosing interval can be selected from the options presented. The 'X' and 'H' buttons allow you to toggle between intervals defined in 'times per day' ('X'):

or 'every number of hours' ('H'):

Irrespective of which option is selected the actual number of administration events and their times are displayed in blue below the options.
Select the chosen days icon: ![]() to select on which days the doses should be given:
to select on which days the doses should be given:
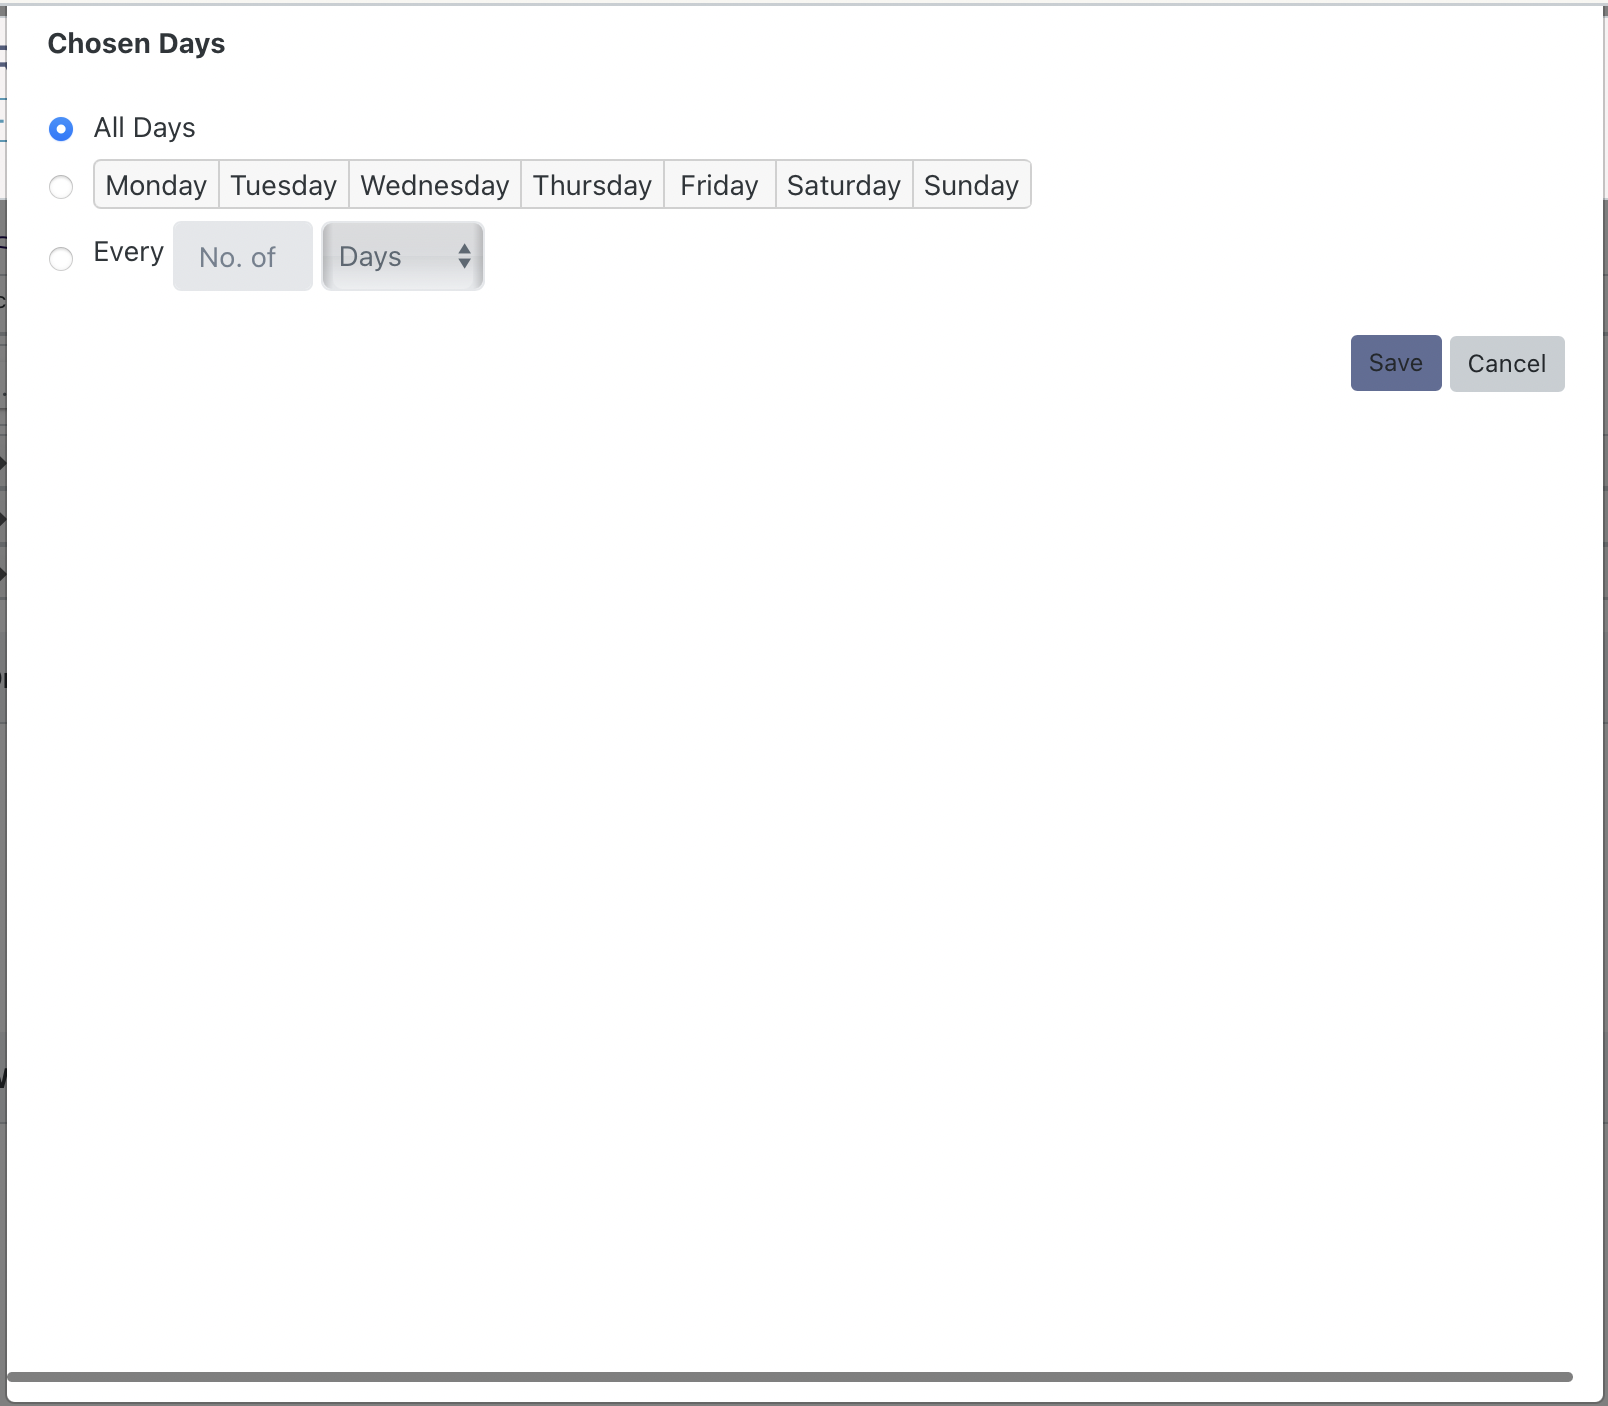
It default to all days, but can be changed to specific days of the week or every selected number of days.
Selecting the additional conditions icon: ![]() opens the additional conditions screen:
opens the additional conditions screen:
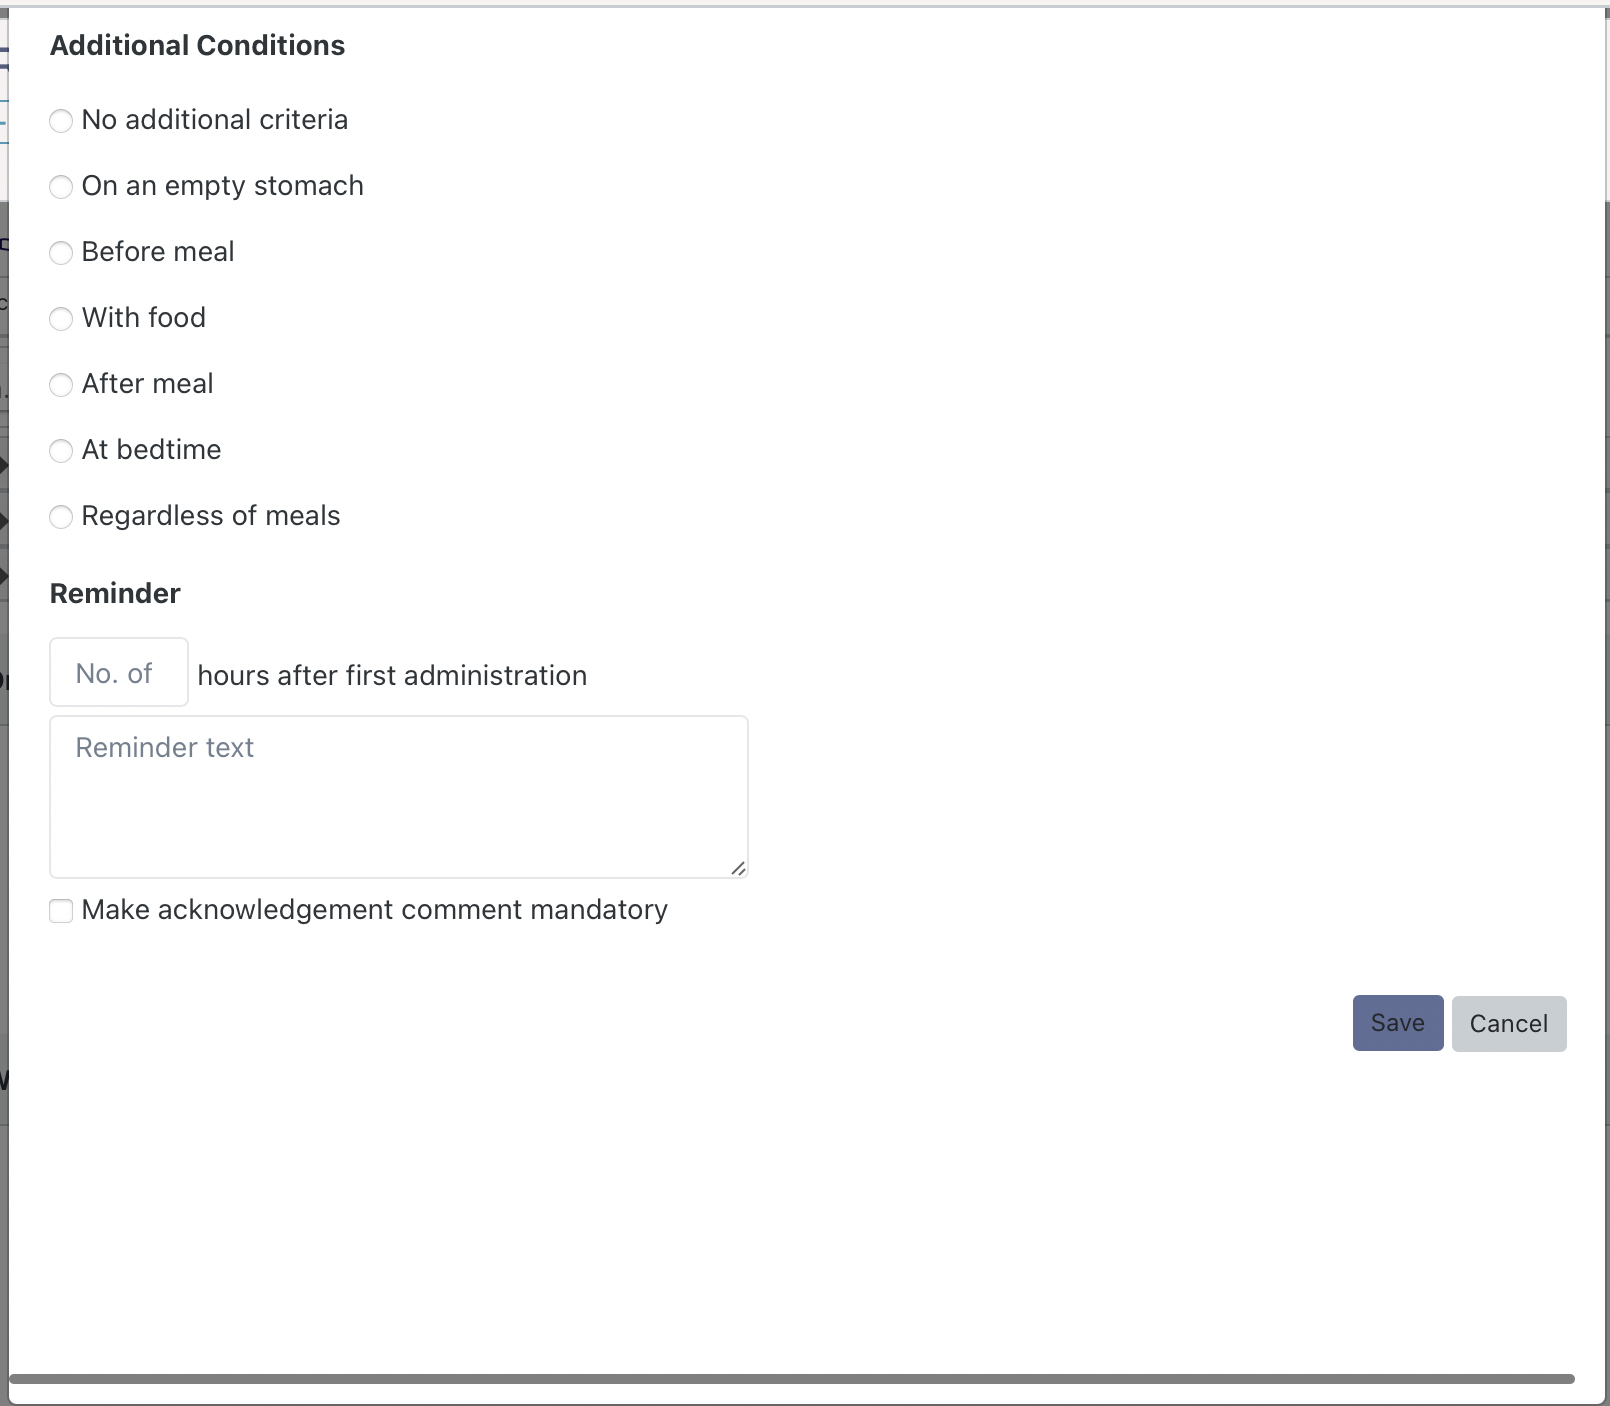
Select any additional conditions you wish to add. When you are creating a prescription (as opposed to editing one) you will also be presented with the option to set a reminder. This reminder can be set from the first administration and the prescriber can determine if a mandatory comment must be entered before the reminder can be acknowledged and dismissed.
The start date defaults to 'today'. Selecting it opens a date picker that allows you to select a different start date:
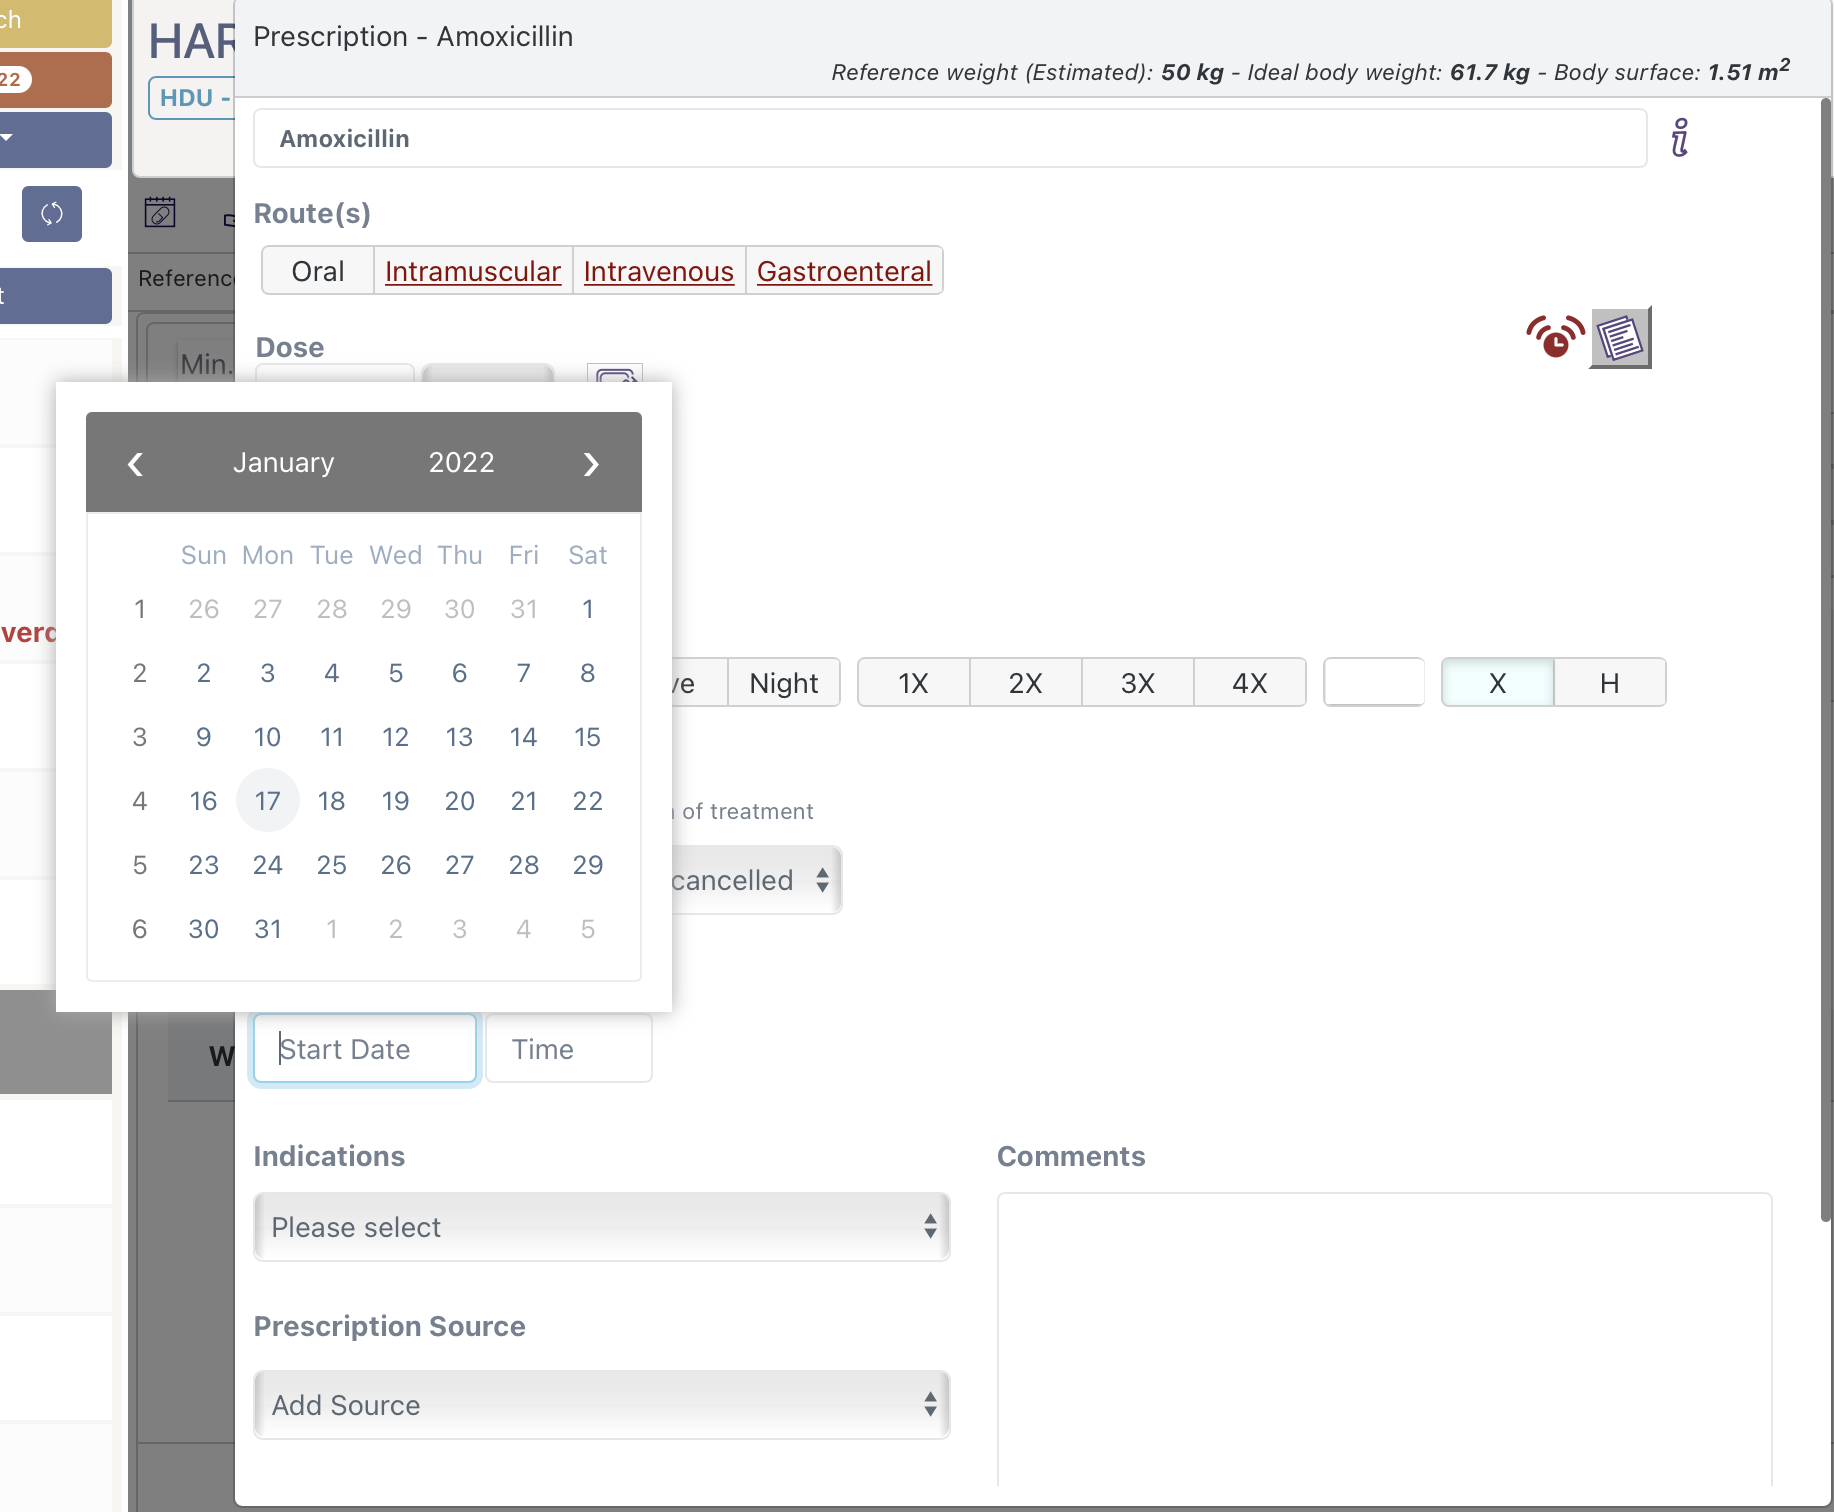
The start time must be selected from one of the administration times defined in the Dosage interval selector. It will default to the next future administration time.
The Duration defaults to "Until canceled" but can be changed to select an end date and time or a duration in hours, days, weeks or months.
Your organization can configure certain therapies to display the Antimicrobial Start date and time. Entering a date and time here will let the system know you long a patient has been on an antimicrobial (this may be from before admission).
You can enter the indication for the prescription by selecting the indications drop down list. This is a list of licensed and unlicensed indications that have been configured by your organization. If the indication you need is not there you can select 'other' to enter you own indication. For some prescriptions (e.g PRN prescriptions) the entering the indication is mandatory.
You can enter the source of the prescription from the prescription source drop down list. You can select more than one source. This is typically done when entering the medicines on admission. If the prescription source you need is not there you can select 'other' to enter you own prescription source.
If you want to provide more information you can enter free text comments in the Comments field.
Navigate to the bottom of the prescribing form to see any calculations that have been made for you in the prescription. At the bottom of the form you will also see the Add Cancel and Clear buttons that will add your prescription to the chart, cancel and close the prescribing form and clear the prescribing form respectively.
When a therapy is added to a prescription (inpatient, or on discharge) the system provides decision support warnings. The content for these warning is not provided directly by Interneuron, instead the system integrates with third party decision support systems. How the openEPMA module displays these warnings is configurable to your organization.
Warnings are initially displayed below the the medicines search screen where ever a therapy is being prescribed:
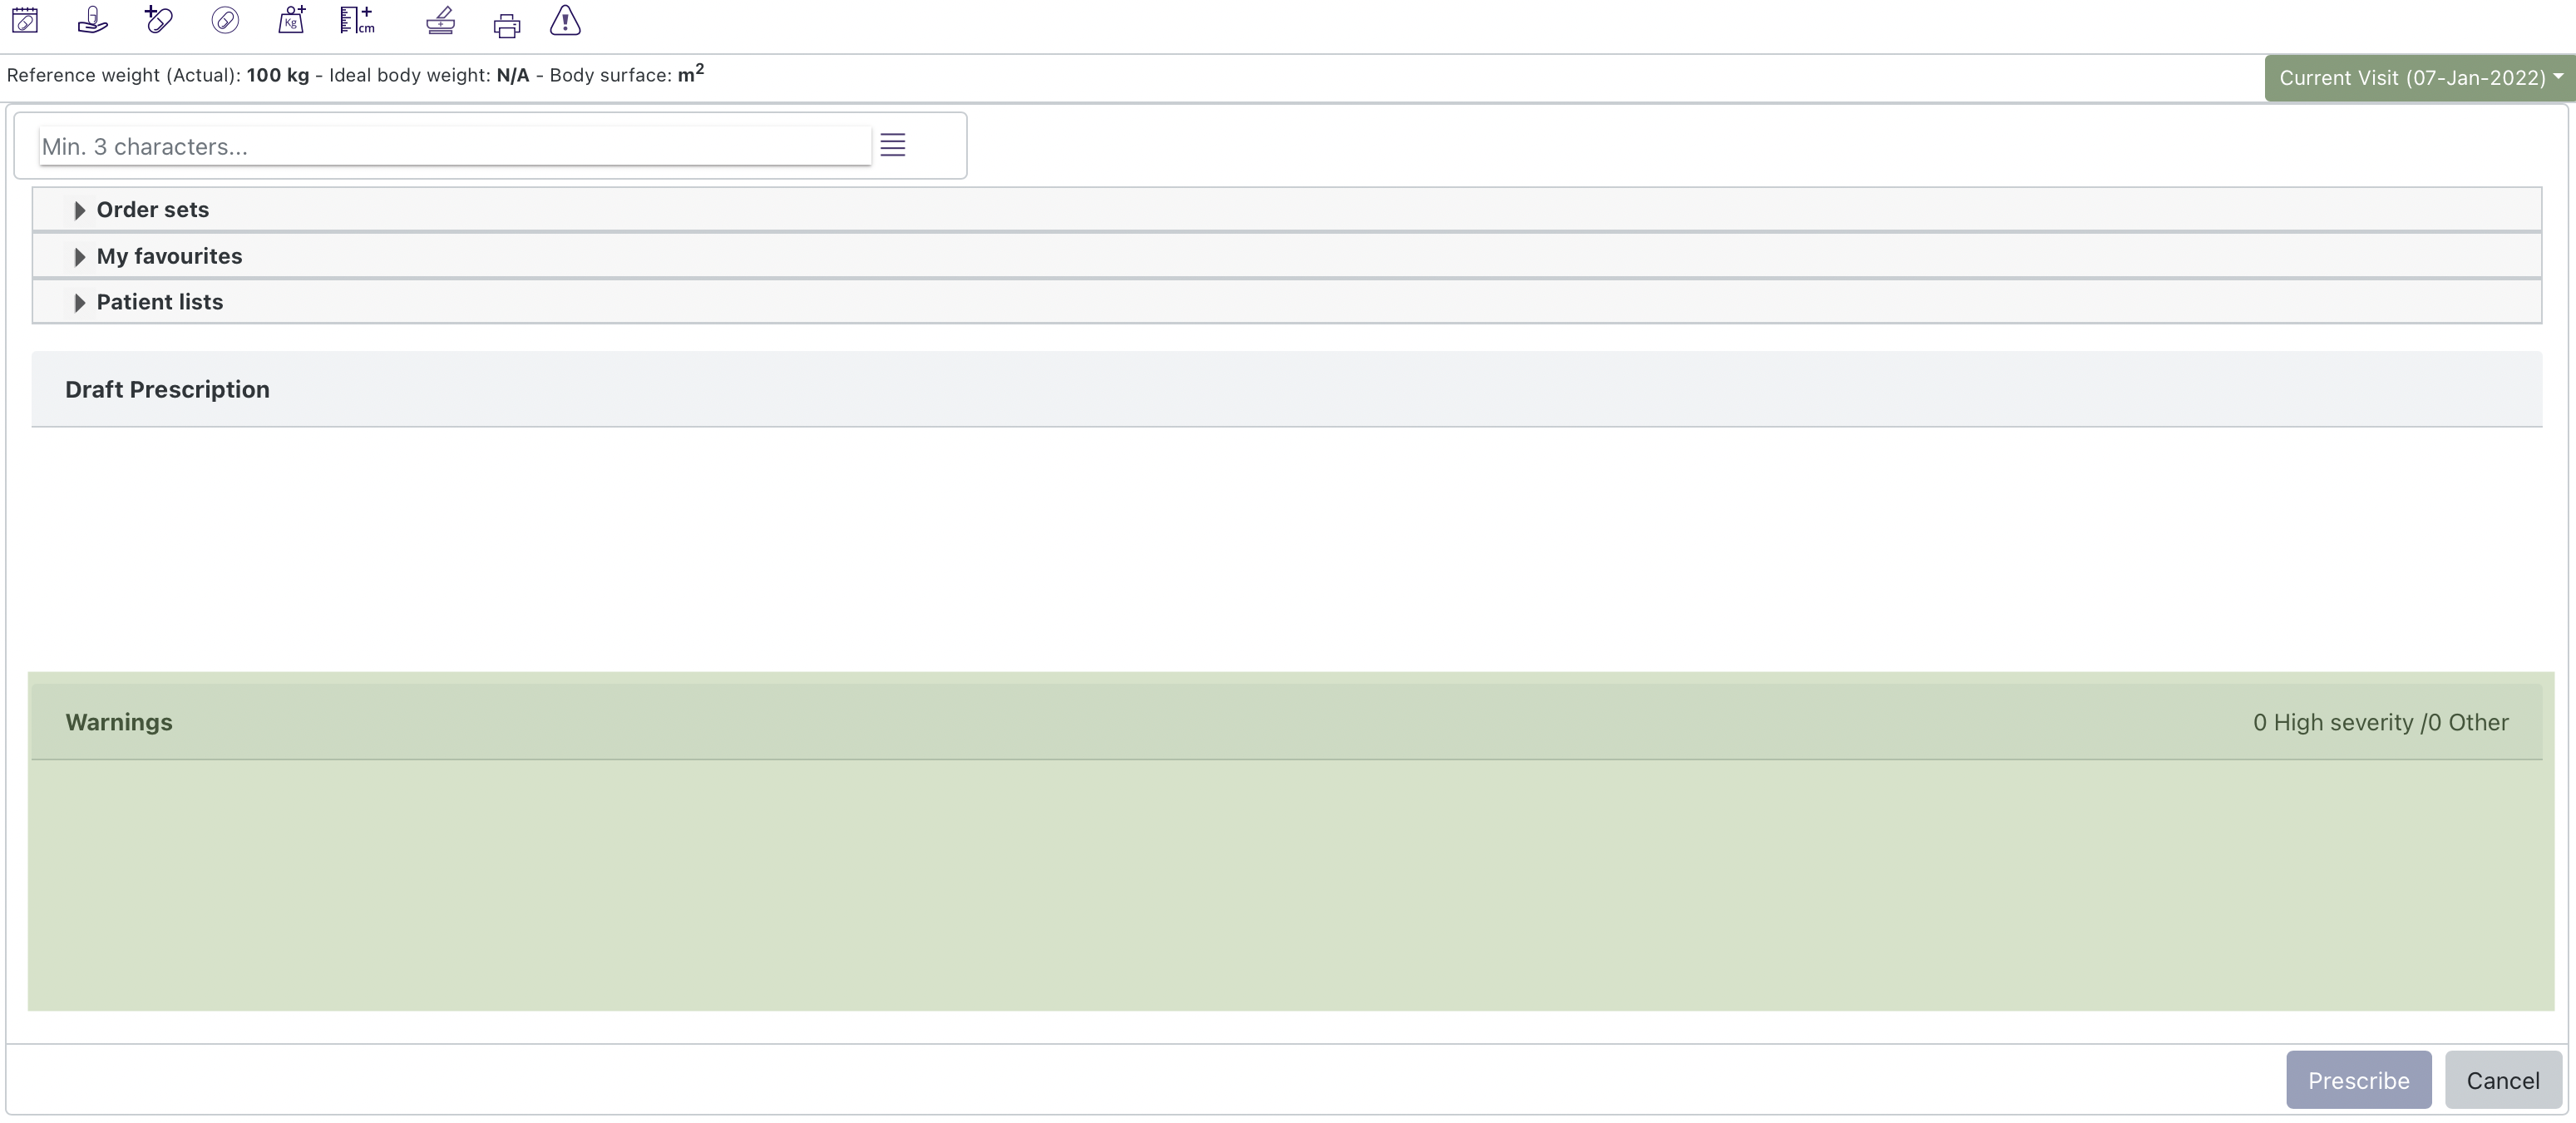
As therapies are added to the draft prescription the system provides decision support warnings.
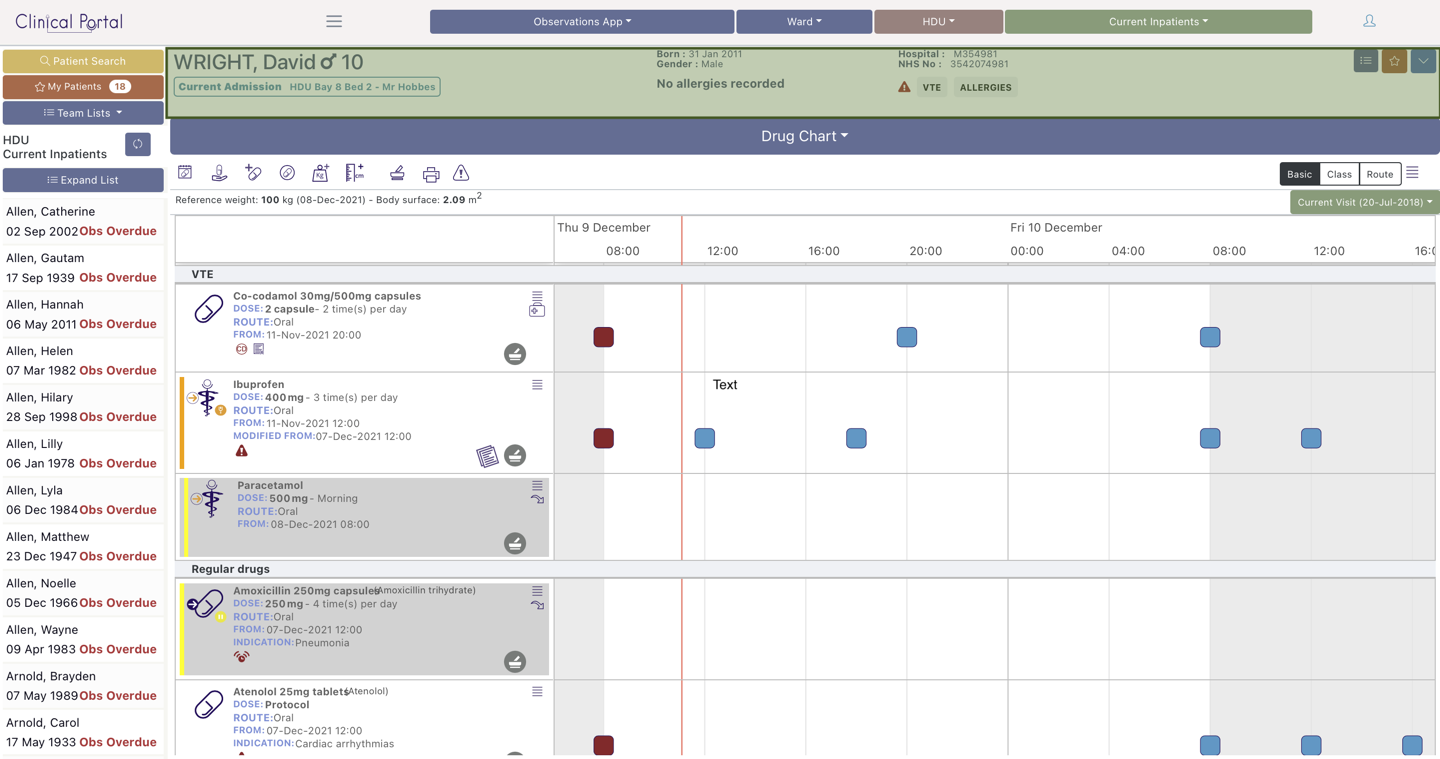
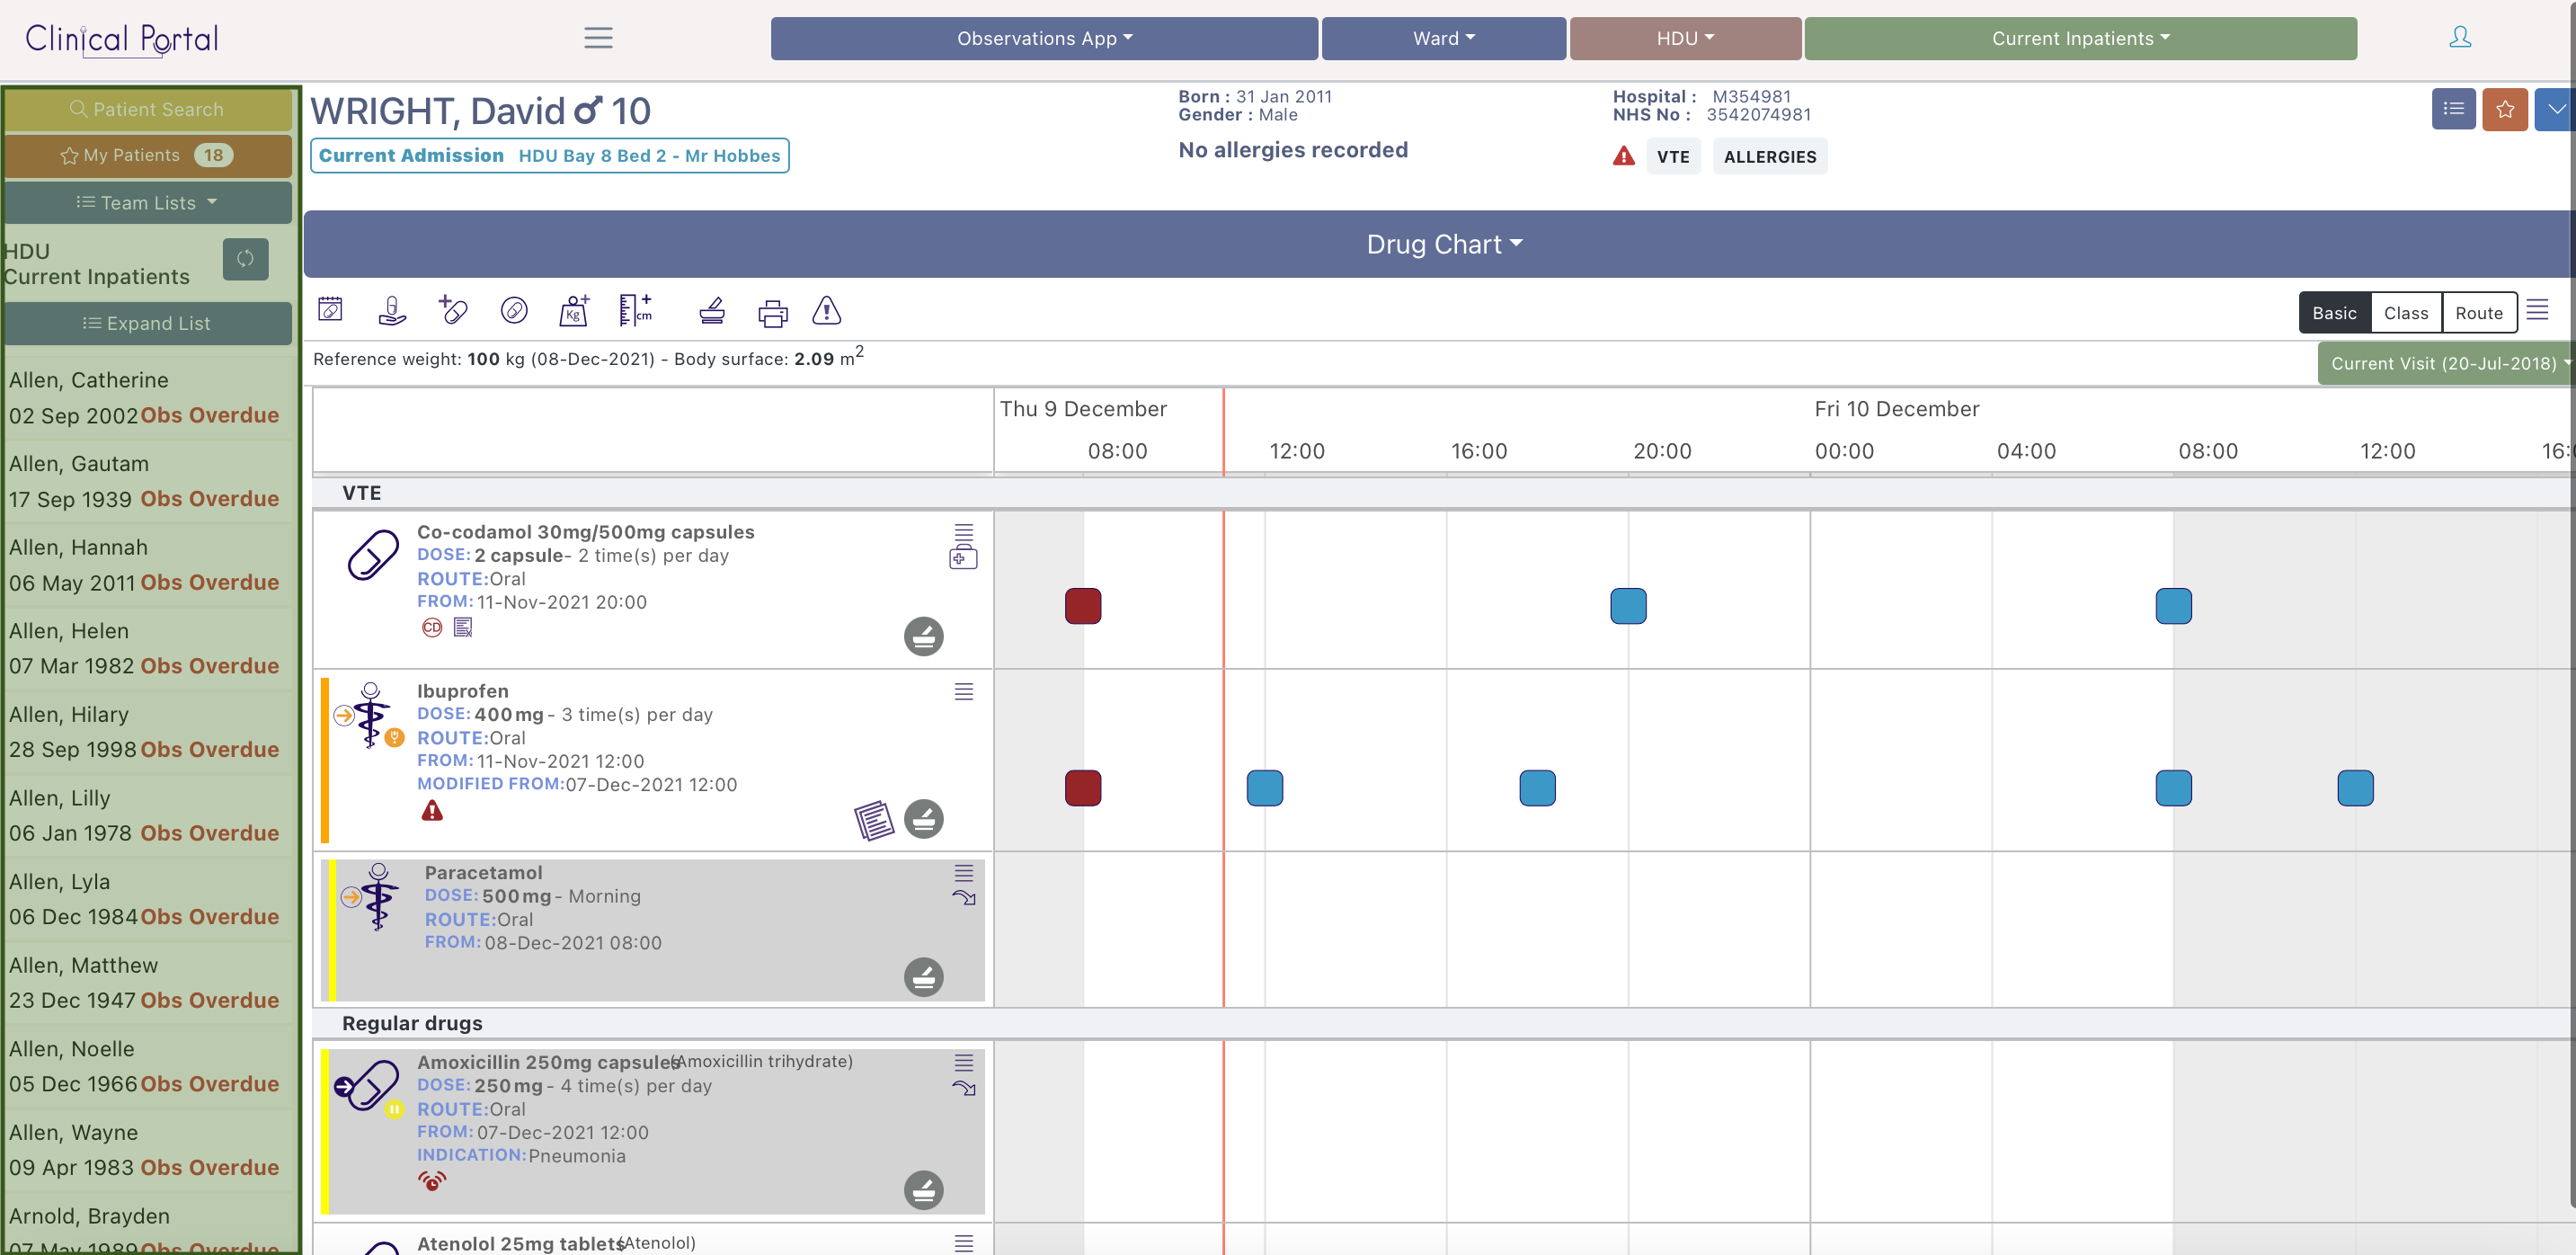
Medicines that are prescribed appear as a list on the Medicines Administration Chart. To access the chart select the administration chart icon in the navigation bar: ![]()
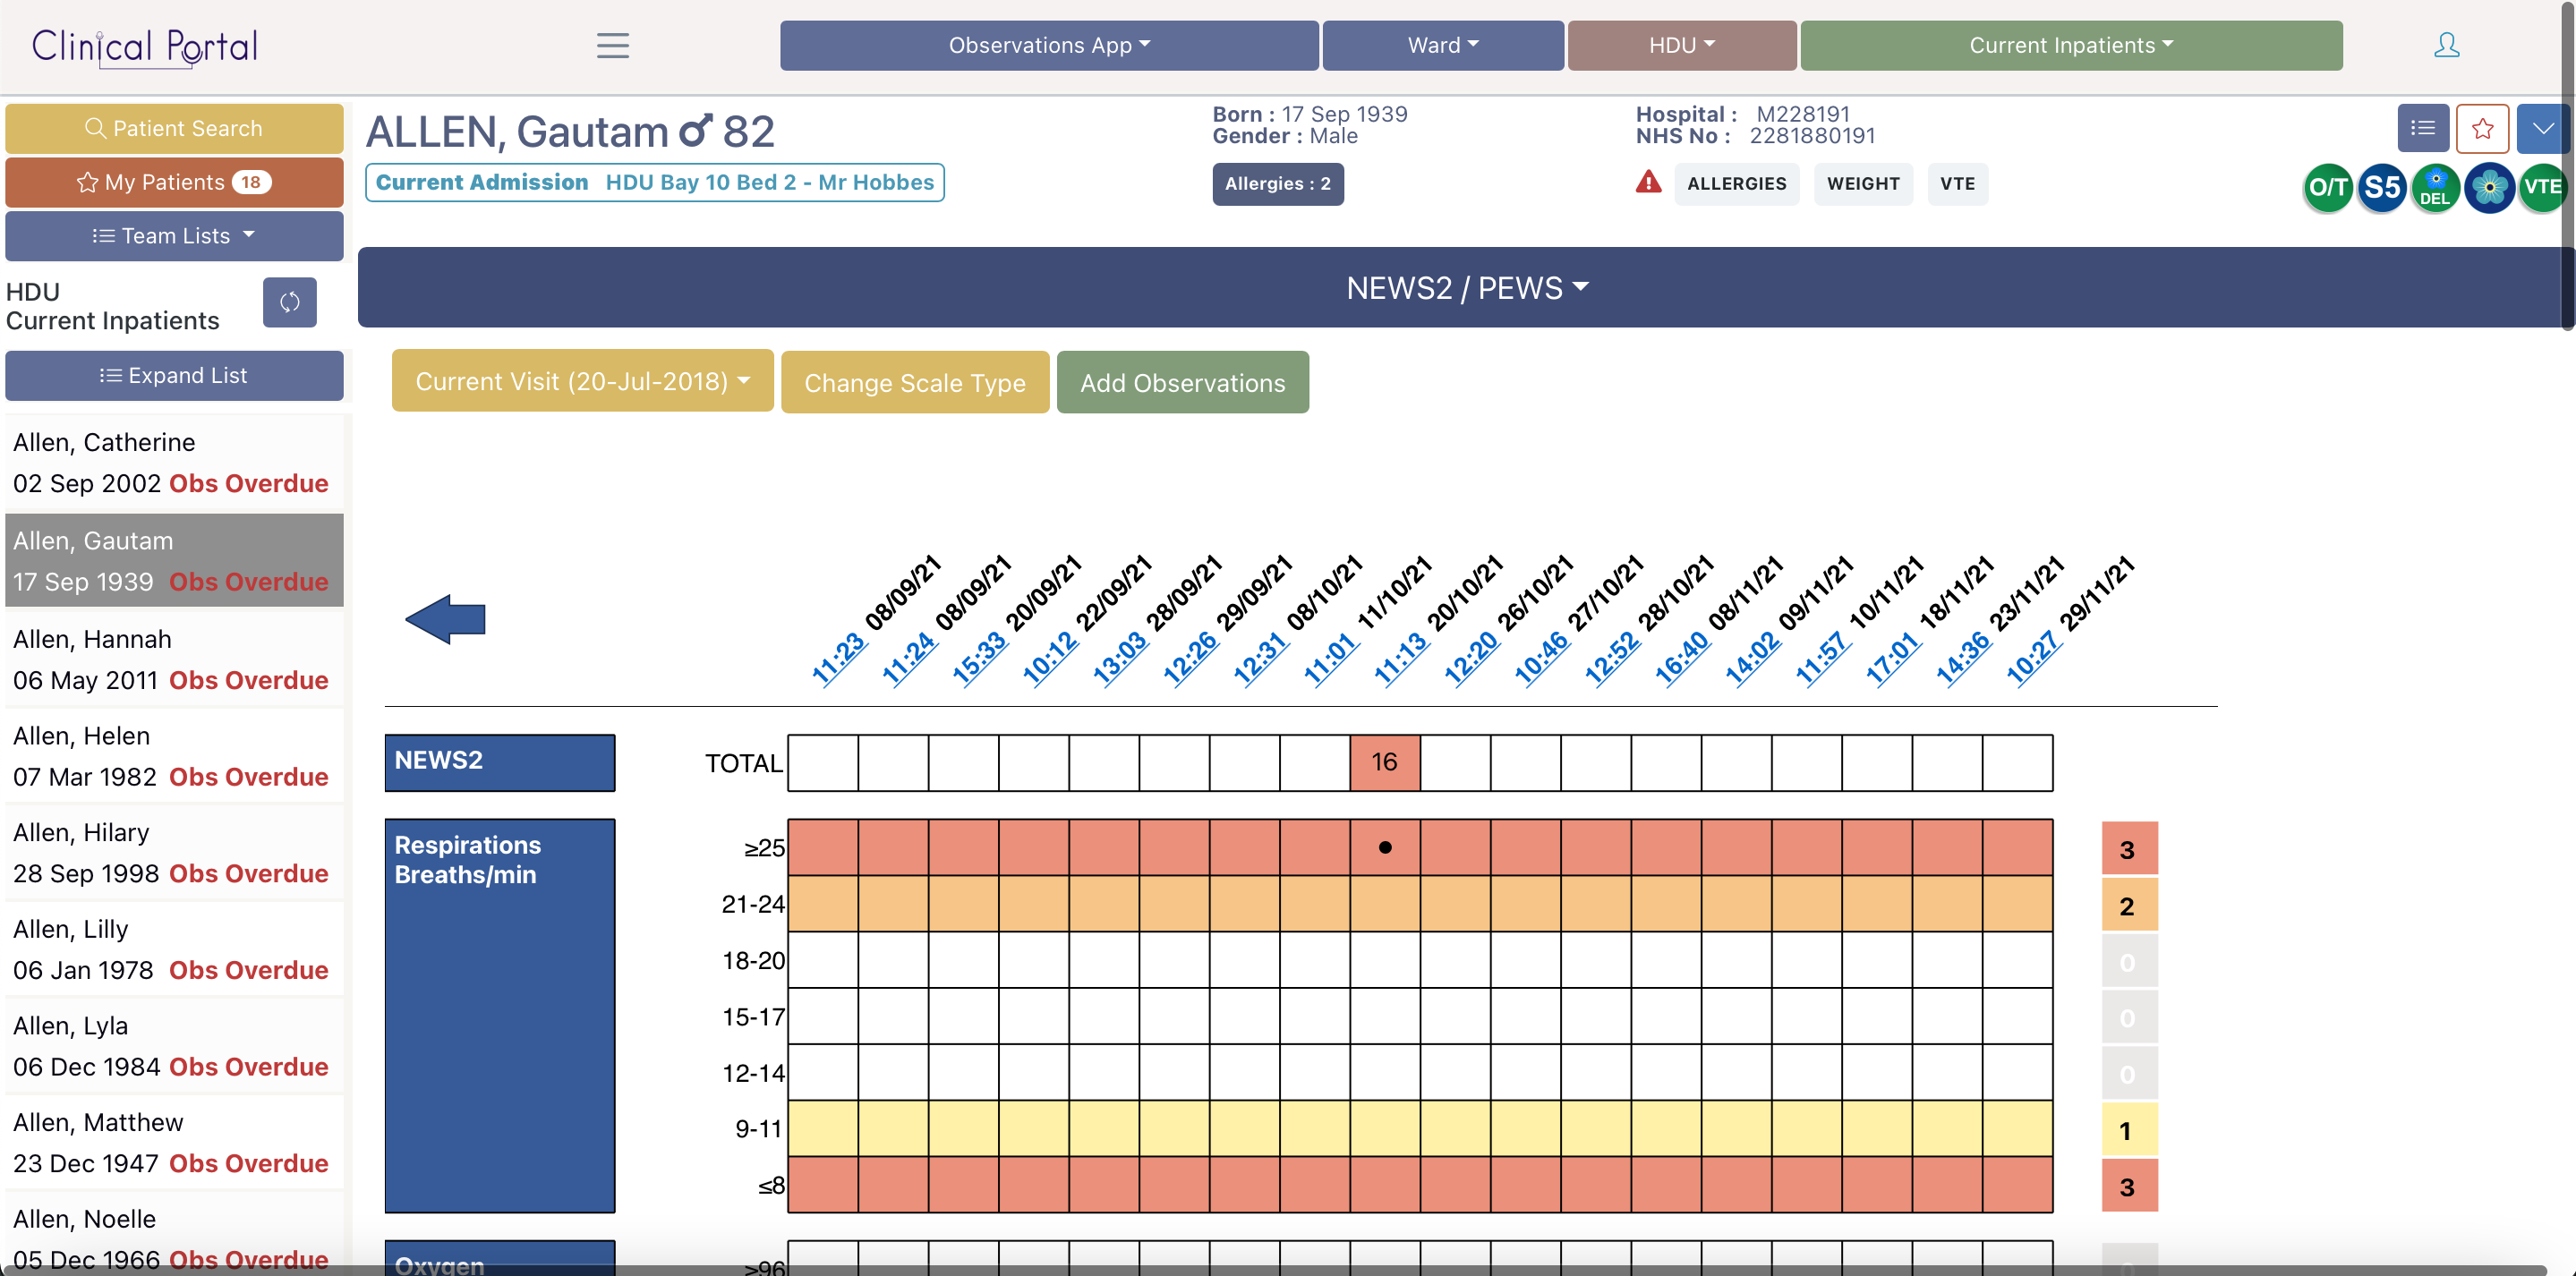
The administration chart displays a timeline view of all the future, pending, given and late administration events:
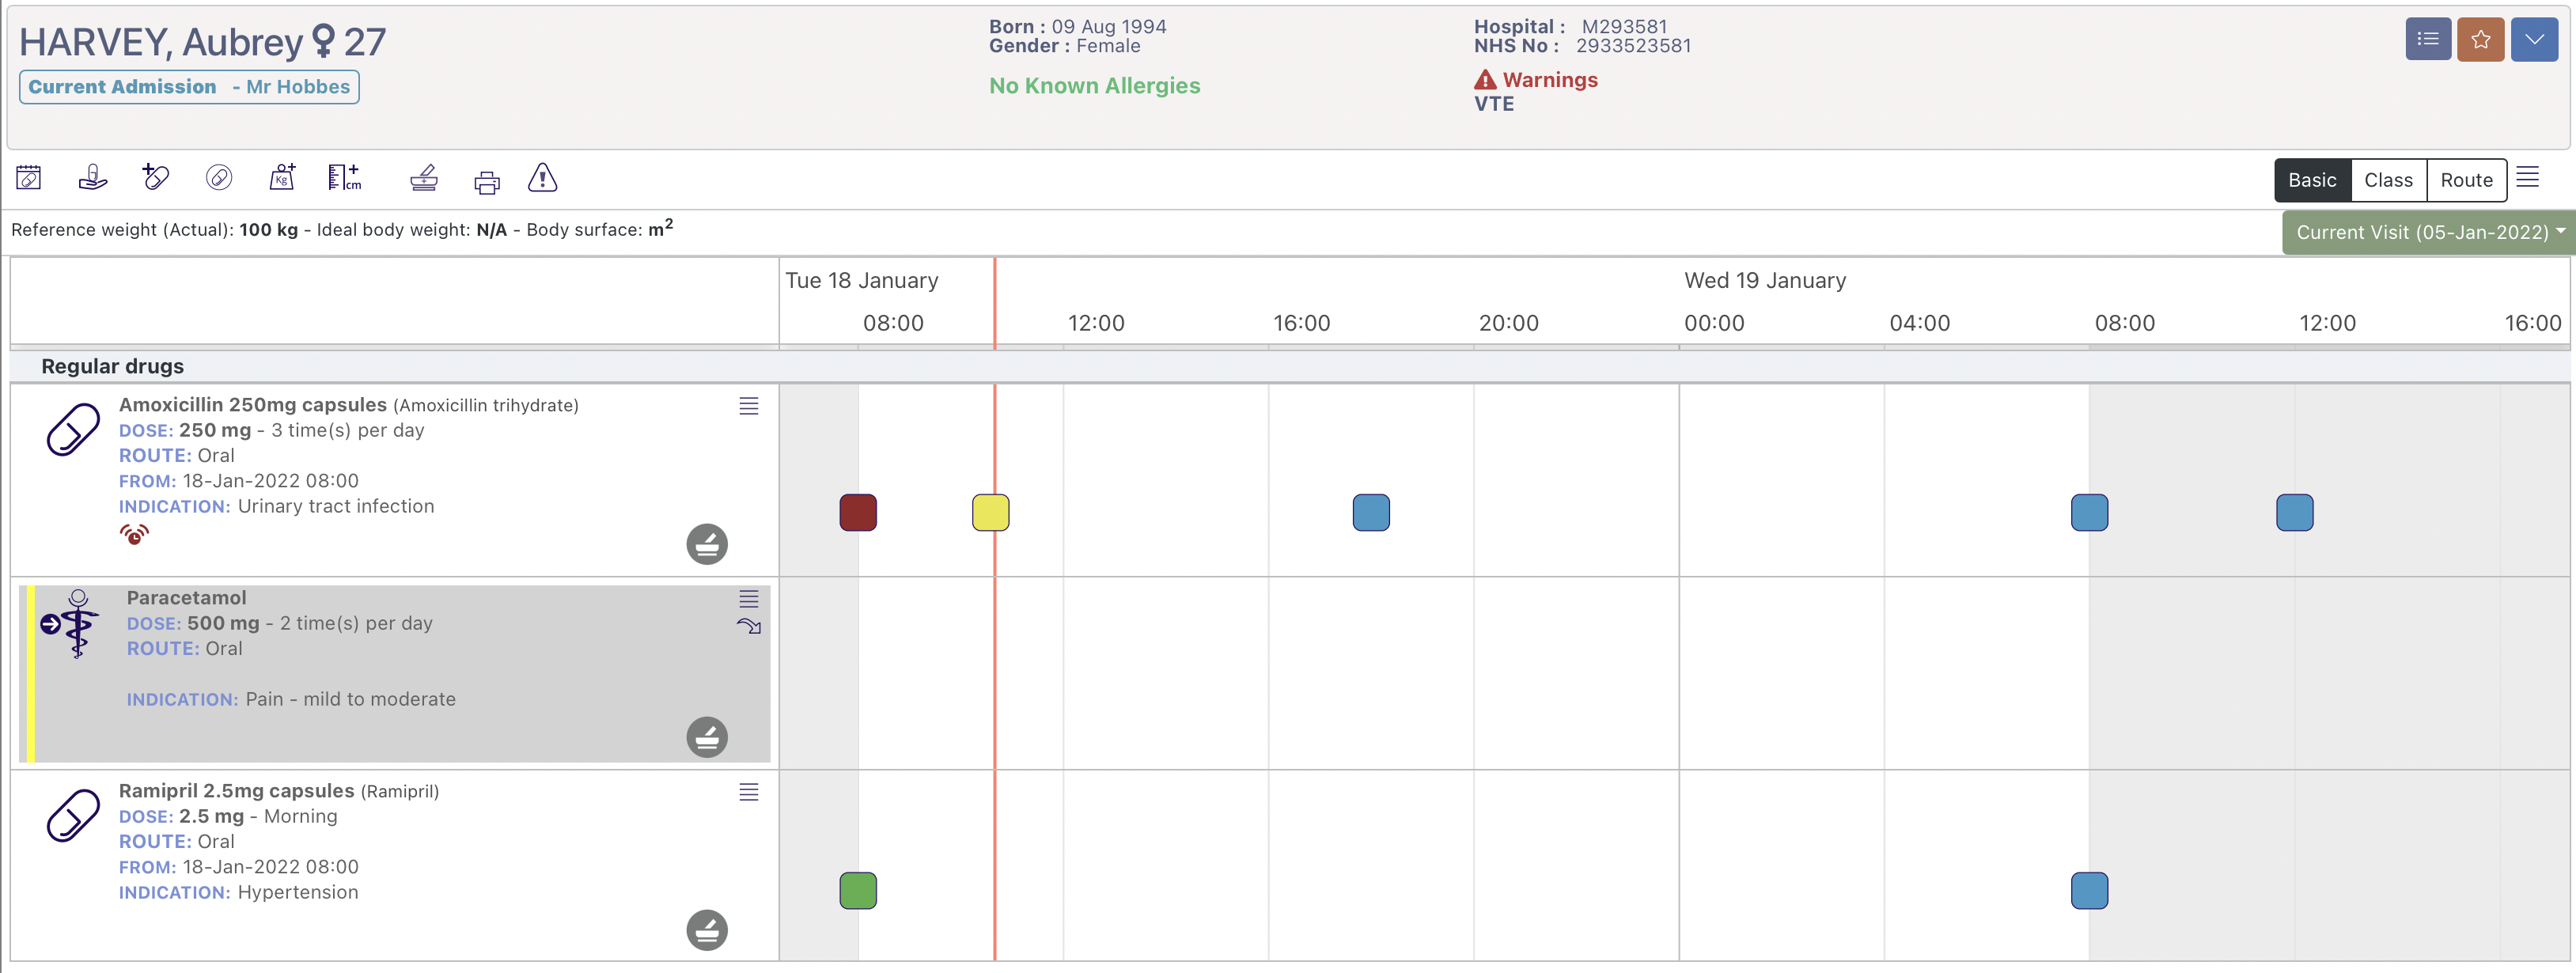
Essential patient data is displayed both in the patient banner and above the prescription list. Information such as a patients name, age, unique ID, allergy status and specific warning (e.g VTE status) are displayed in the banner. Expanding the banner may also provide more information based on your organizations configurations.
The patients reference weight, ideal body weight and body surface area is displayed directly above the prescription list. To update the patient weight select the weight icon: ![]() and to update the patient height select the height icon:
and to update the patient height select the height icon: ![]() from the navigation bar.
from the navigation bar.
If calculated values are not possible the system will display 'N/A'.
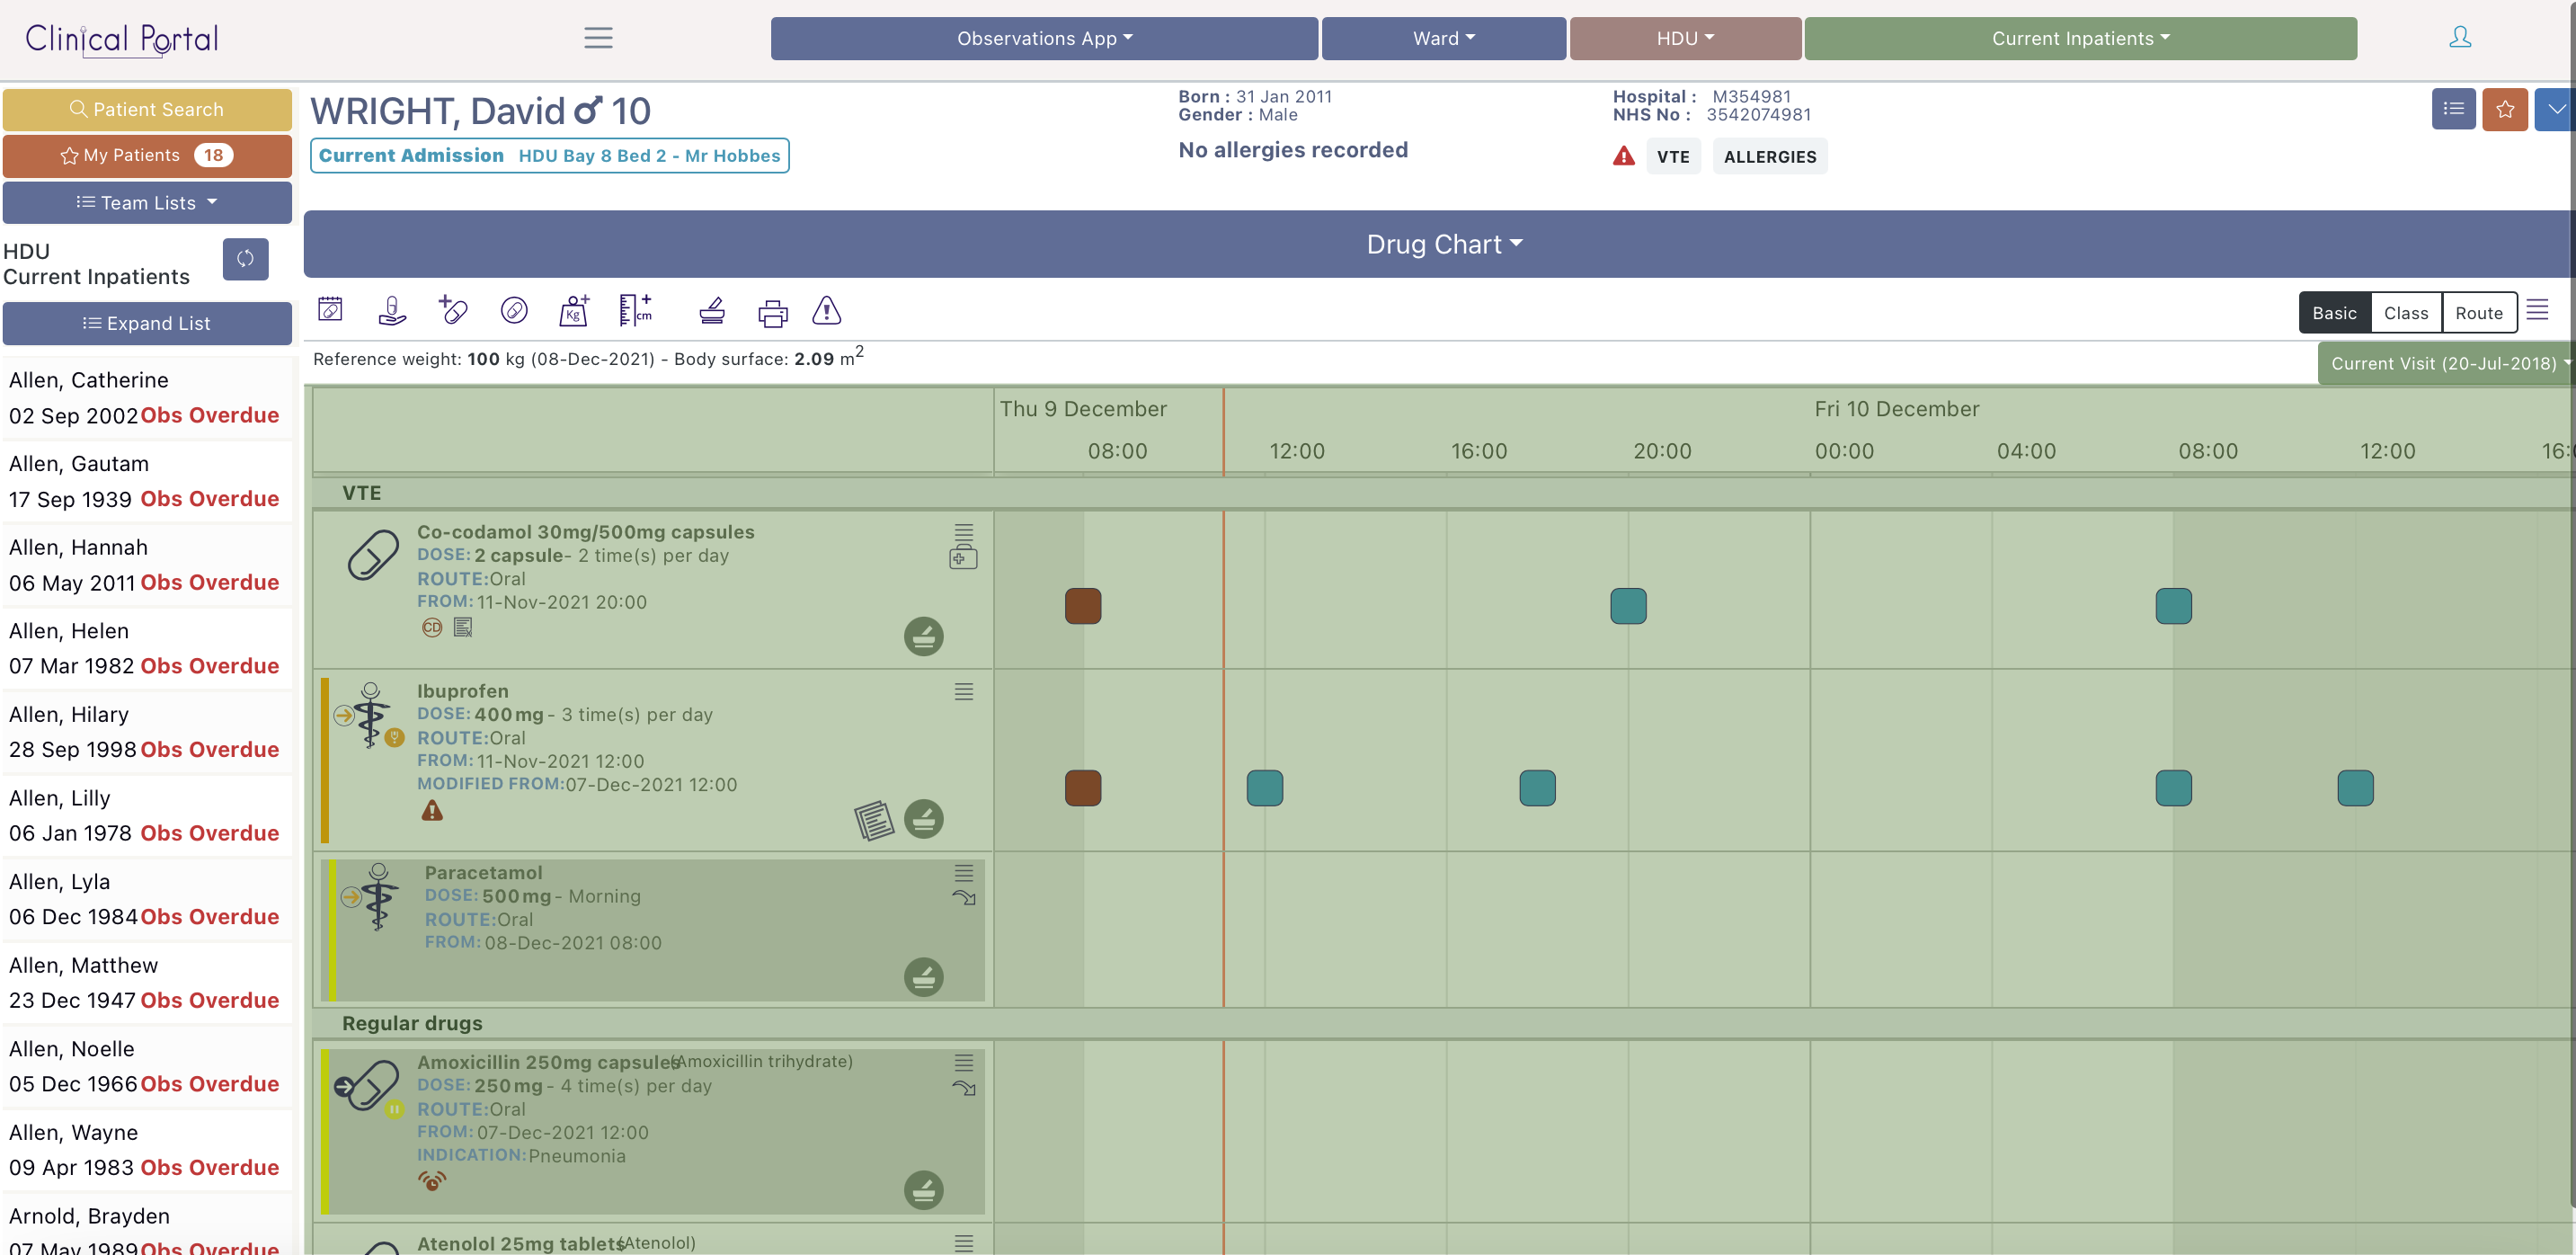
The prescription list of all the therapy prescription cards appears on the left. A therapy can be active, suspended or stopped. Suspended or stopped therapies appear in grey and all their future administration events are removed from the prescription timeline.
A suspended therapy has a yellow bar, a suspended icon: ![]() and can be restarted by selecting the restart arrow:
and can be restarted by selecting the restart arrow:

A stopped therapy has a red bar and will display the canceled icon: ![]() or the stopped icon:
or the stopped icon: ![]() depending if it was stopped before an administration event was due. A stopped therapy can not be restarted.
depending if it was stopped before an administration event was due. A stopped therapy can not be restarted.

It is important to note the difference between suspending and stopping a medicine. A suspended medicine is intended to be restarted at some point even if that is by the patients General Practitioner after discharge. A stopped medicine can not be restarted. If you wish to give a patient a therapy that has been stopped you will need to prescribe it again.
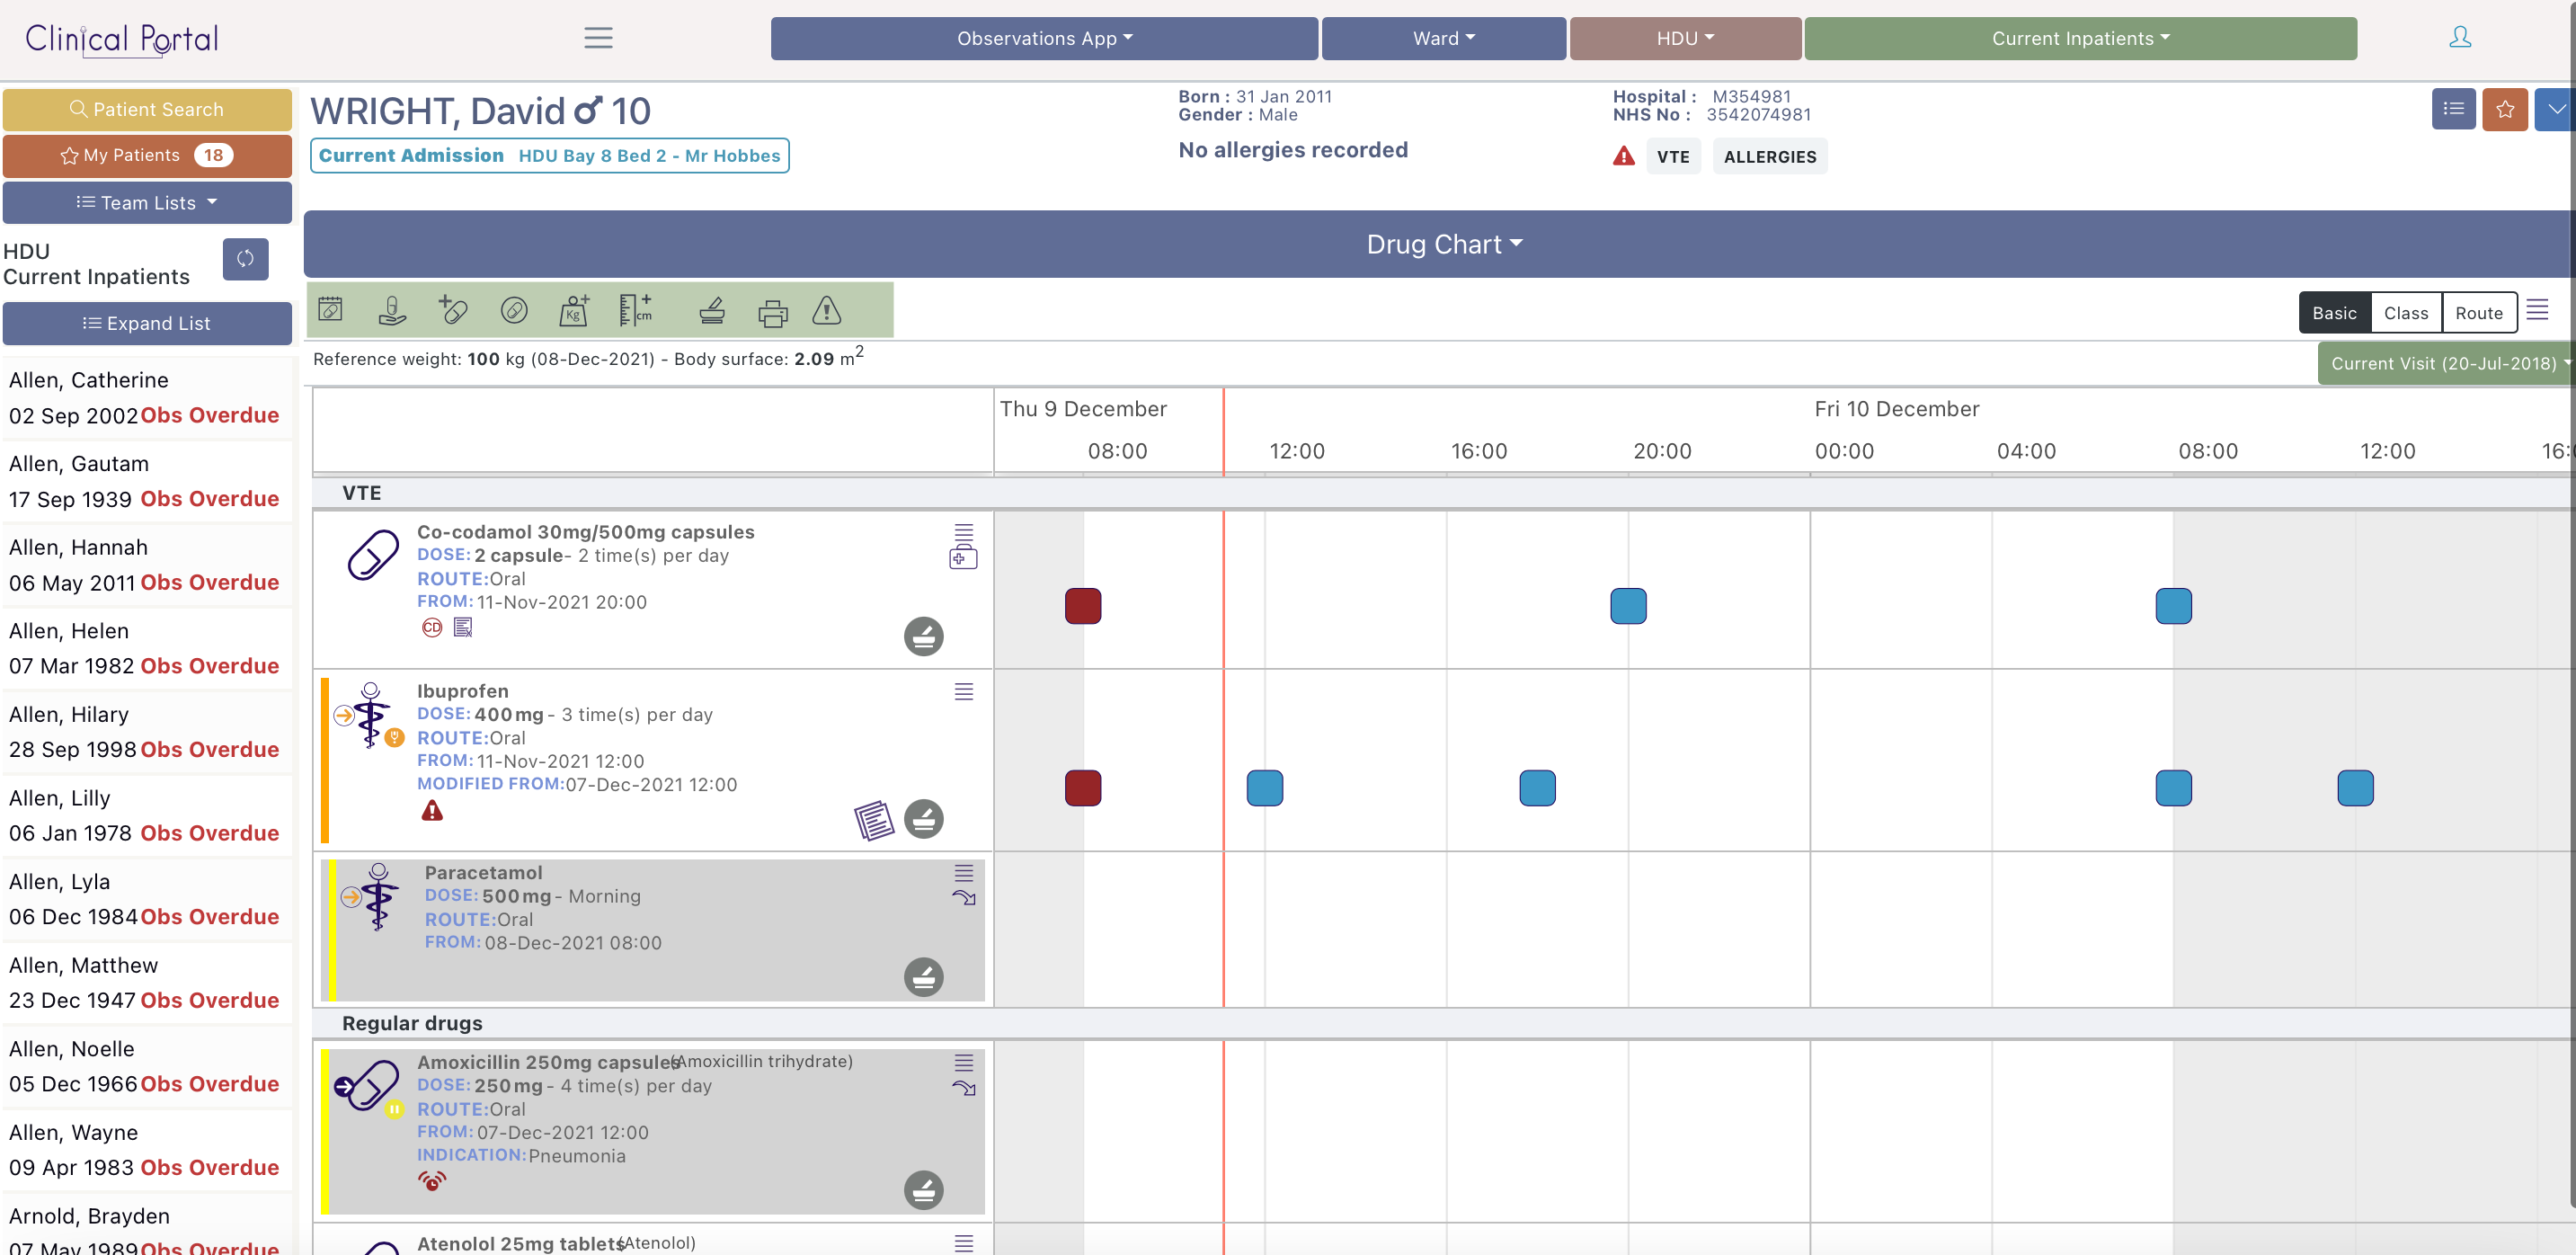
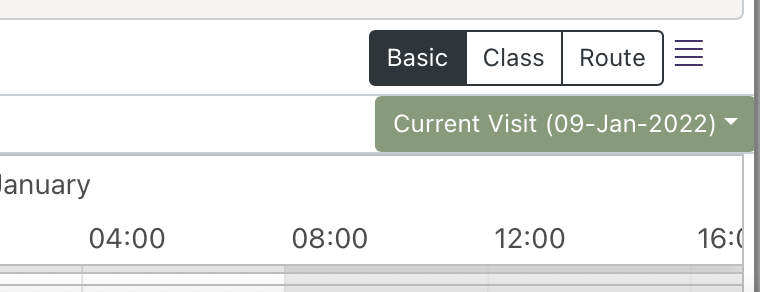
The prescription list can be sorted into three different groups via the chart grouping control at the top right of the module:
The therapies are grouped into different (configurable) categories set by your organization. For example
The therapies are grouped into their respective therapeutic classes. The class categories by default align with the classes in the British National Formulary (BNF) but this can be configured by your organization.
The therapies are grouped depending on their route. Oral, Intravenous, Intramuscular etc.
Selecting the 'hamburger icon' to the left of the chart grouping control opens a menu with more options:
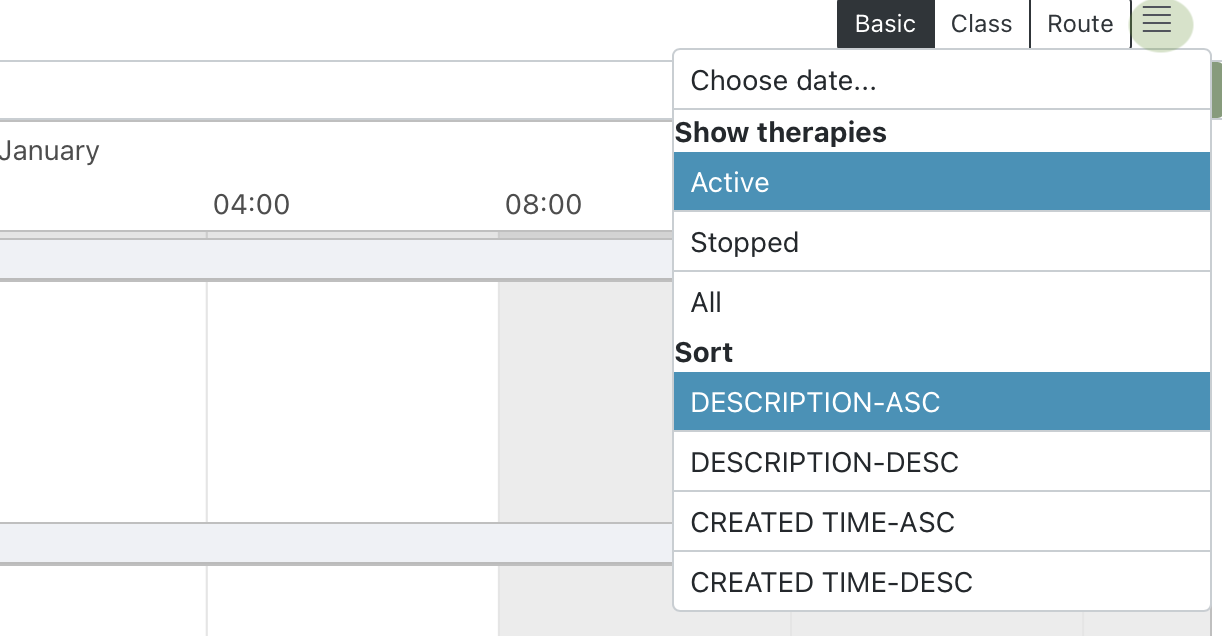
The show therapies options allows you to filter the visible therapies to show only:
Please note: When an active therapy has been stopped it will remain in the active therapy view for 5 mins before being moved into the stopped therapies. This time delay can be configured by your organization.
Sorting, with any prescription grouping, can be changed from the therapy description (alphabetical) or the time the therapy was created in both ascending and descending order.
Selecting the 'Choose date' option reveals the chart date selector:

Selecting the date field brings up a date picker that allows you to navigate to a specific date on the chart.
The prescription card states the name of the therapy (VTM/VMP/AMP) and lists the details of the posology:
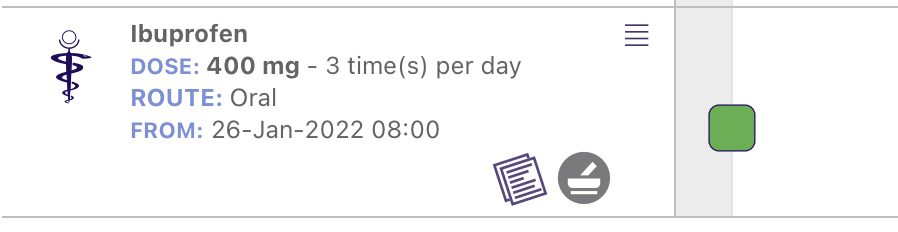
There are a number of different icon types that appear on the prescription card:


To access additional options on a prescription select the 'hamburger' menu on the prescription card:
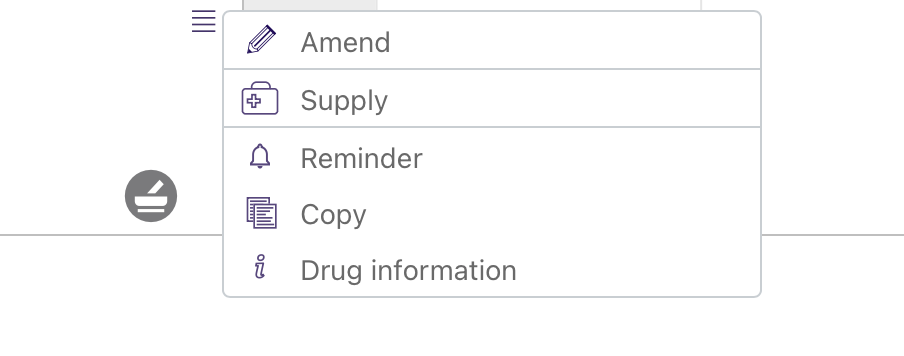
Select the 'Amend' option to view options to amend the prescription.
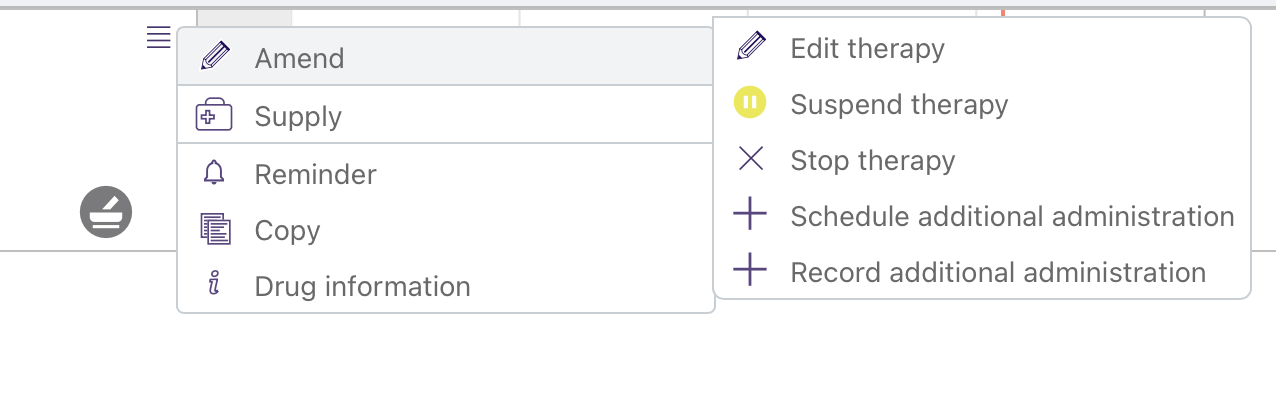
Edit therapy
This reopens The Prescribing Form and allows the user to modify the prescription. The extent to which the prescription can be modified is configured by your organization.
Suspend therapy
To suspend a therapy you must enter a reason. All future administration events are removed and the therapy is clearly marked as 'suspended'.
Select the 'Add' arrow to restart the therapy.

Stop therapy
To stop a therapy you must enter a reason. All future administration events are removed and the therapy is clearly marked as 'stopped'.
A stopped therapy can not be restarted, it must be prescribed again.
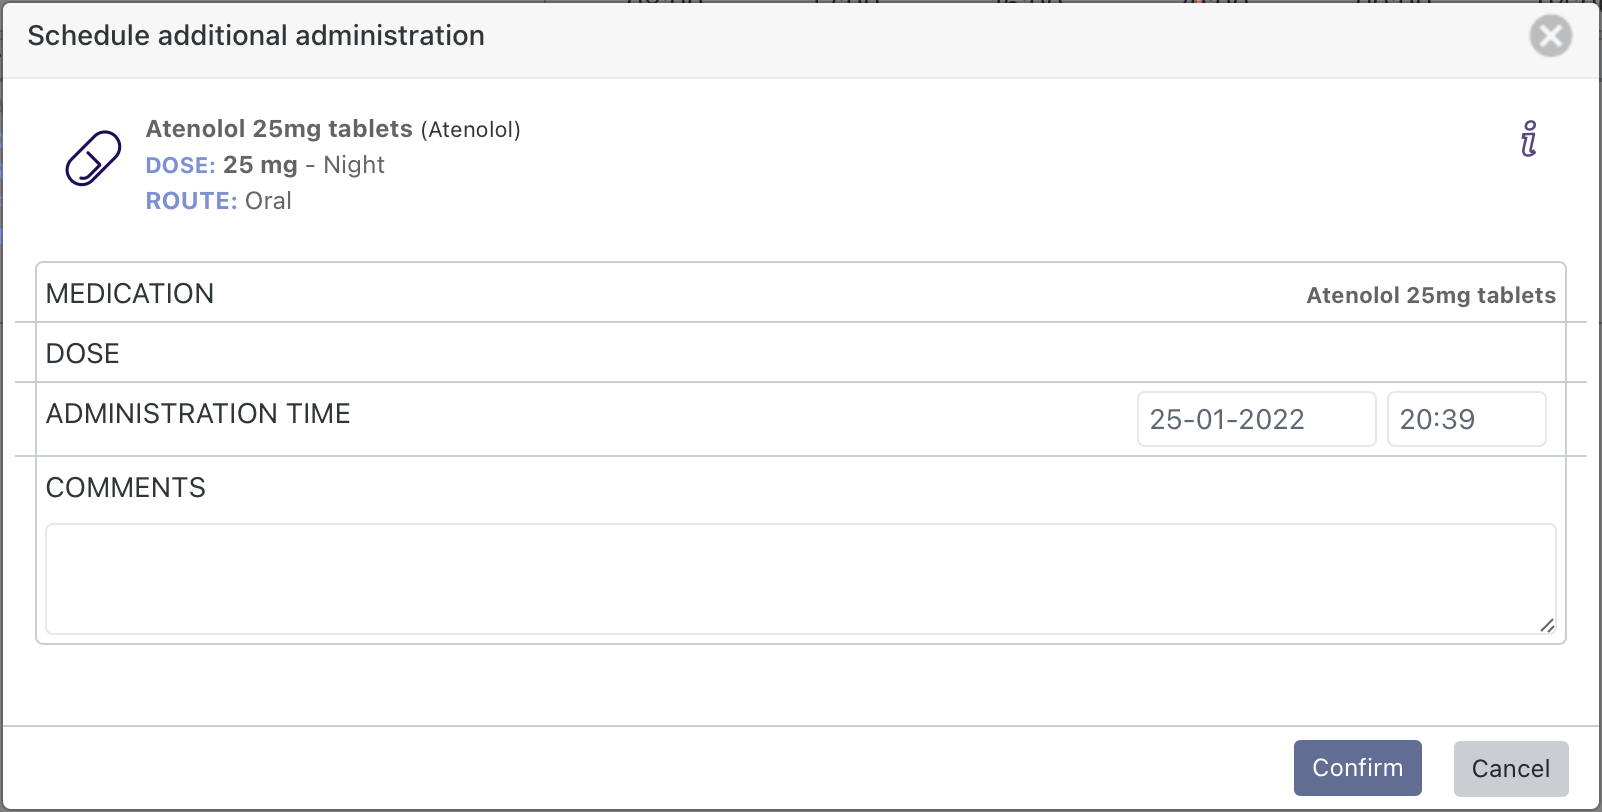
Schedule additional administration
Select to schedule an additional administration in addition to the current prescription.
This option is only available to a prescriber.
The dose of the administration can be different to the current prescription.
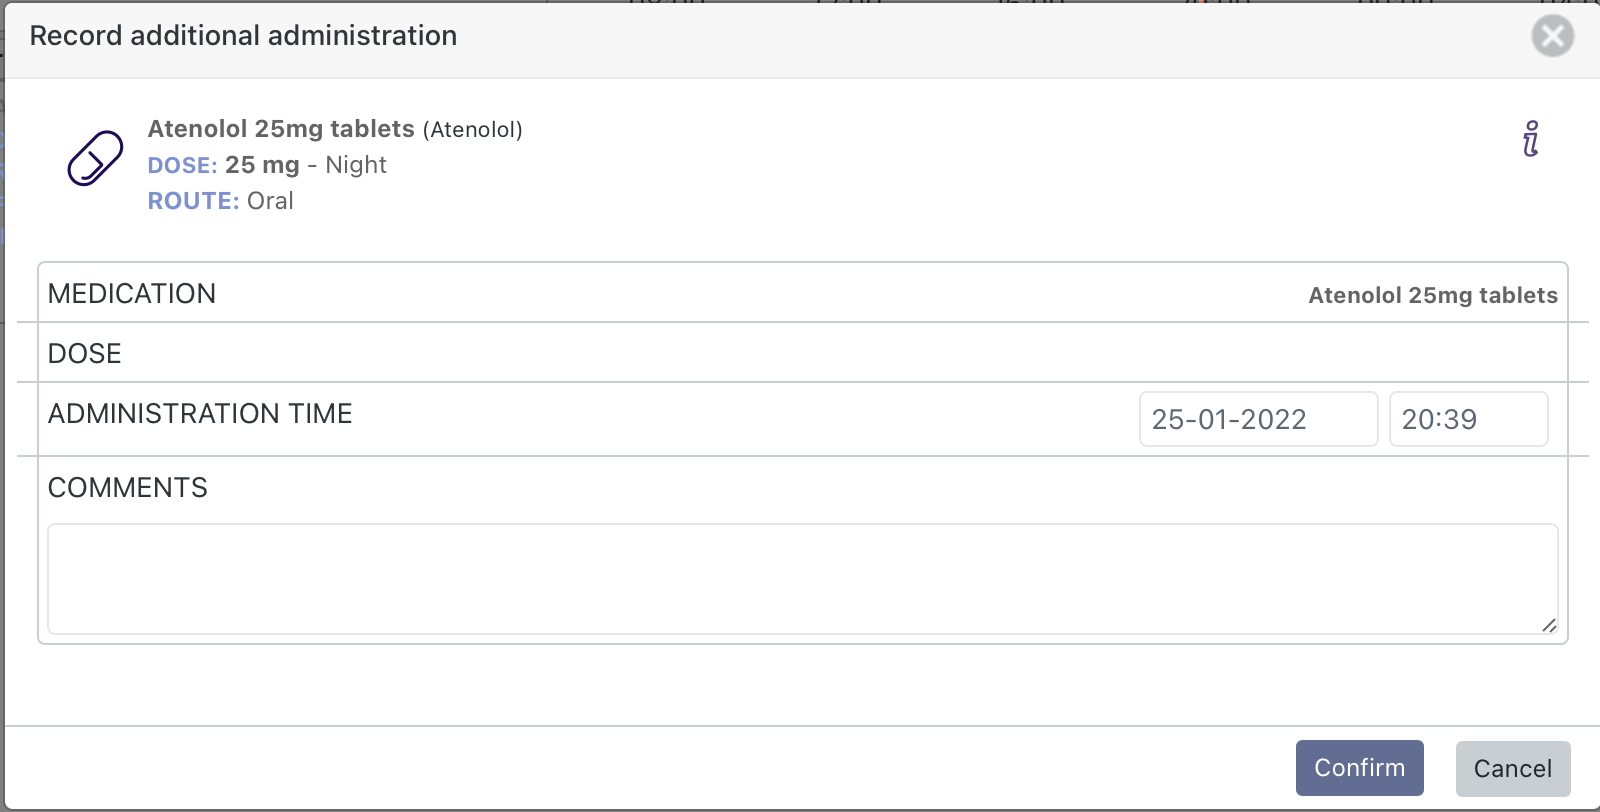
Record additional administration
Select to record an additional administration.
This option is used to document if a additional dose that was not prescribed, was given to the patient.
Select 'Supply' to view options related to the availability and supply of the therapy.
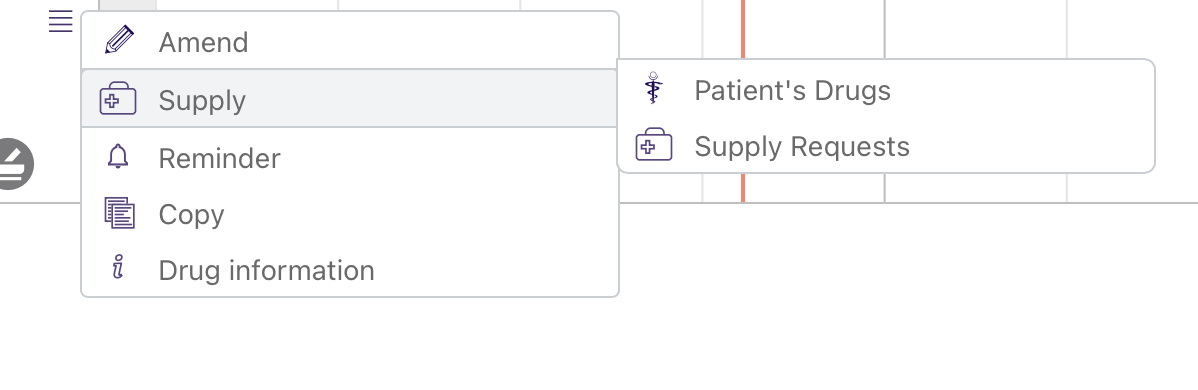
Patient's Drugs
Supply Requests
Select this options to add or acknowledge a reminder.
Selecting Copy opens the The Prescribing Form with a second copy of the prescription selected. This is sometimes required when you want to re-start a therapy that has been stopped.
There are two ways to see any additional information about the prescription:
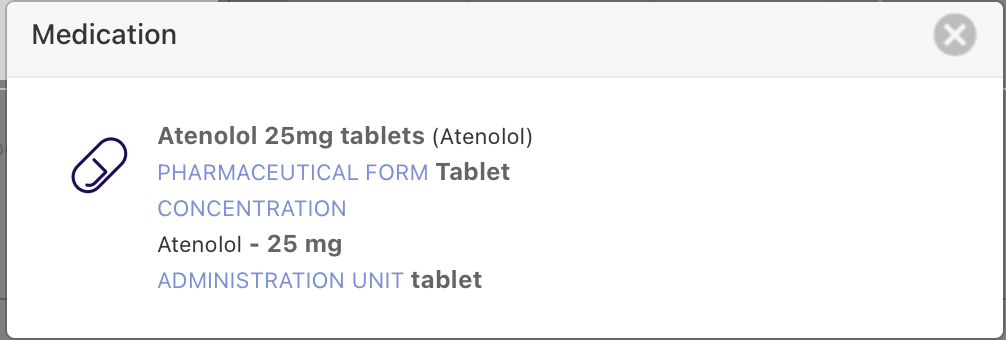
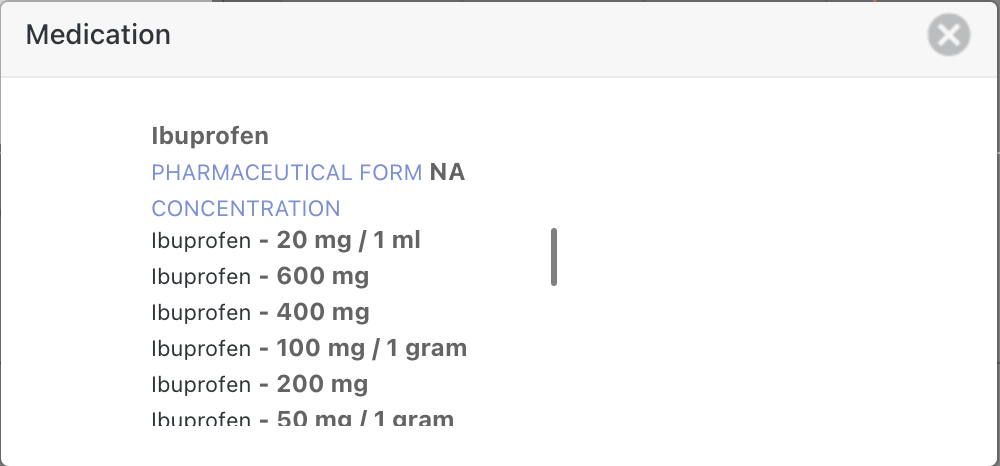
The Drug information menu item will list the details of the prescription:
e.g for a VMP the formulation and dose:
Or if the prescription is a VTM it will list the potentially compatible VMPs
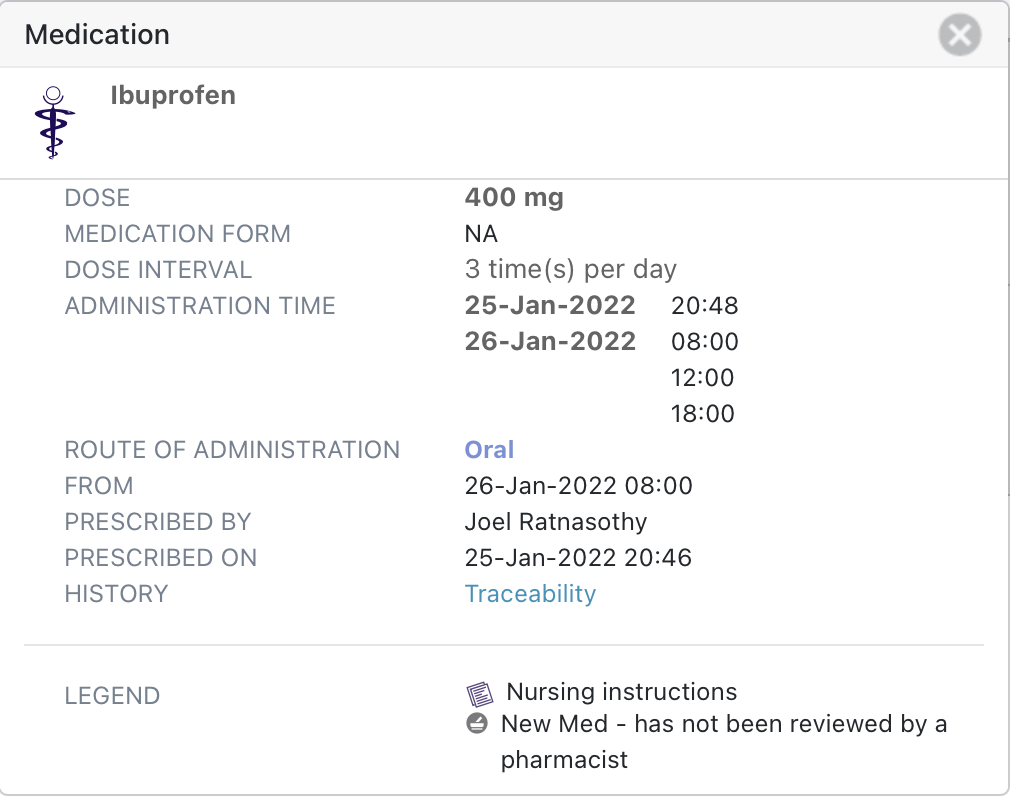
Selecting the body of the prescription card itself opens up an expanded view that shows more details of the prescription including a legend that defines any icons present on the prescription card and a link to a traceability view that shows the history of any changes that have been made to the prescription.
Upon selection from menu item Supply Request and IF NO Supply Request record exists, then system will display a modal window with option to create new Supply Request.
· IF the prescribed medication is VTM, then system will provide the ability for user select a VMP/AMP. For VTM, Supply Request cannot be created.
· IF the prescribed medication is VMP/AMP, then system will provide the ability for user to select different VMP/AMP
· Supply Request will have several statuses
o Incomplete- Incomplete is a default status/value for new Supply Request
o Pending- * Pending - always available for selection:
o Approved- * Approved: always available for selection:
Selected by default if a supply request, for a formulary or non-formulary request, was previously saved as ‘Approved’
The User will only be able to select ‘Approved’ IF the User has been assigned the RBAC role(s) to approve a formulary or non-formulary request:
IF current status = ‘Fulfilled’, THEN the User will only be able to select ‘Approved’ IF the User has the appropriate role to change the status of a request from ‘Fulfilled' to 'Approved’
o Fulfilled- * Fulfilled - always available for selection
o Rejected- -Rejected - always available for selection
-Selected by default if a supply request, for a formulary or non-formulary request, was previously saved as ‘Rejected’
On each prescription card there is a pharmacy review icon that can be set to several different states:
By default it is set to 'Pharmacist review not required'. A pharmacist however can review a medicine and set the review status to 'Therapy has been reviewed by a pharmacist' or 'Therapy has been refereed back to the prescriber for review'. If it is set by a pharmacist to either of these states, if it is subsequently edited it will automatically be set to 'Therapy requires pharmacist review'.
If you are a pharmacist you are able to change the pharmacist review icon status. You can do this when you add a comment to a prescription or when you edit a prescription.
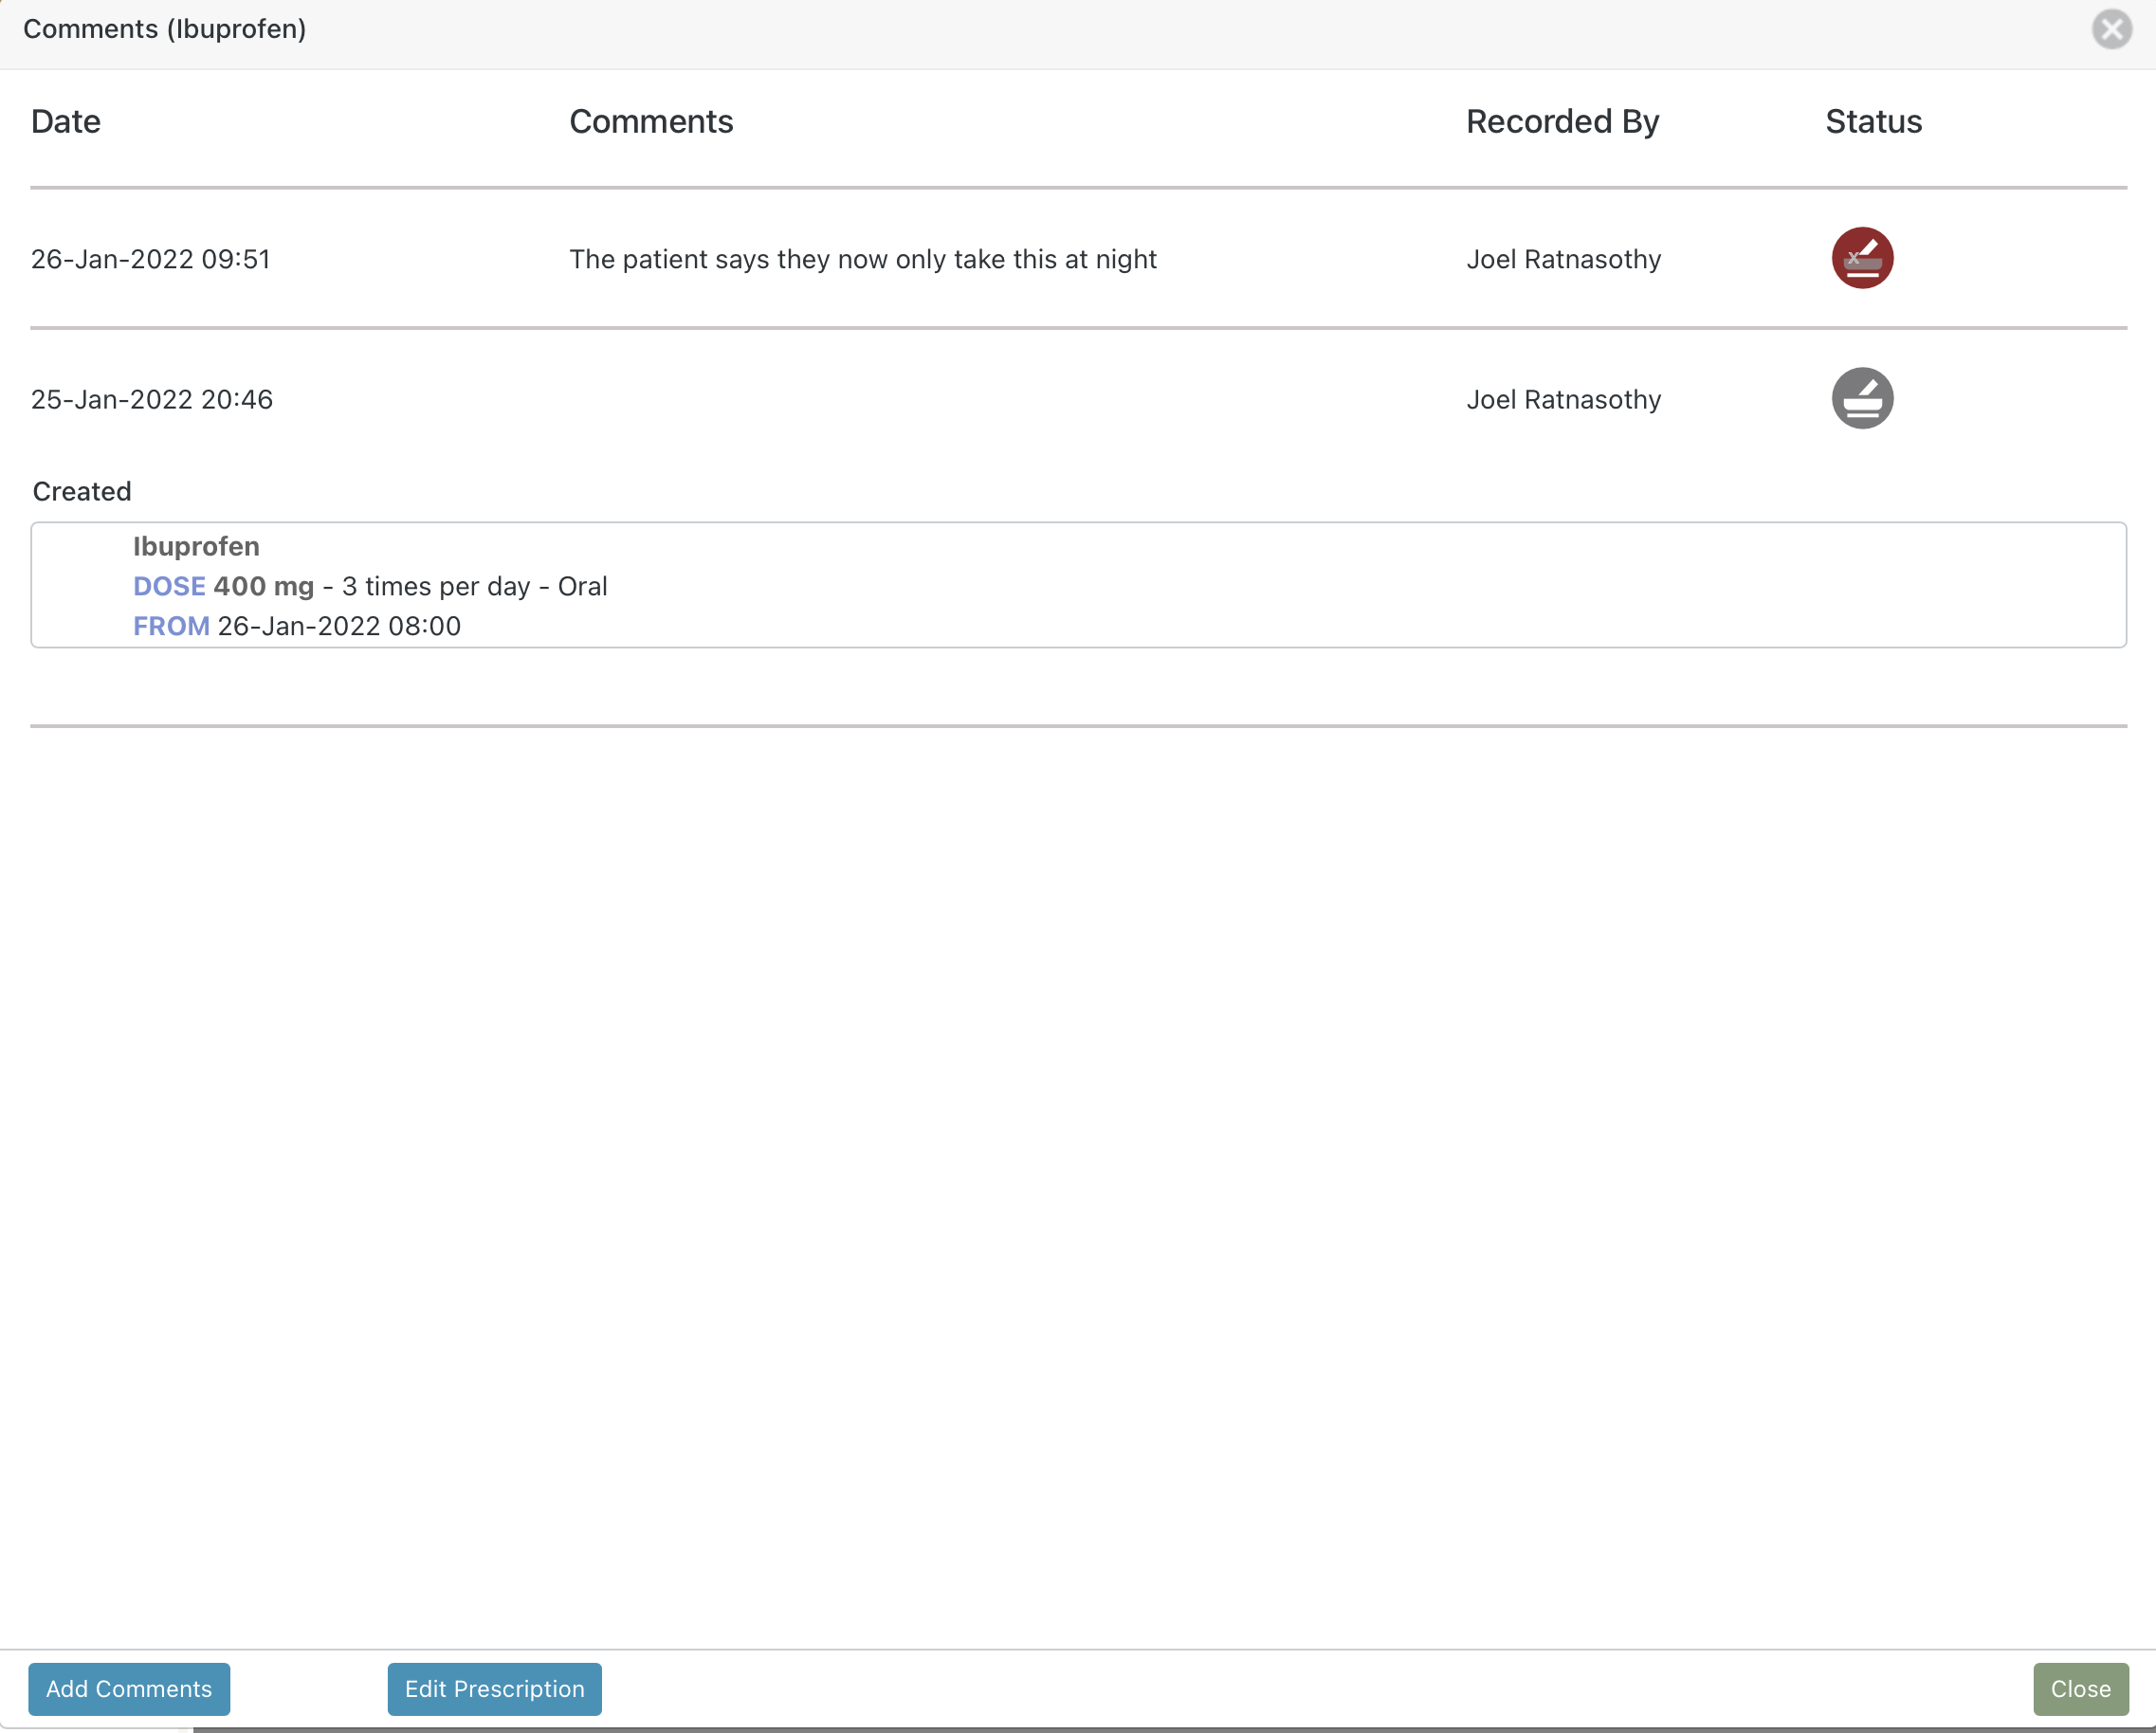
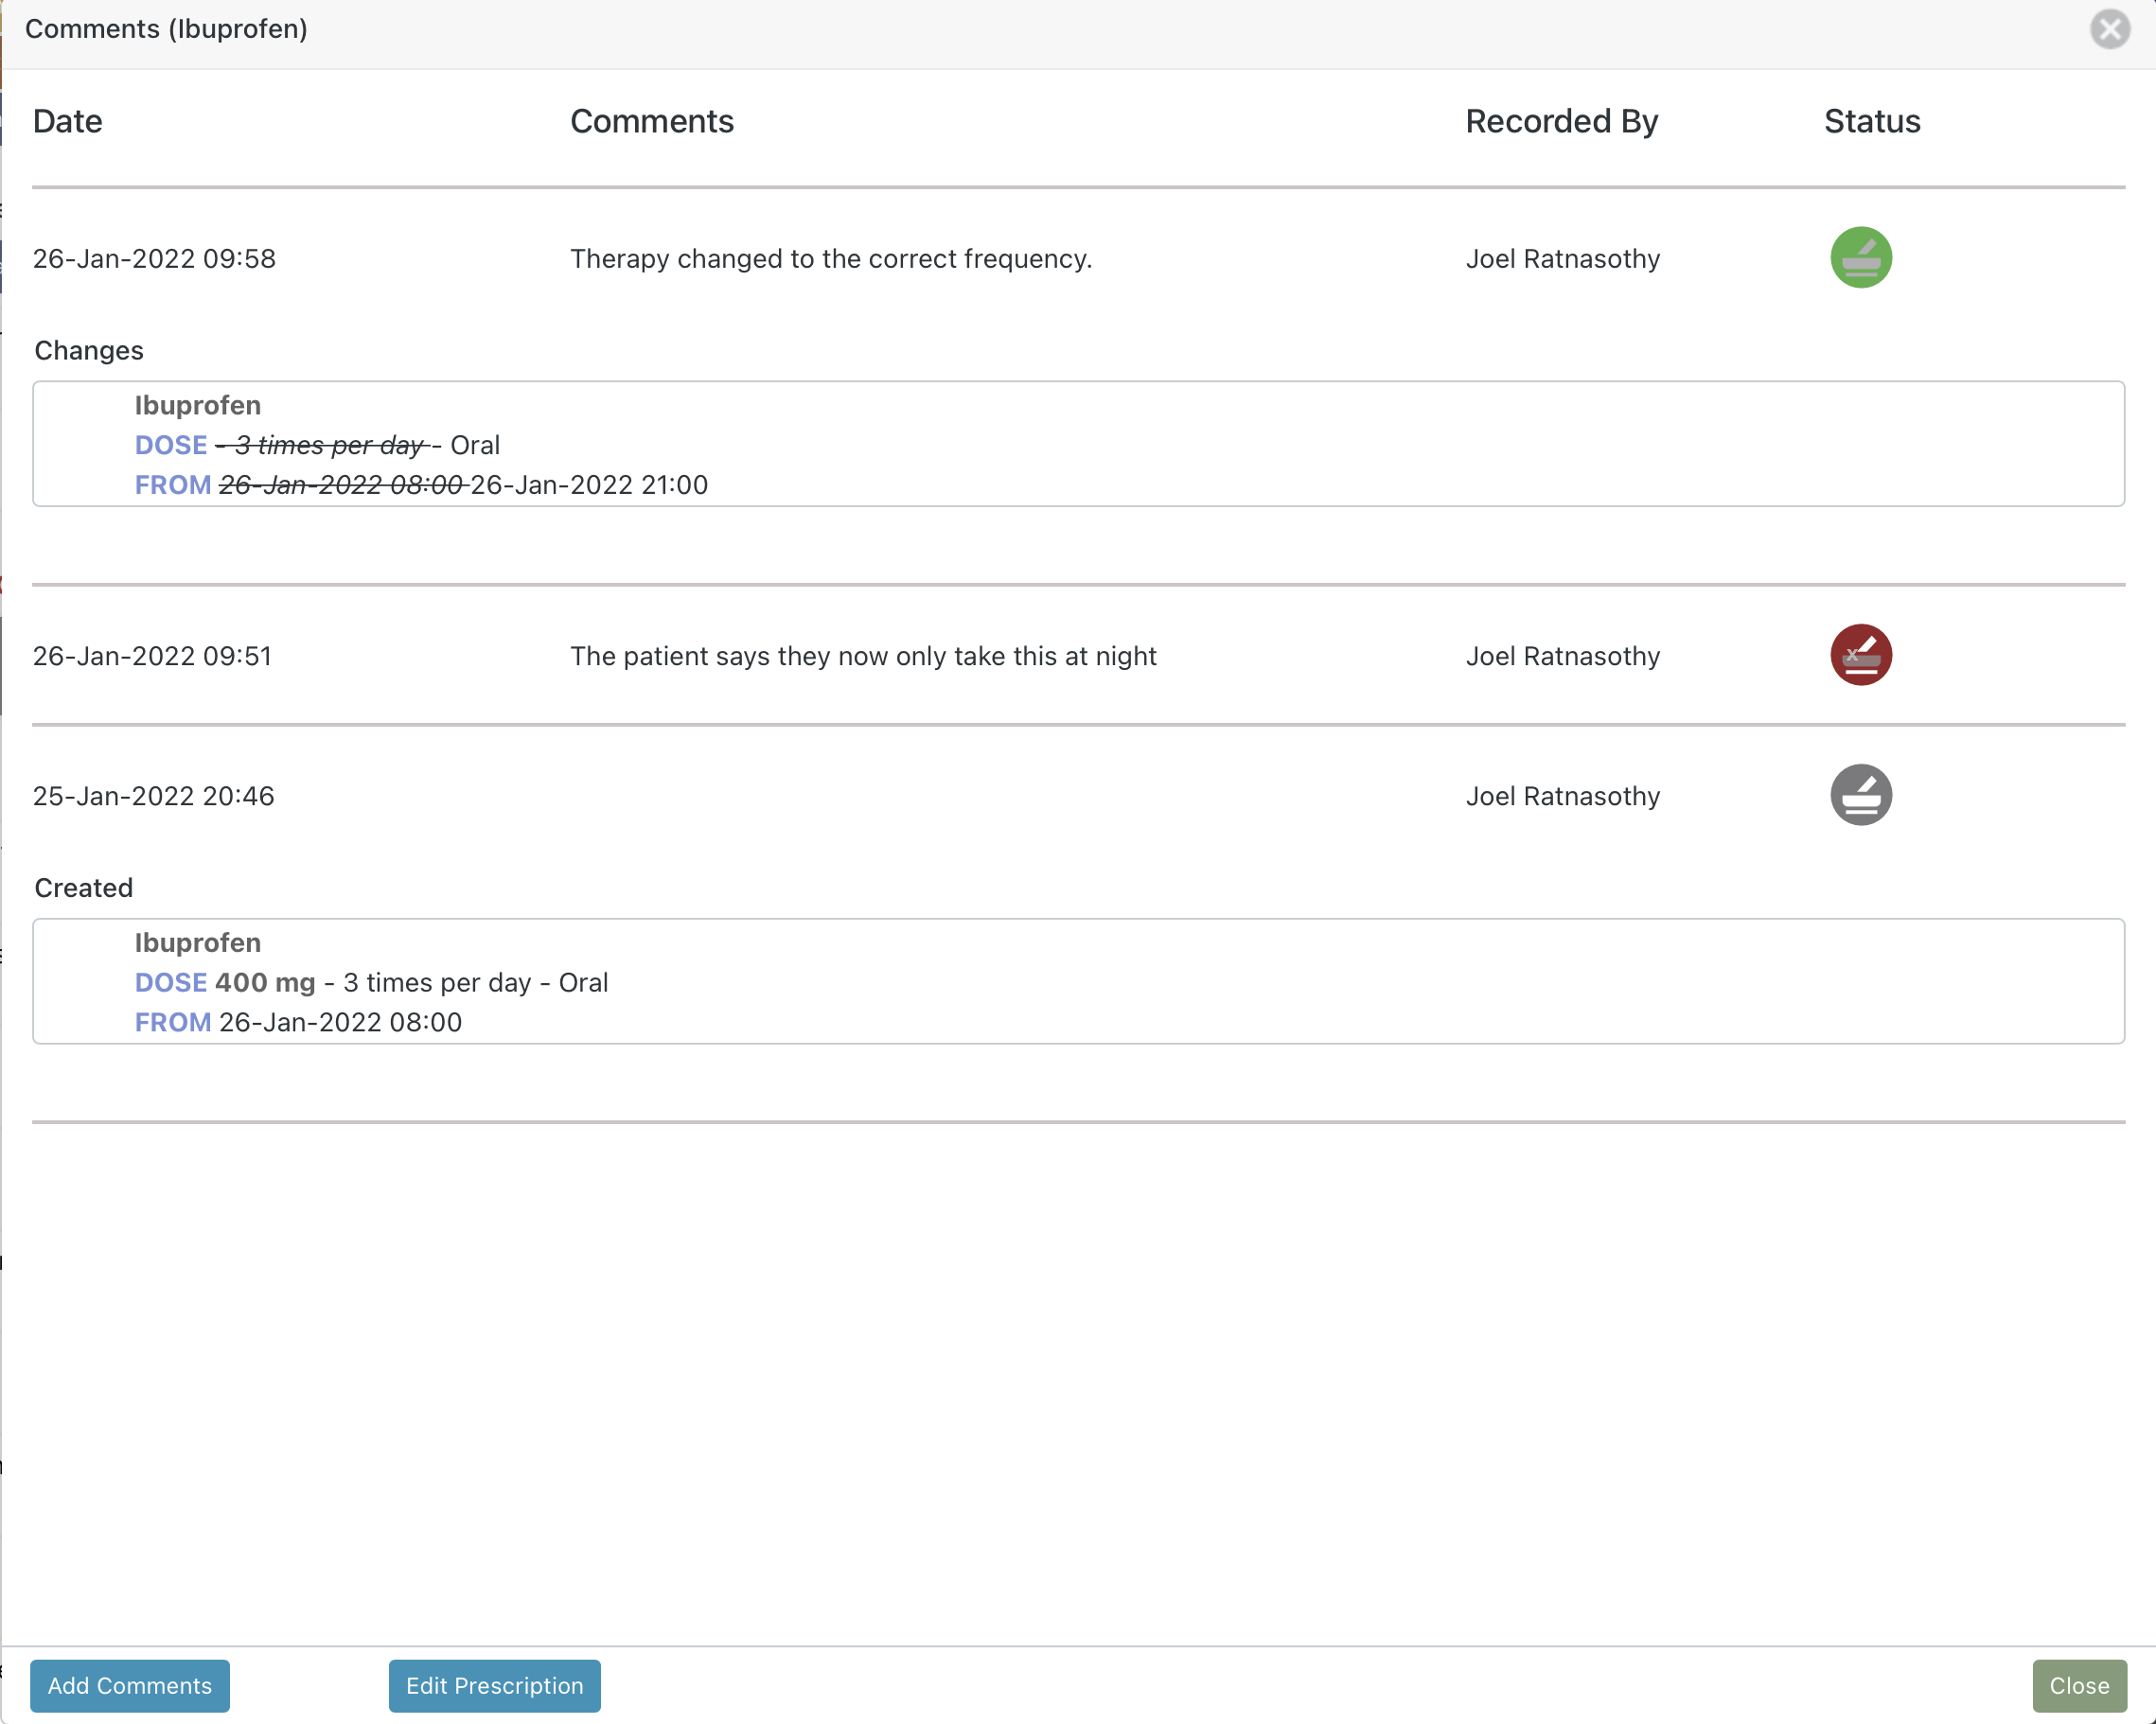
Selecting the pharmacy review icon brings up the comments and history view:
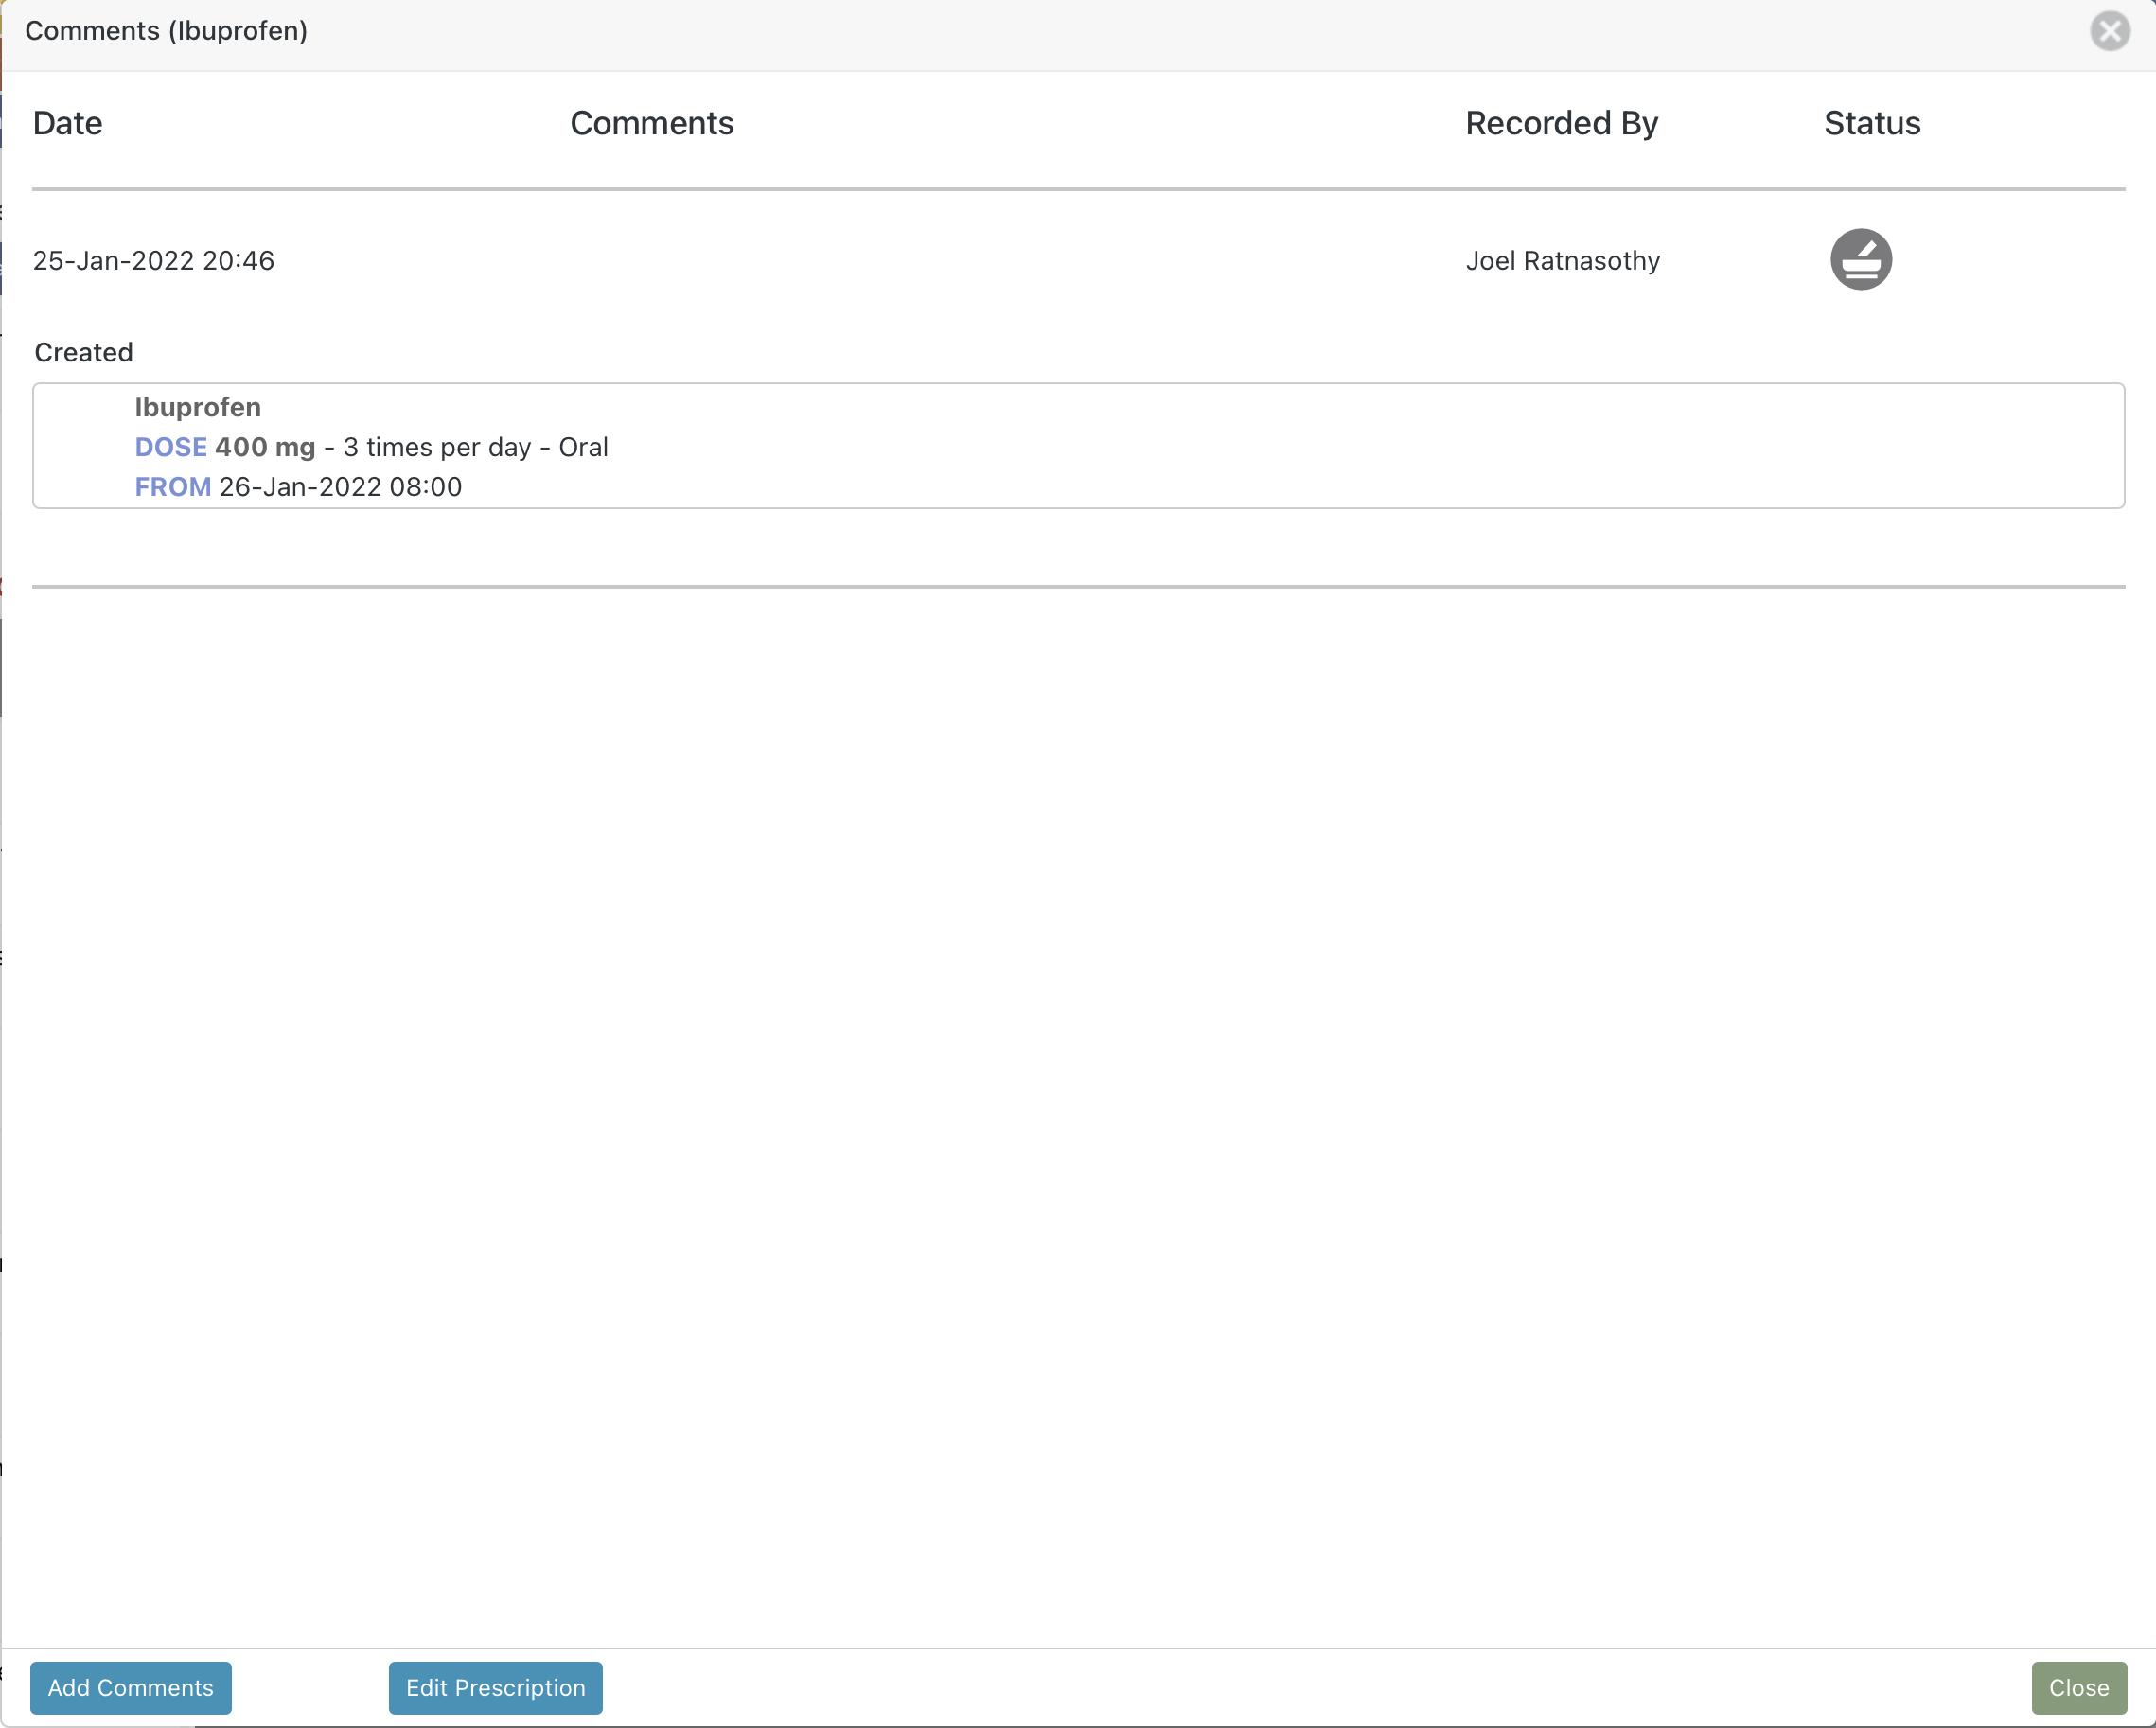
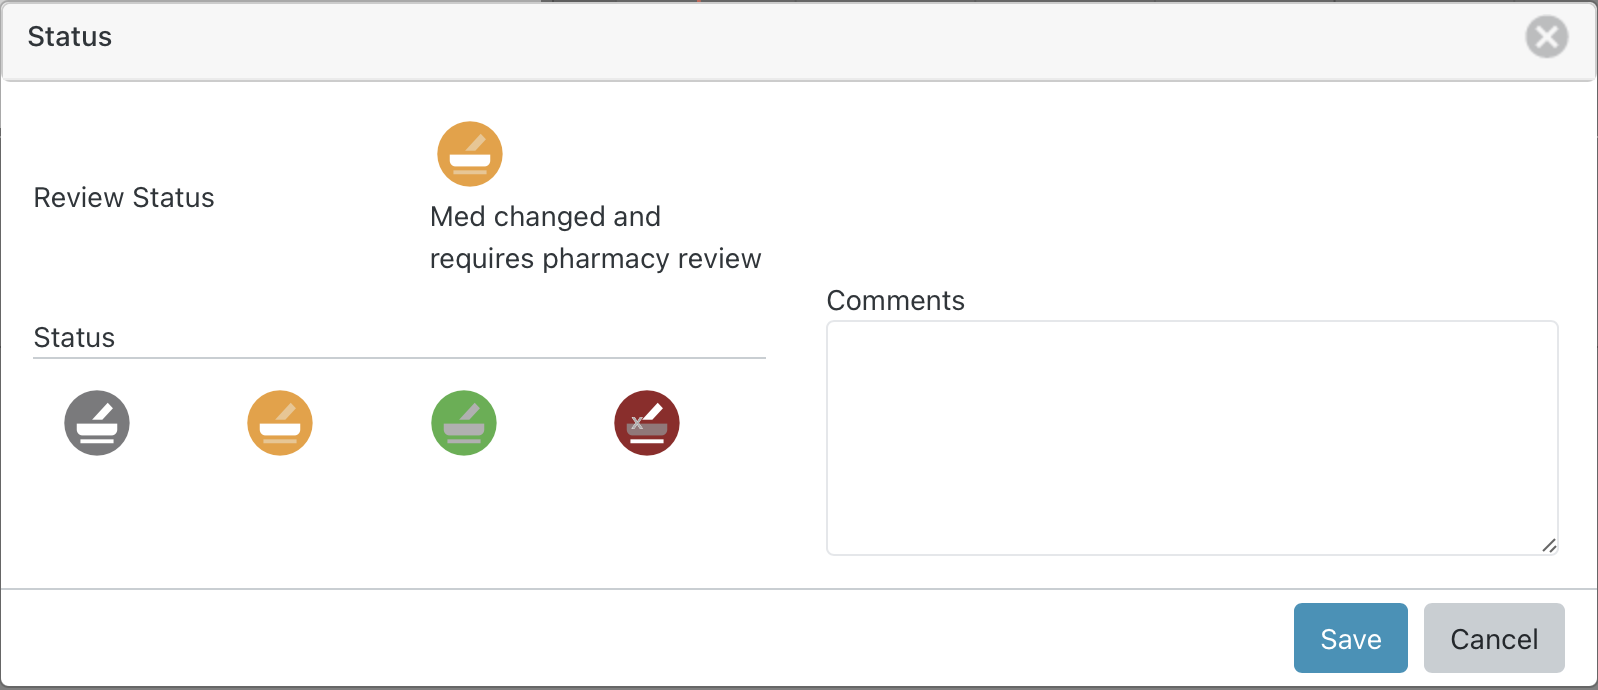
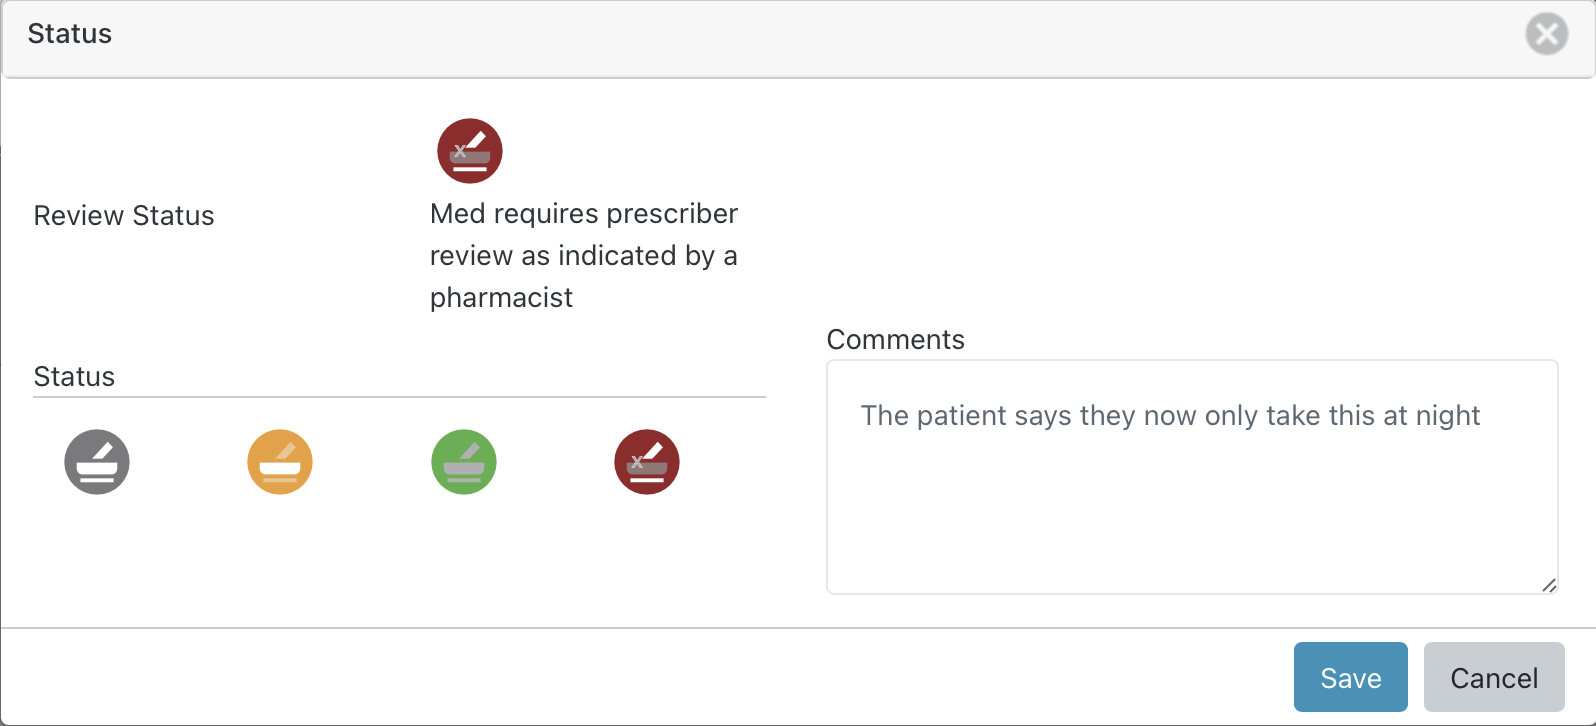
Selecting 'Add Commnets' displays the 'Status' view where you can add a comment and change the status of the pharmacist review icon:
The comments and history view is updated to show the change:
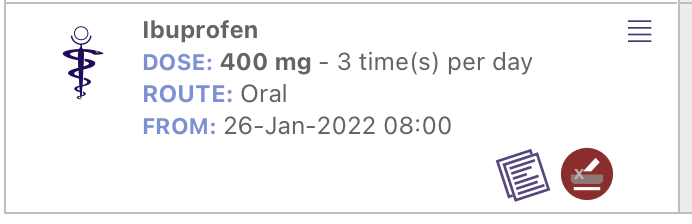
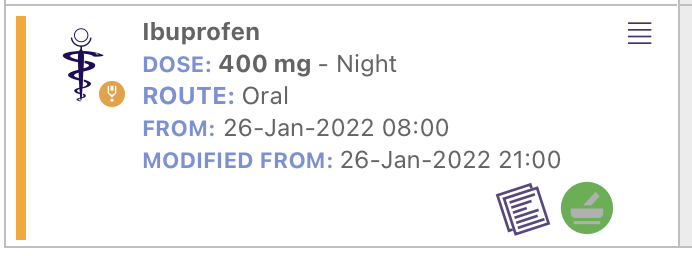
And the the prescription card icon is also updated:
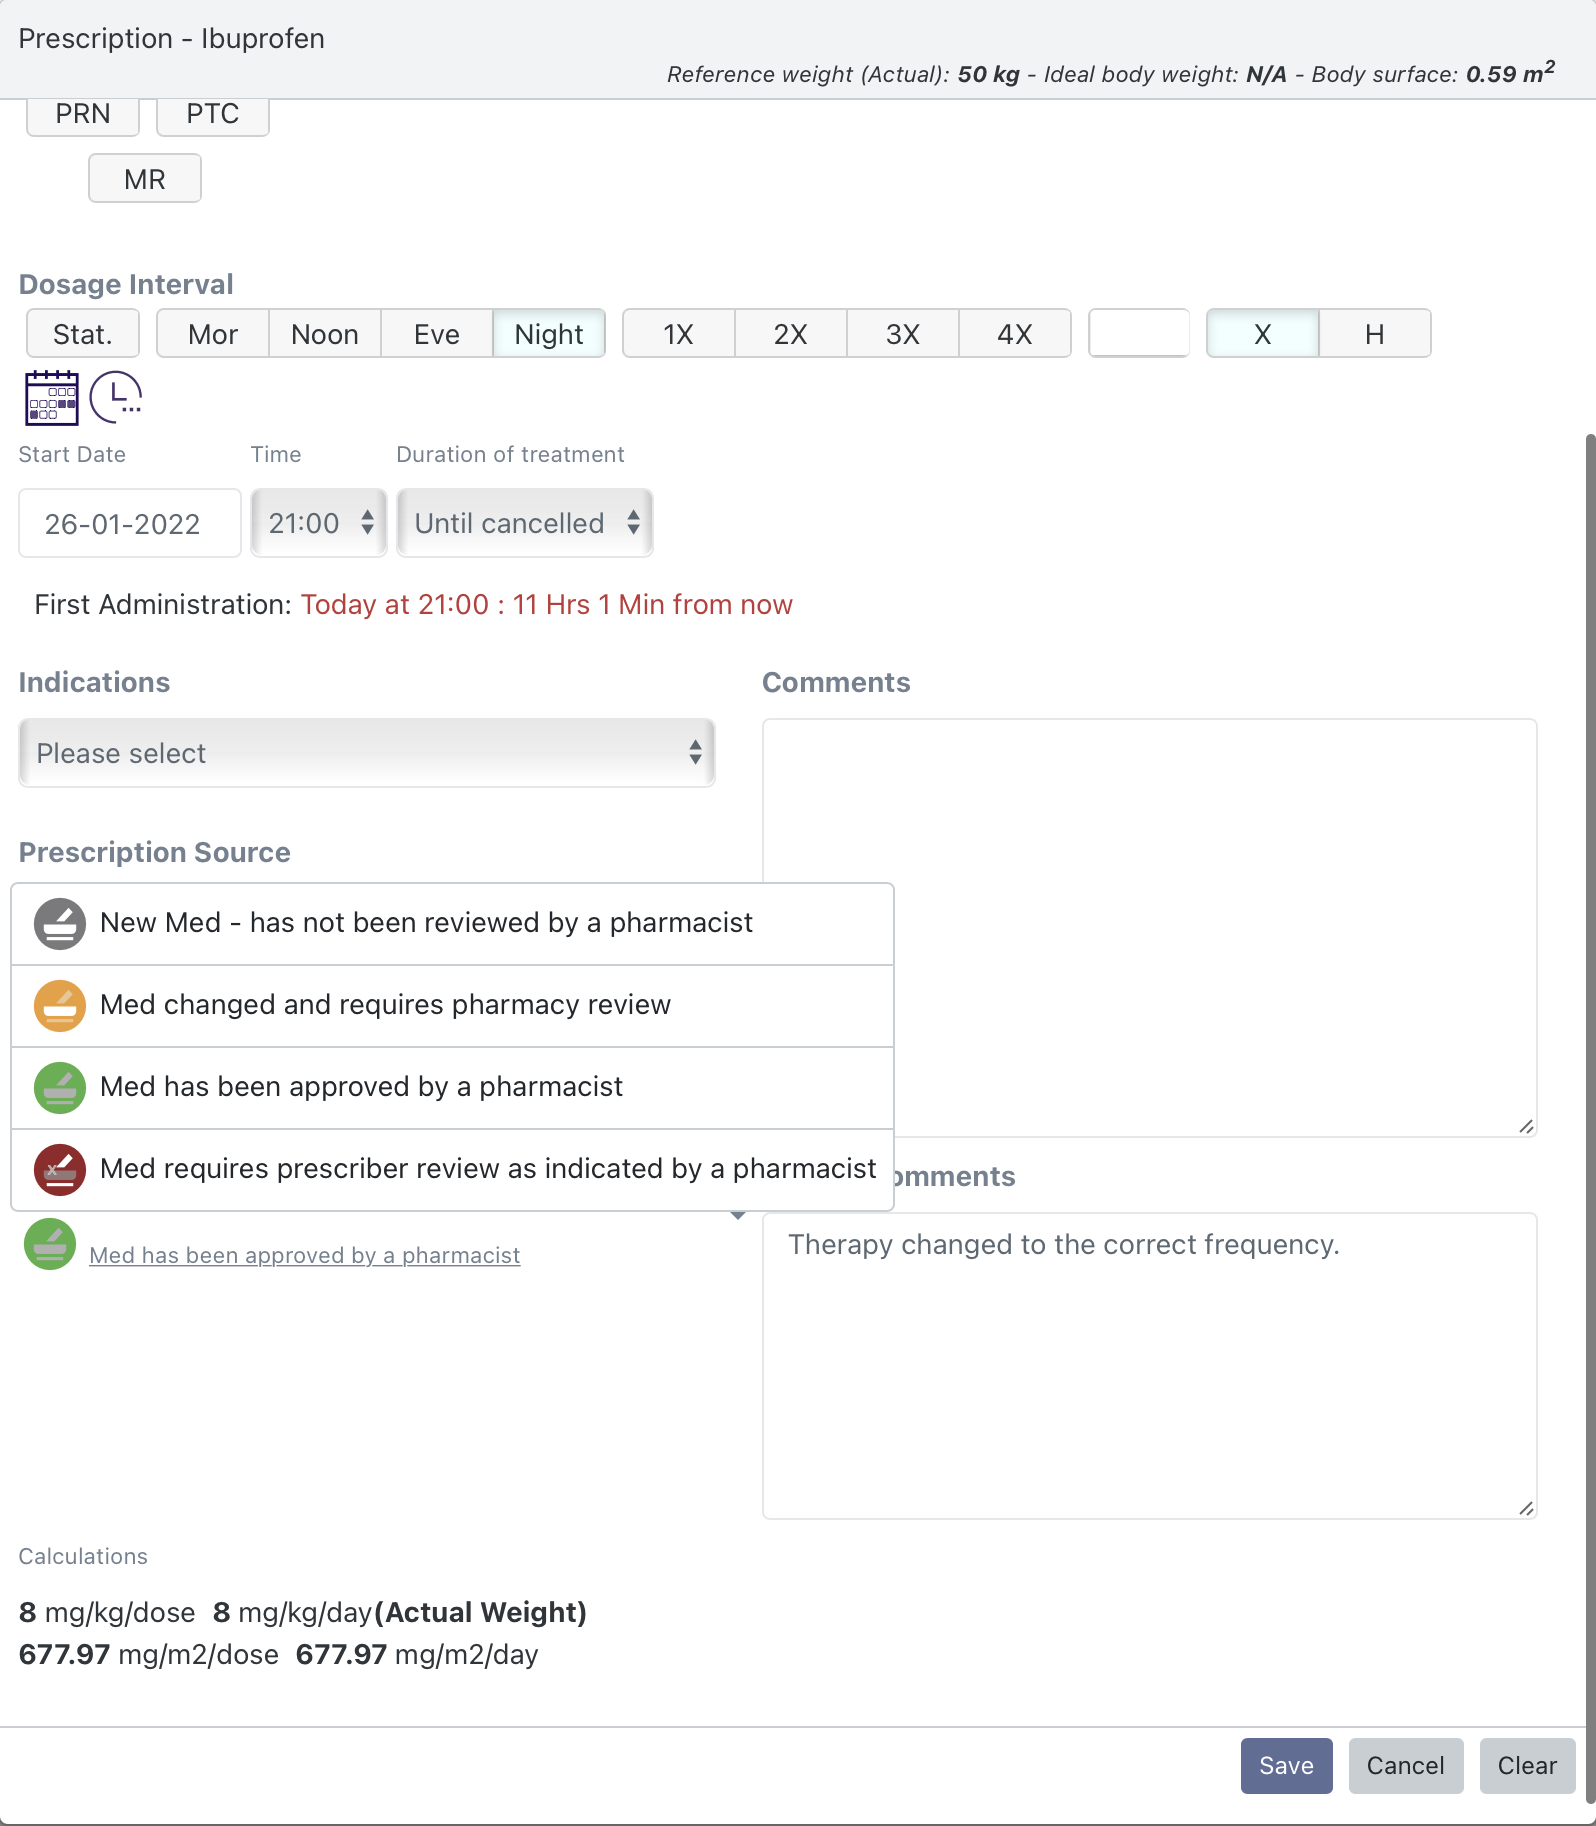
The pharmacist review icon can also be changed when editing the prescription. Bringing up the comments and history view - but this time selecting 'Edit Prescription' opens the prescribing form. Here the prescription can be modified and the status updated at the same time. Scrolling to the bottom you will now see the Review Status and Review Comments section in addition to the normal prescription options above:
As before any edits update the comments and history view:
And the the prescription card icon is also updated:
If you are a member of the pharmacy team you can mark the patient as having been reviewed. This is independent the individual therapy Pharmacist Review.
Select the Daily Pharmacy Review icon from among the navigation icons:![]() to open the Pharmacy Review view:
to open the Pharmacy Review view:
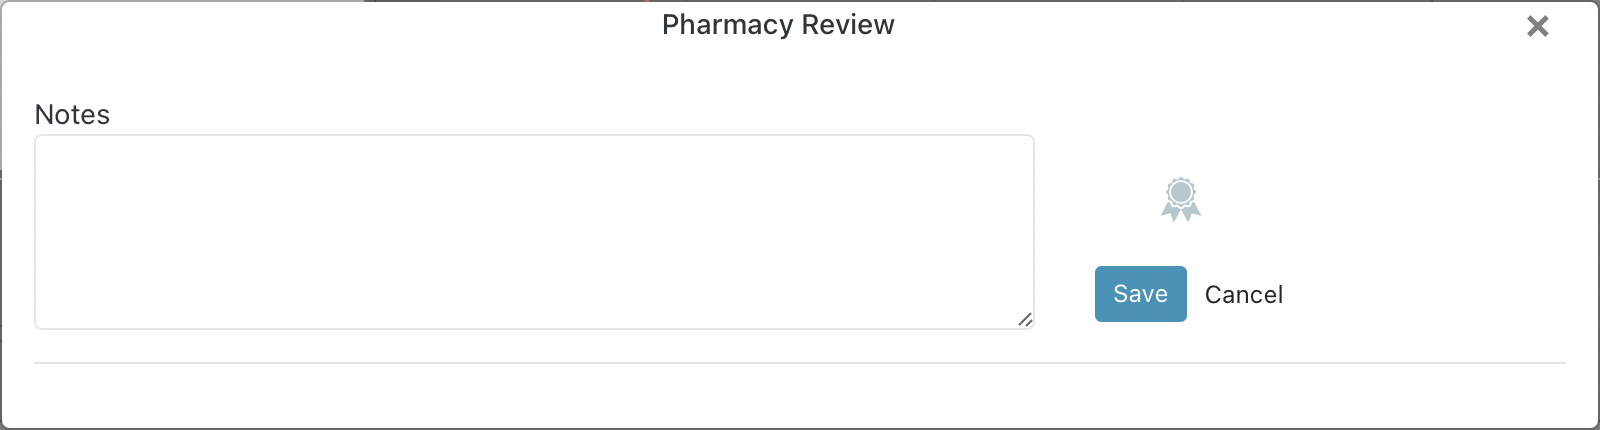
There are two types of users who are able to complete the Daily Pharmacy Review:
You are able to enter any notes to be associated with your review before selecting 'save'.
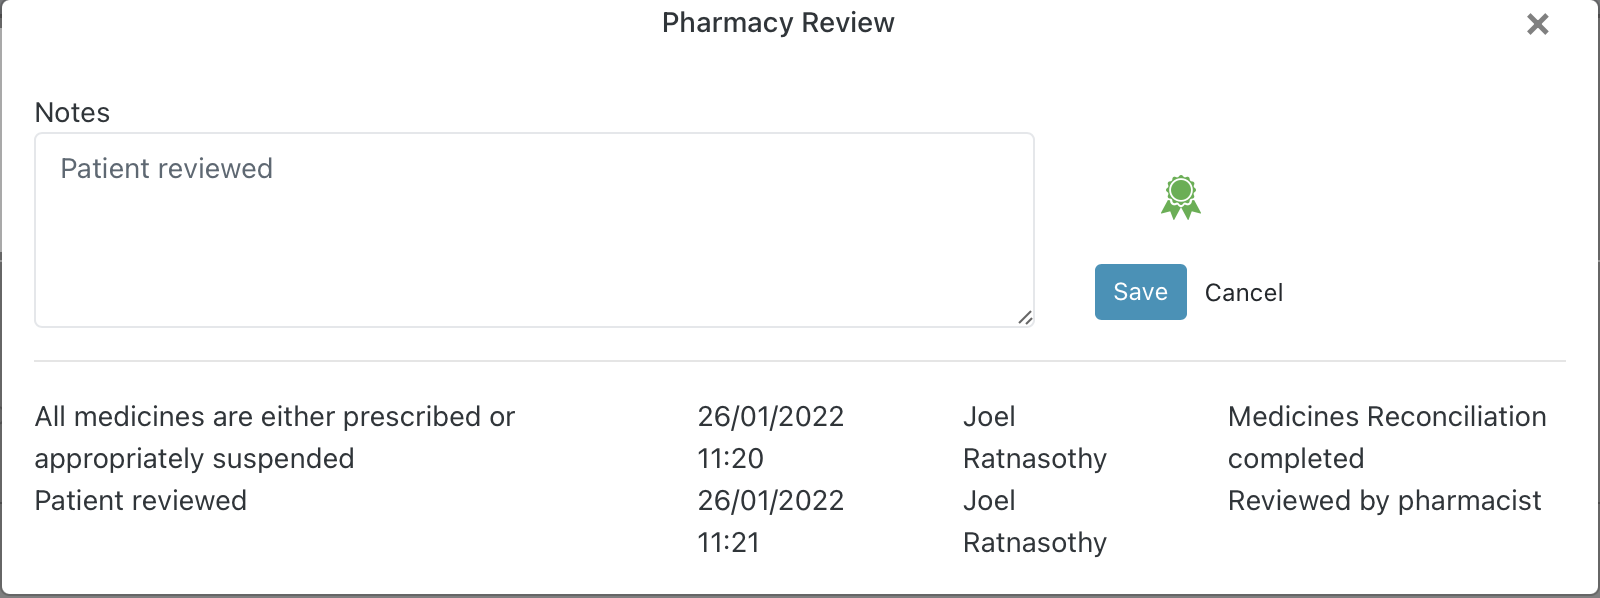
The system will record the notes, the date of the review, the name of the user and their role (either Pharmacist or Pharmacy technician). The first Pharmacy Review done by a Pharmacist is market as the 'Medicines Reconcilliation':
Depending on which user has performed the daily pharmacy review and when, the navigation icon itself will change to reflect its status:

The Therapy Overview provides a timelines of all historic changes to therapies. To view the Therapy Overview select the icon ![]() from the navigation bar:
from the navigation bar:
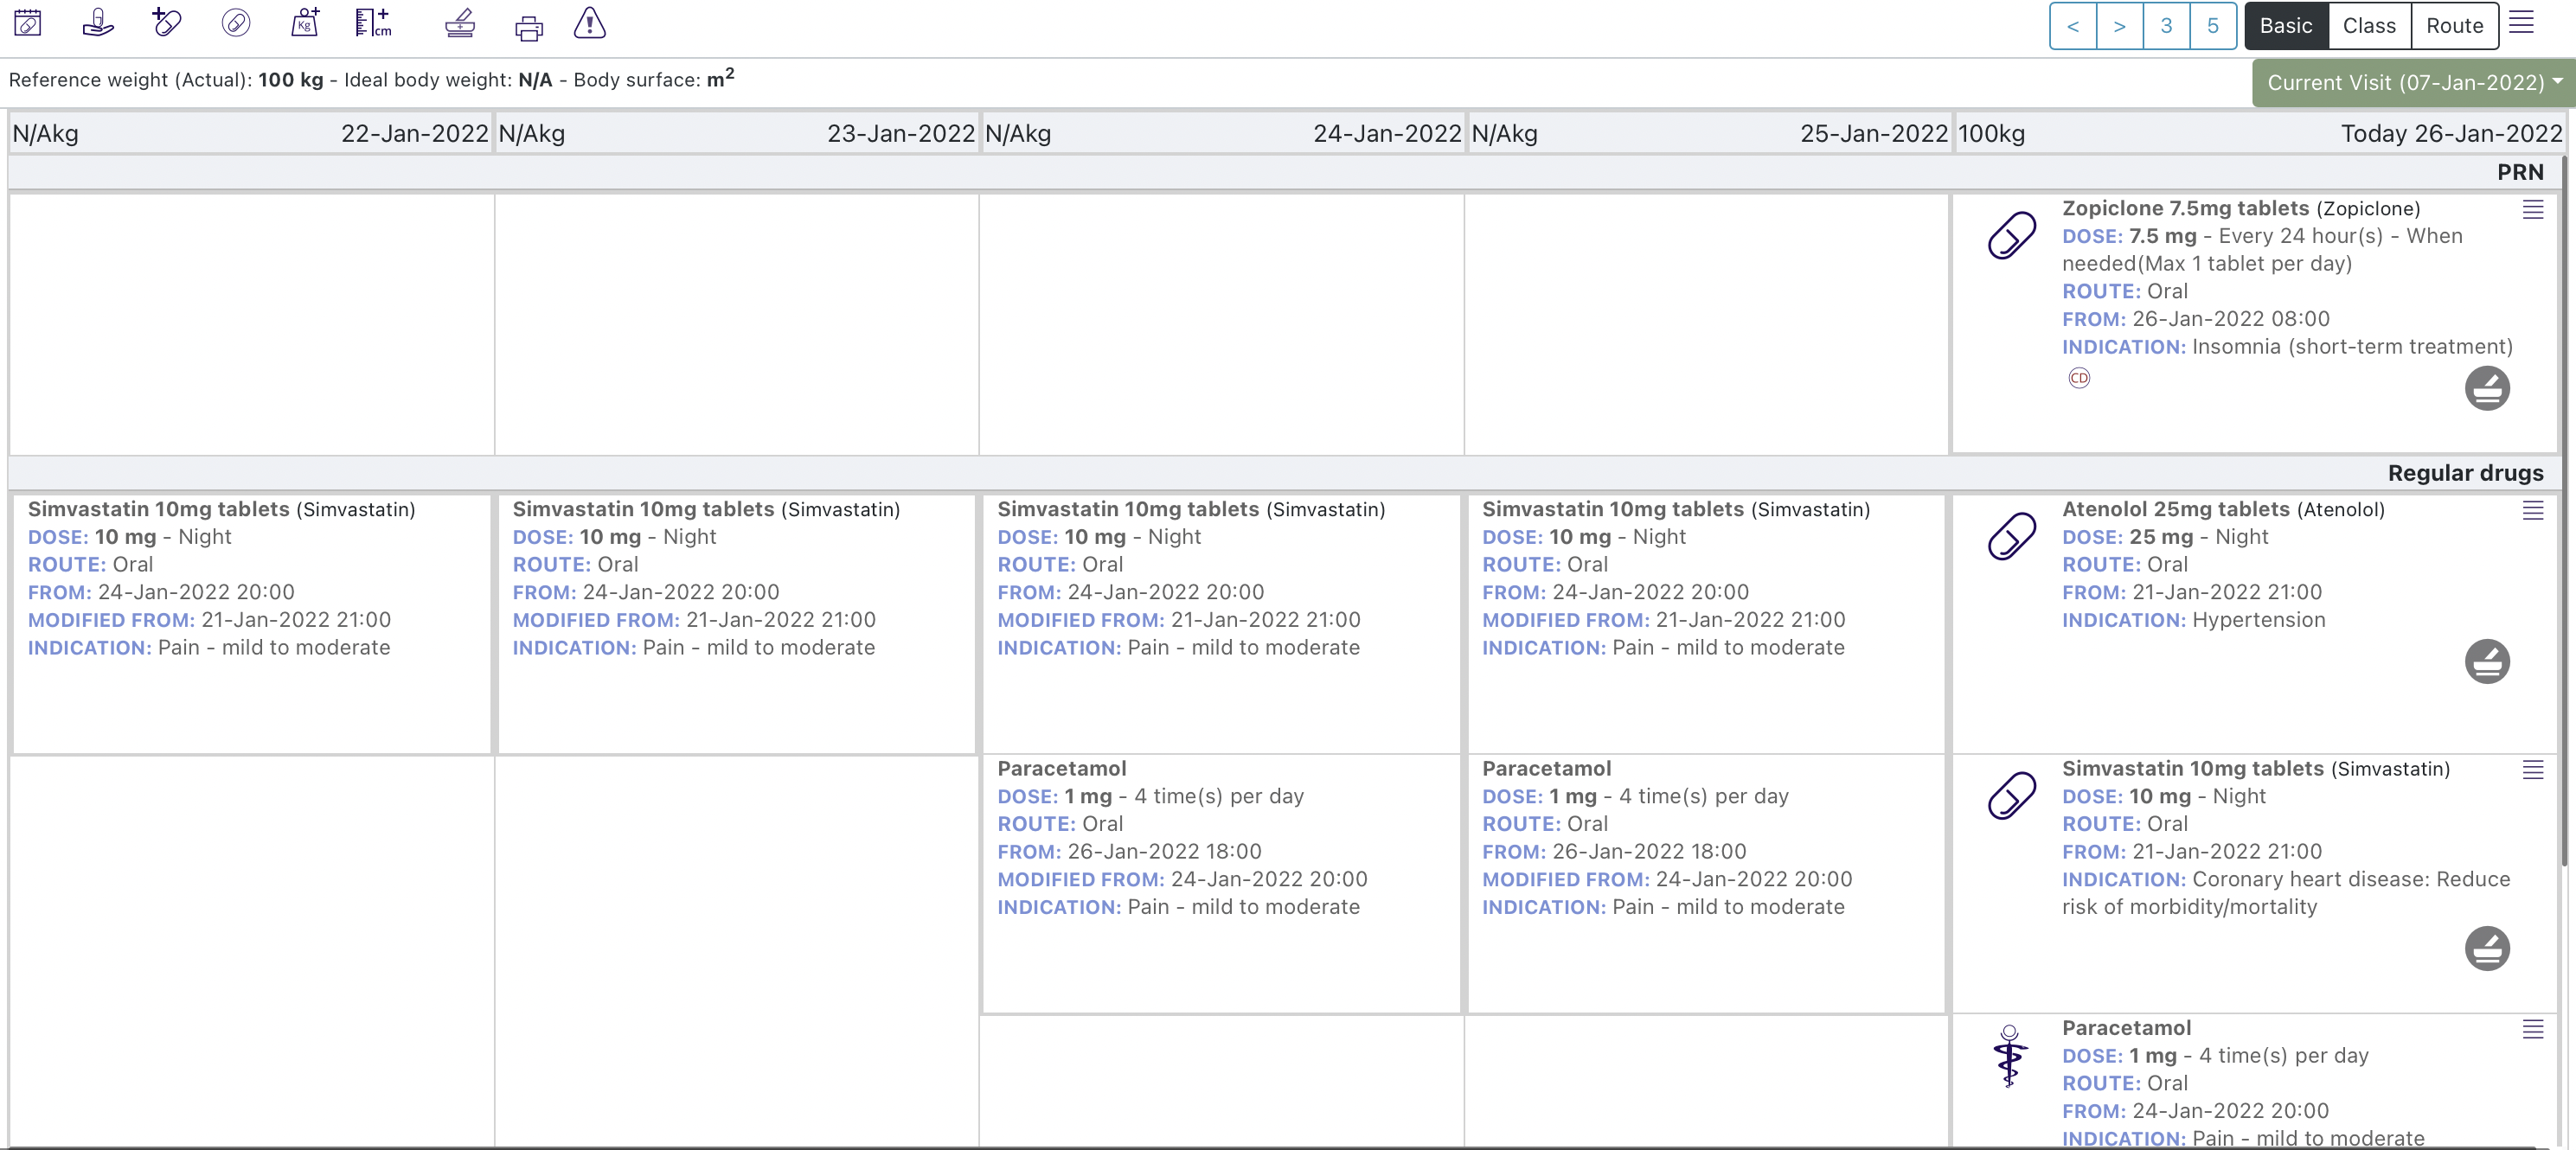
The most recent prescription is displayed on the right and the date navigator at the top of the screen (next to the grouping control) allows you to navigate back in time:
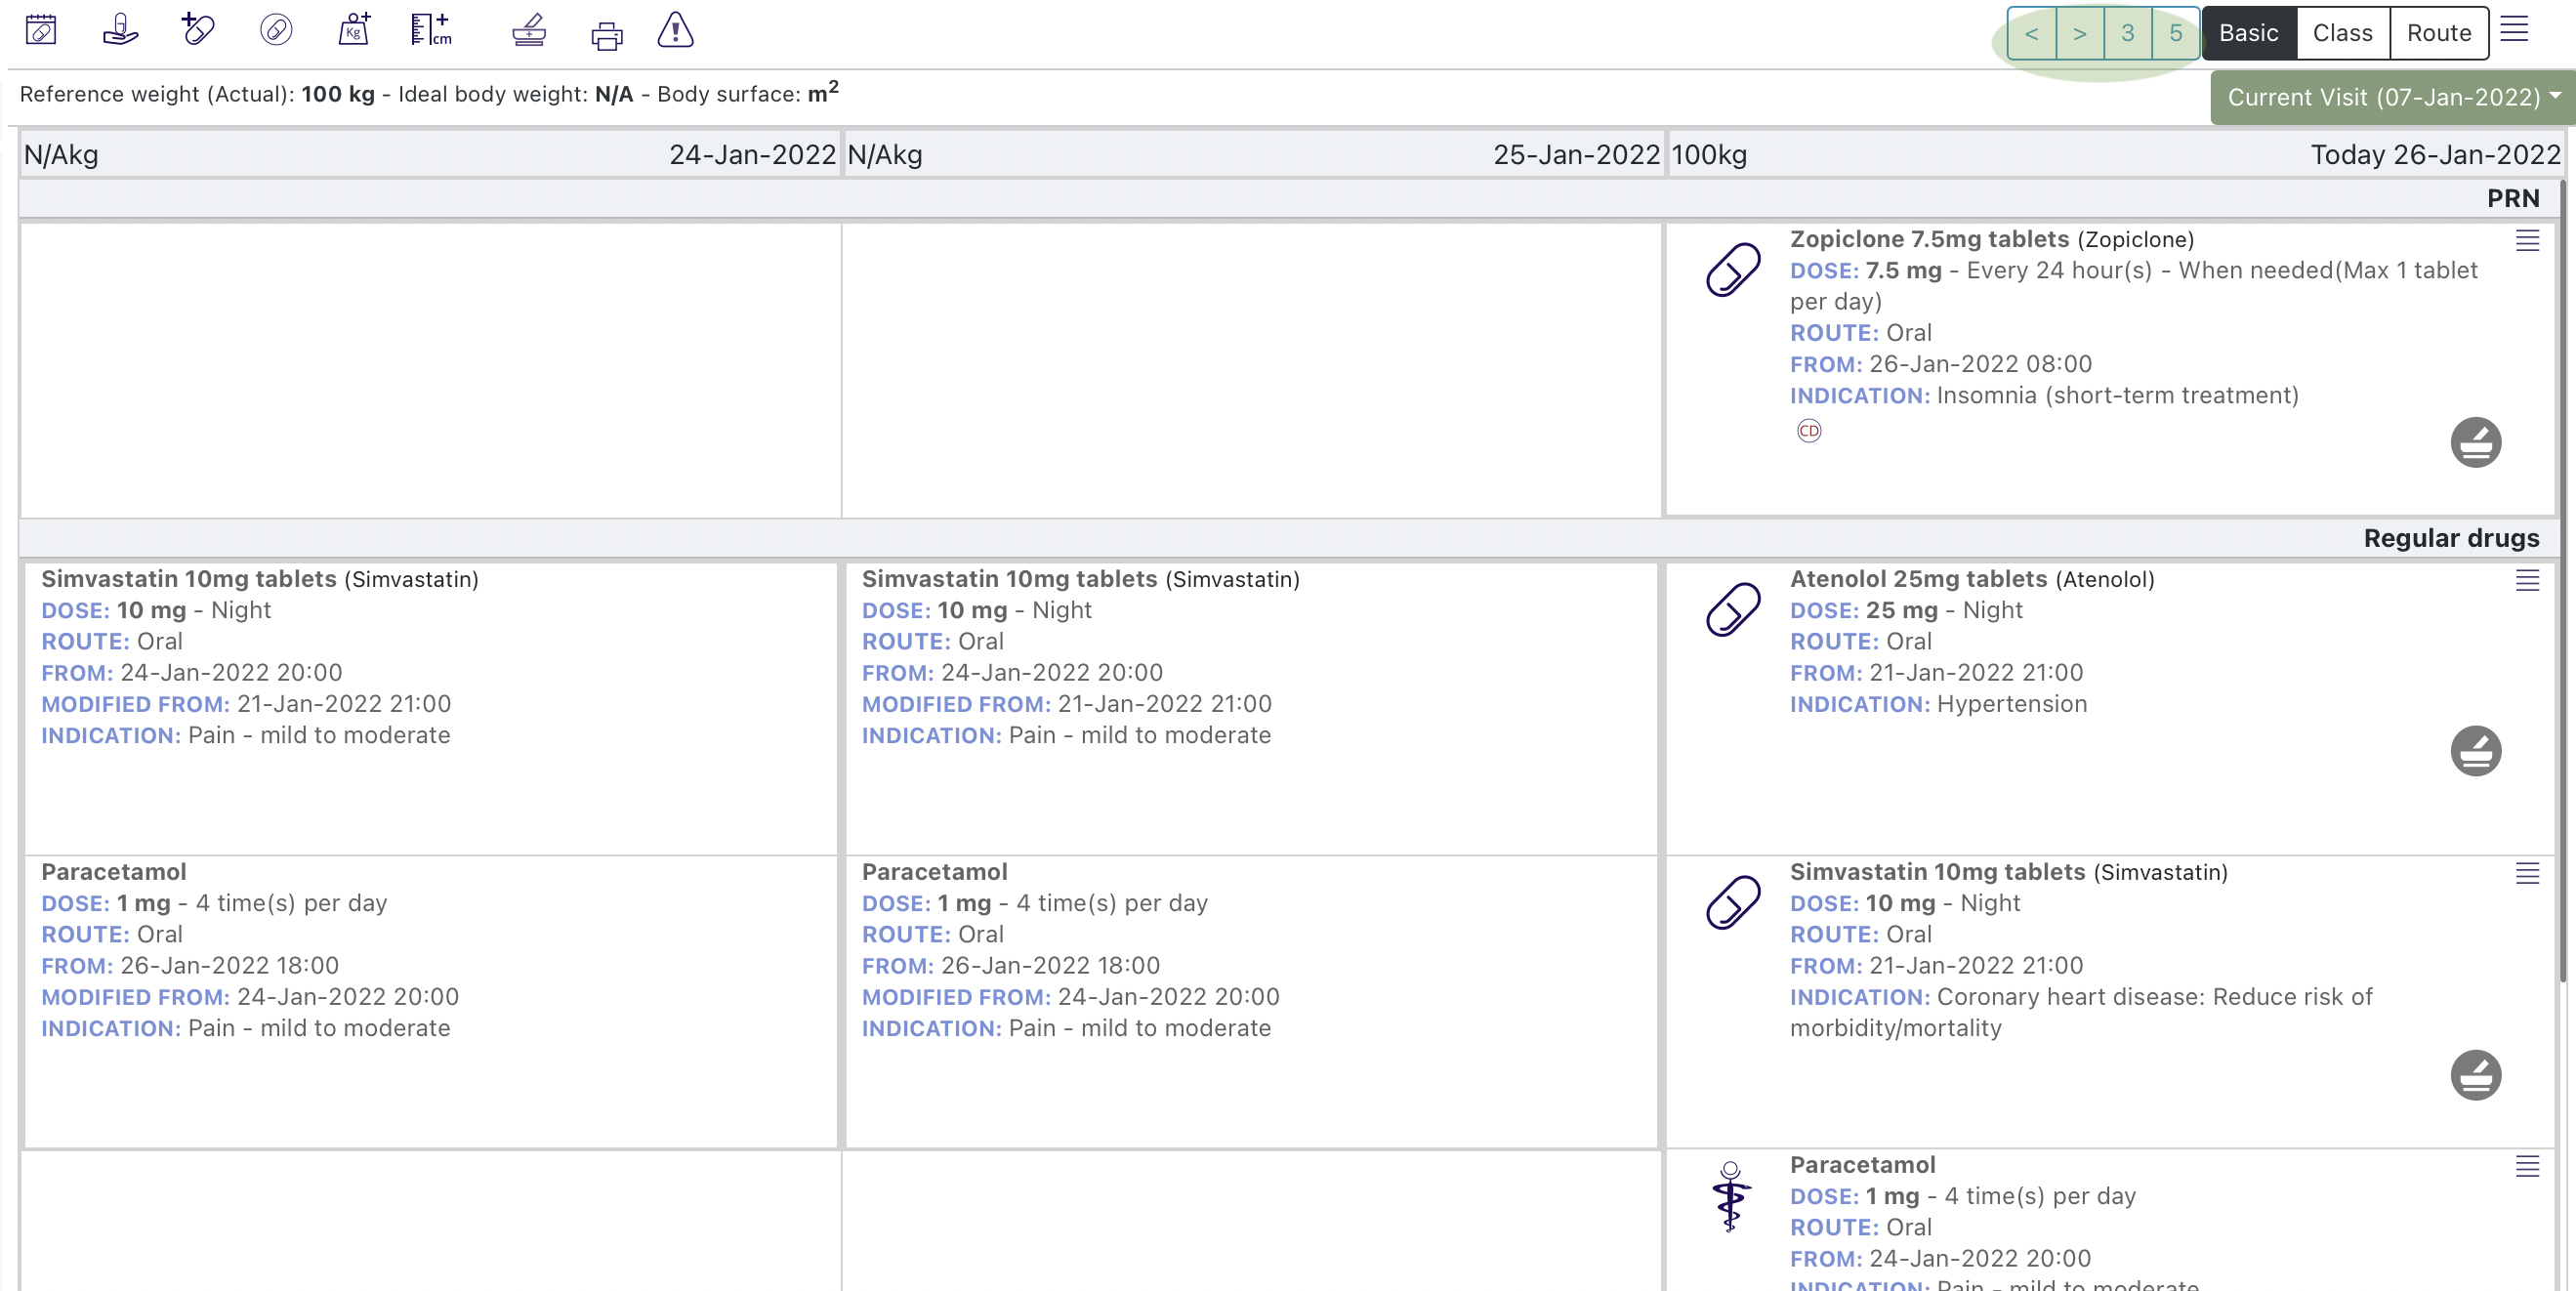
You can also choose between displaying 3 or 5 days in the view:
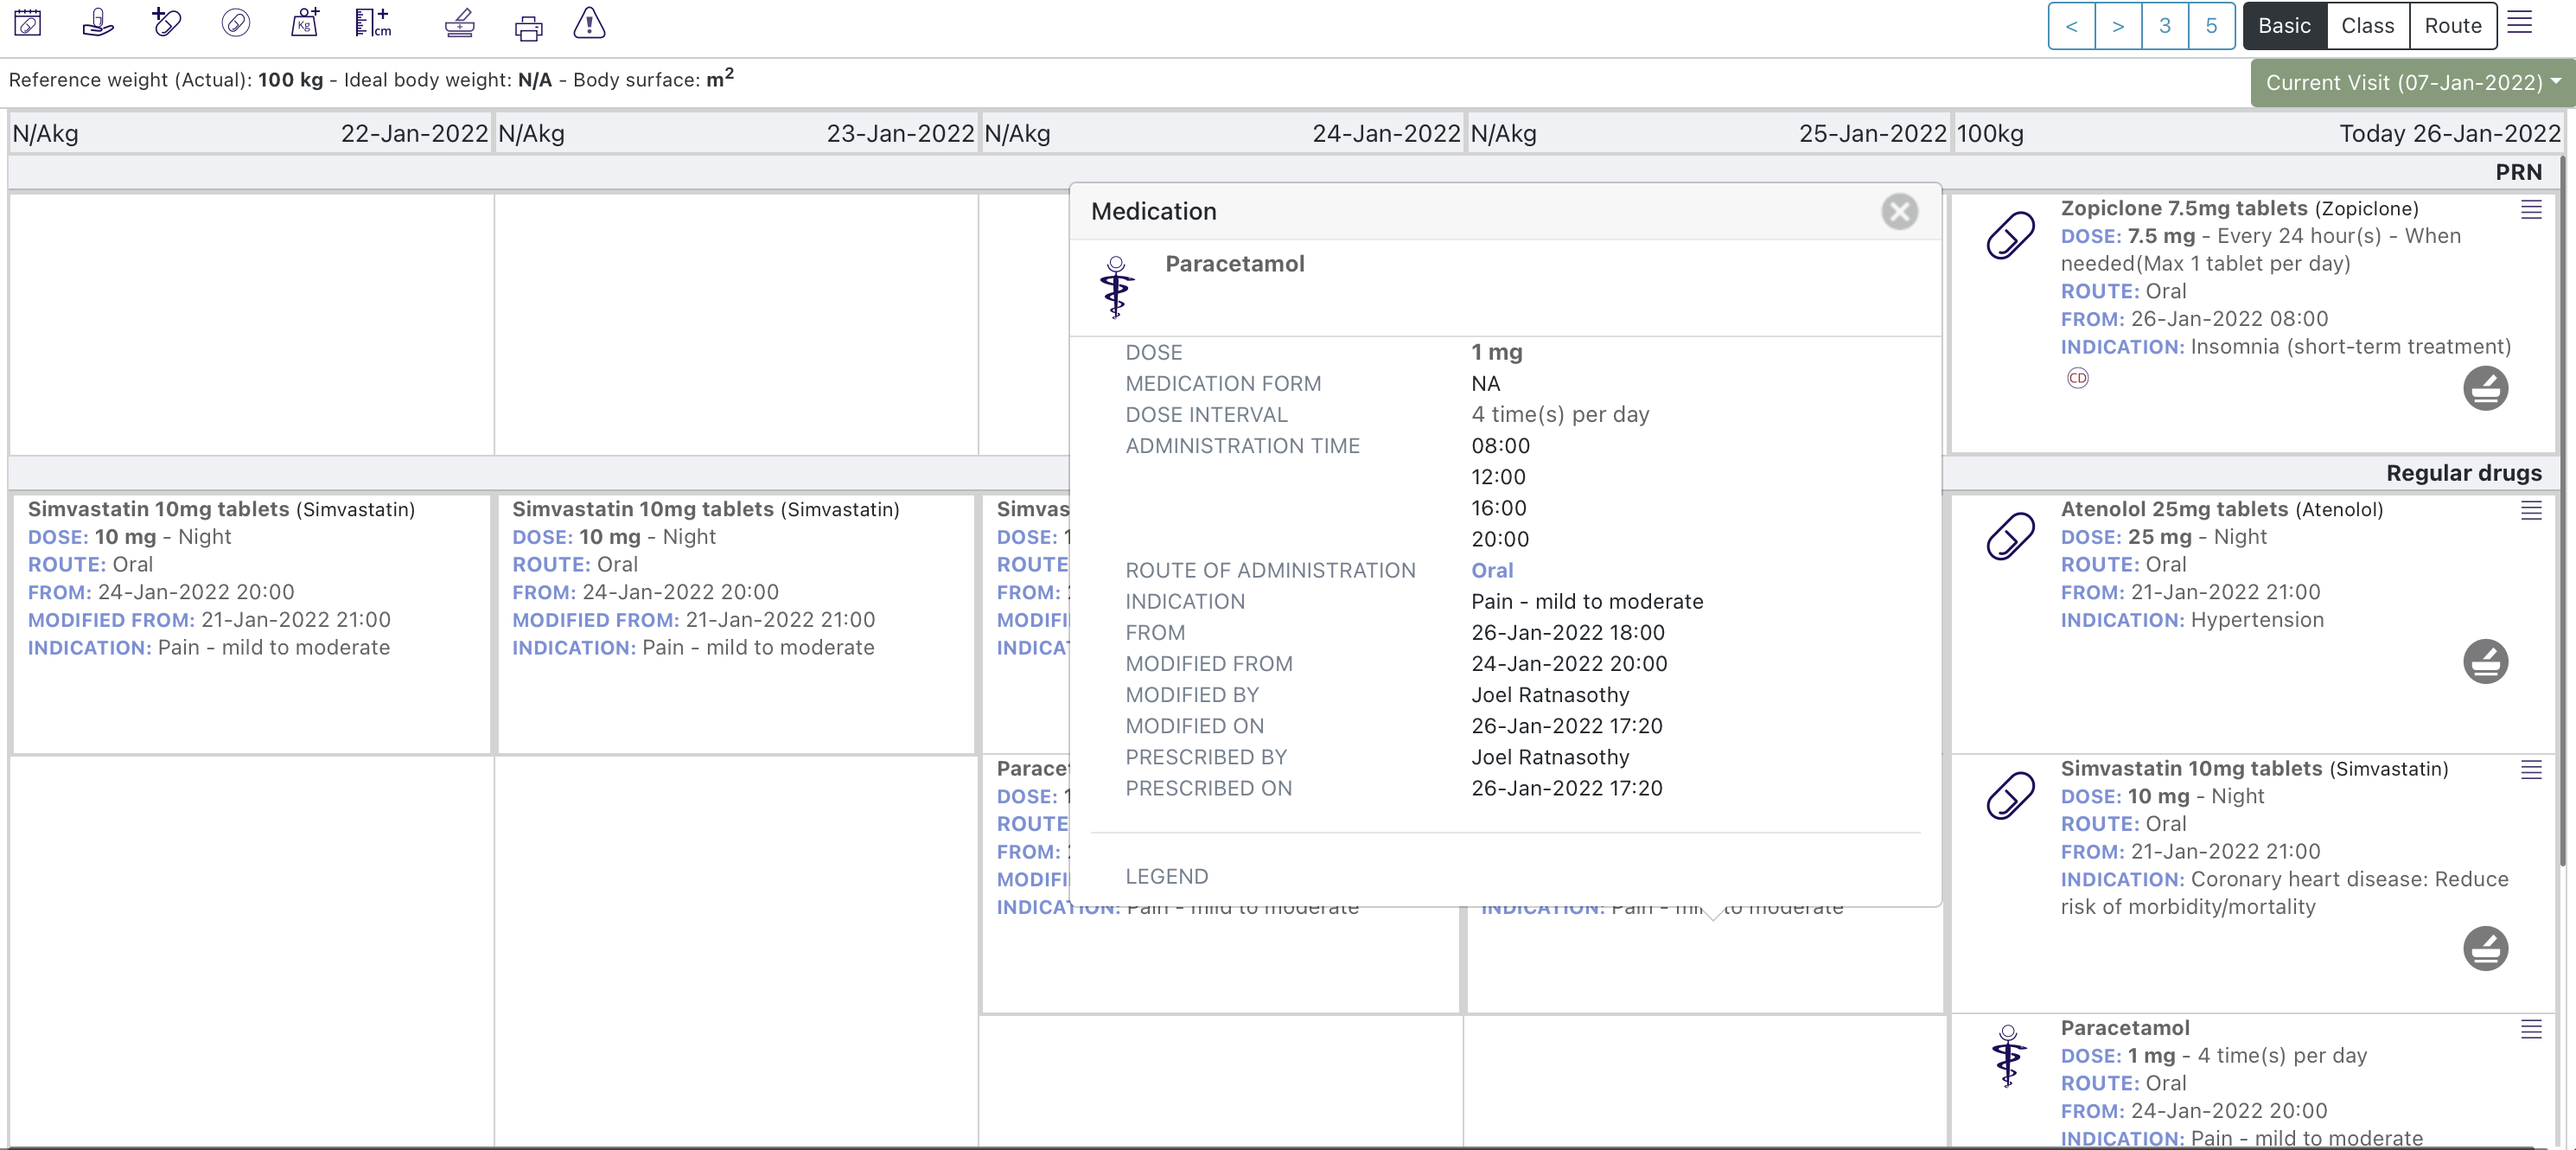
Selecting a prescription card displays the expanded prescription card for that day:
The pharmacy review icons behave in the same way as the Pharmacist Review icons on the main administration chart.
To prescribe the medicines a patient requires on discharge select the 'Medicines on Admission & Discharge' icon within the navigation icons: ![]()
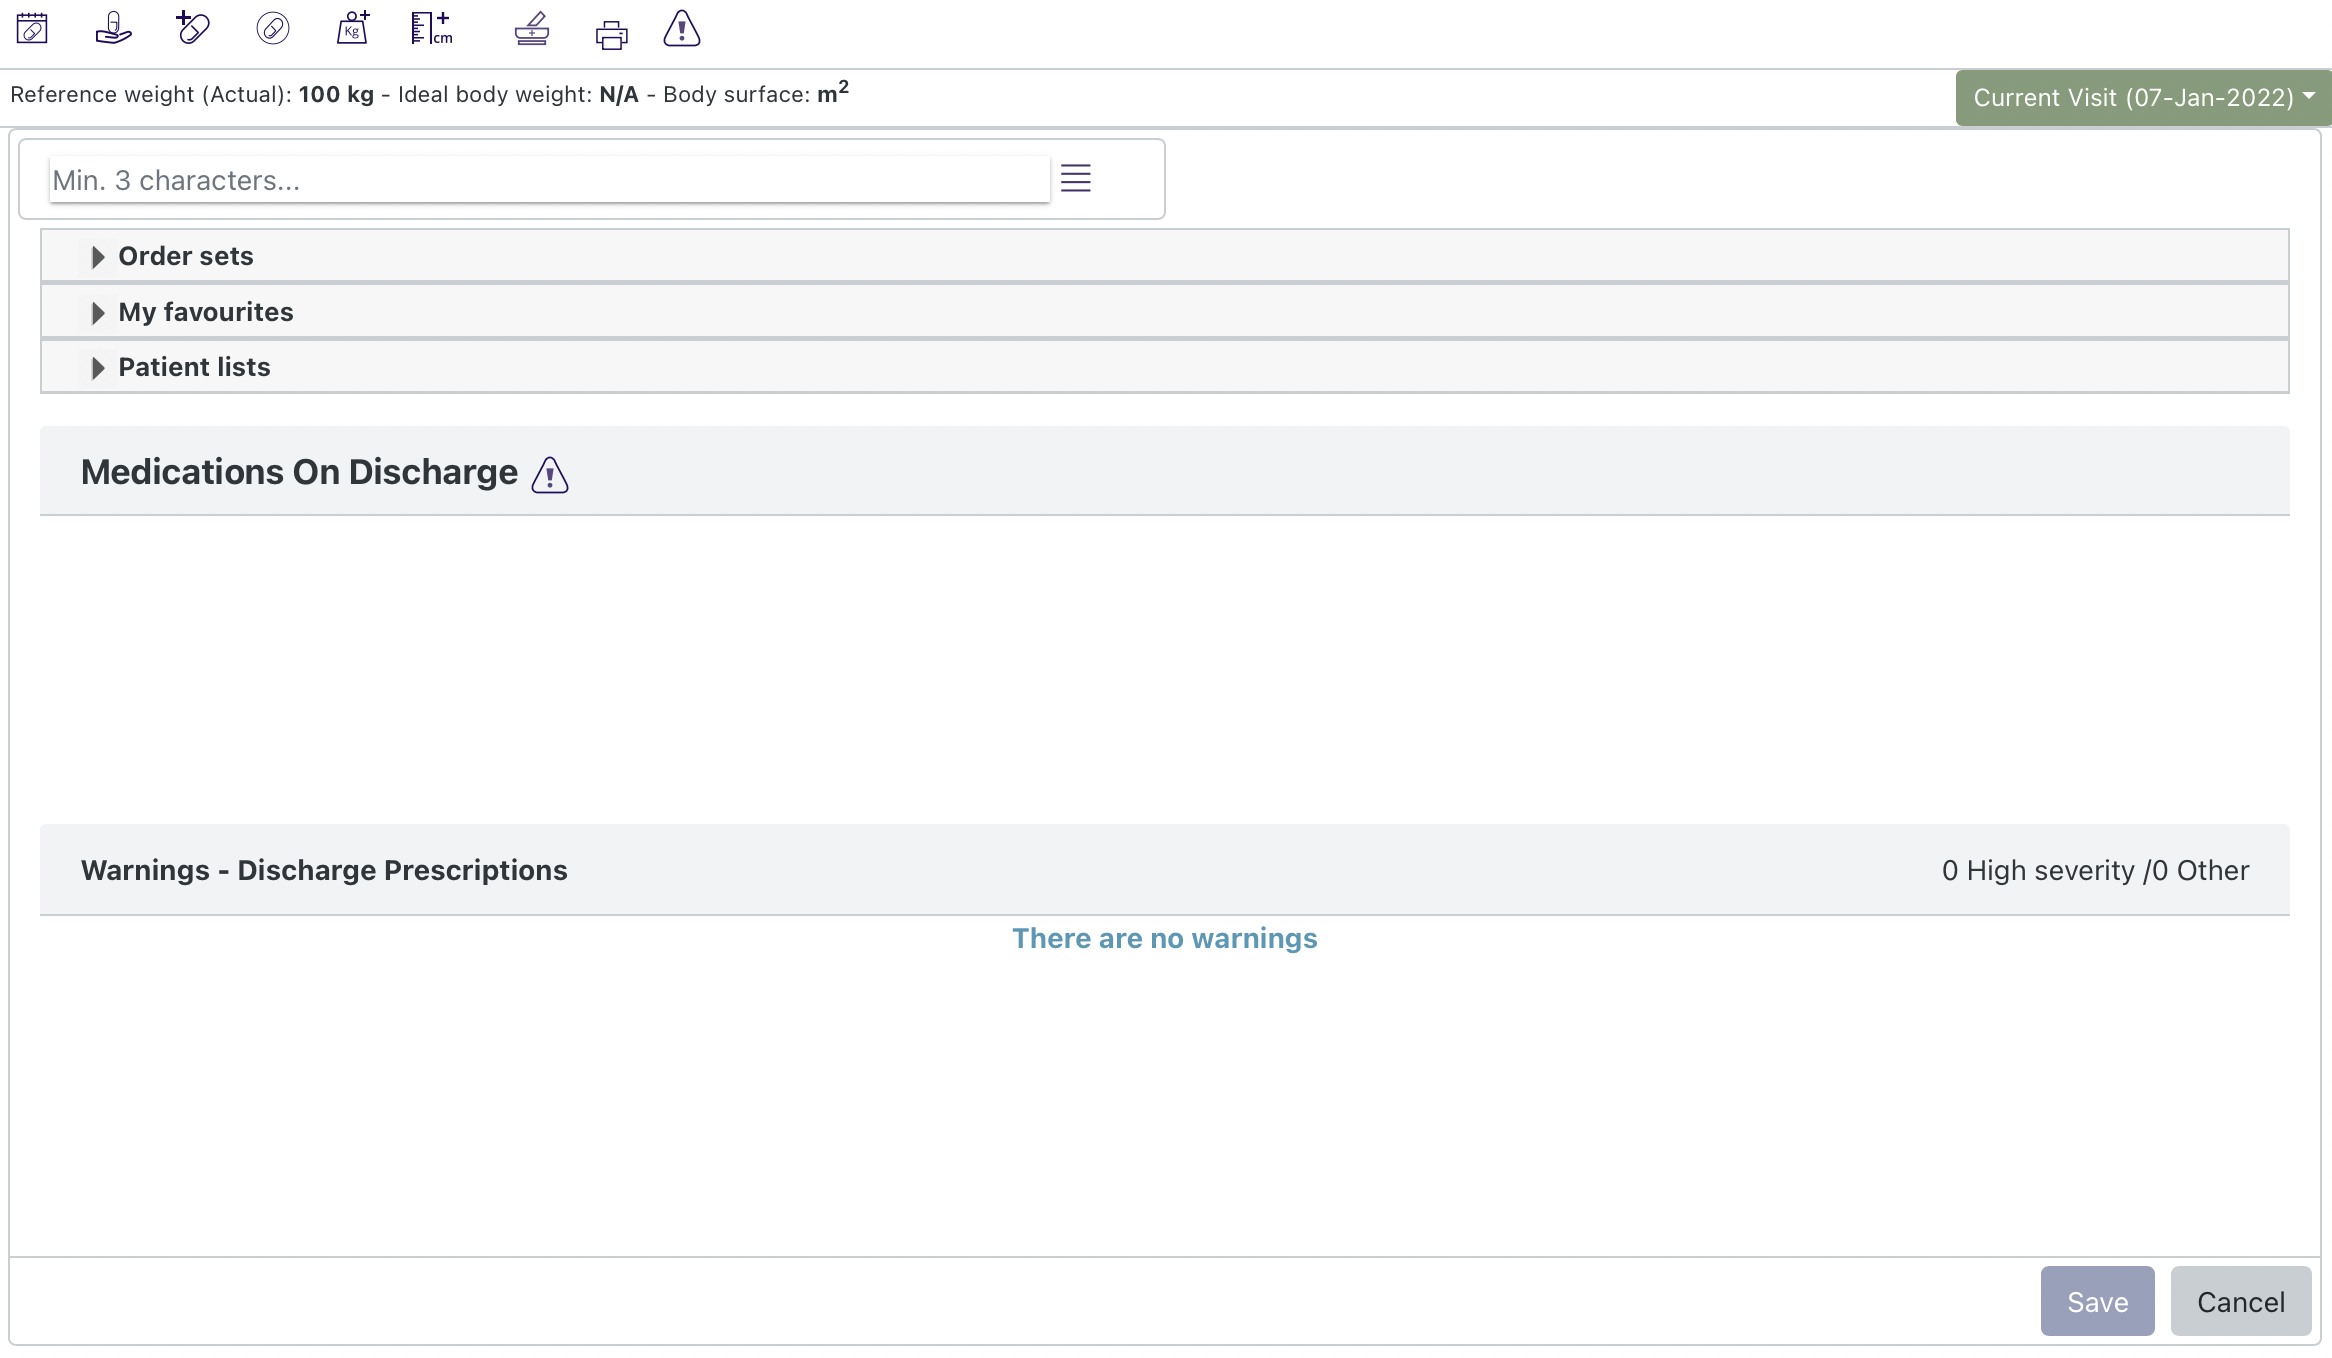
The Discharge prescription list is in the centre:
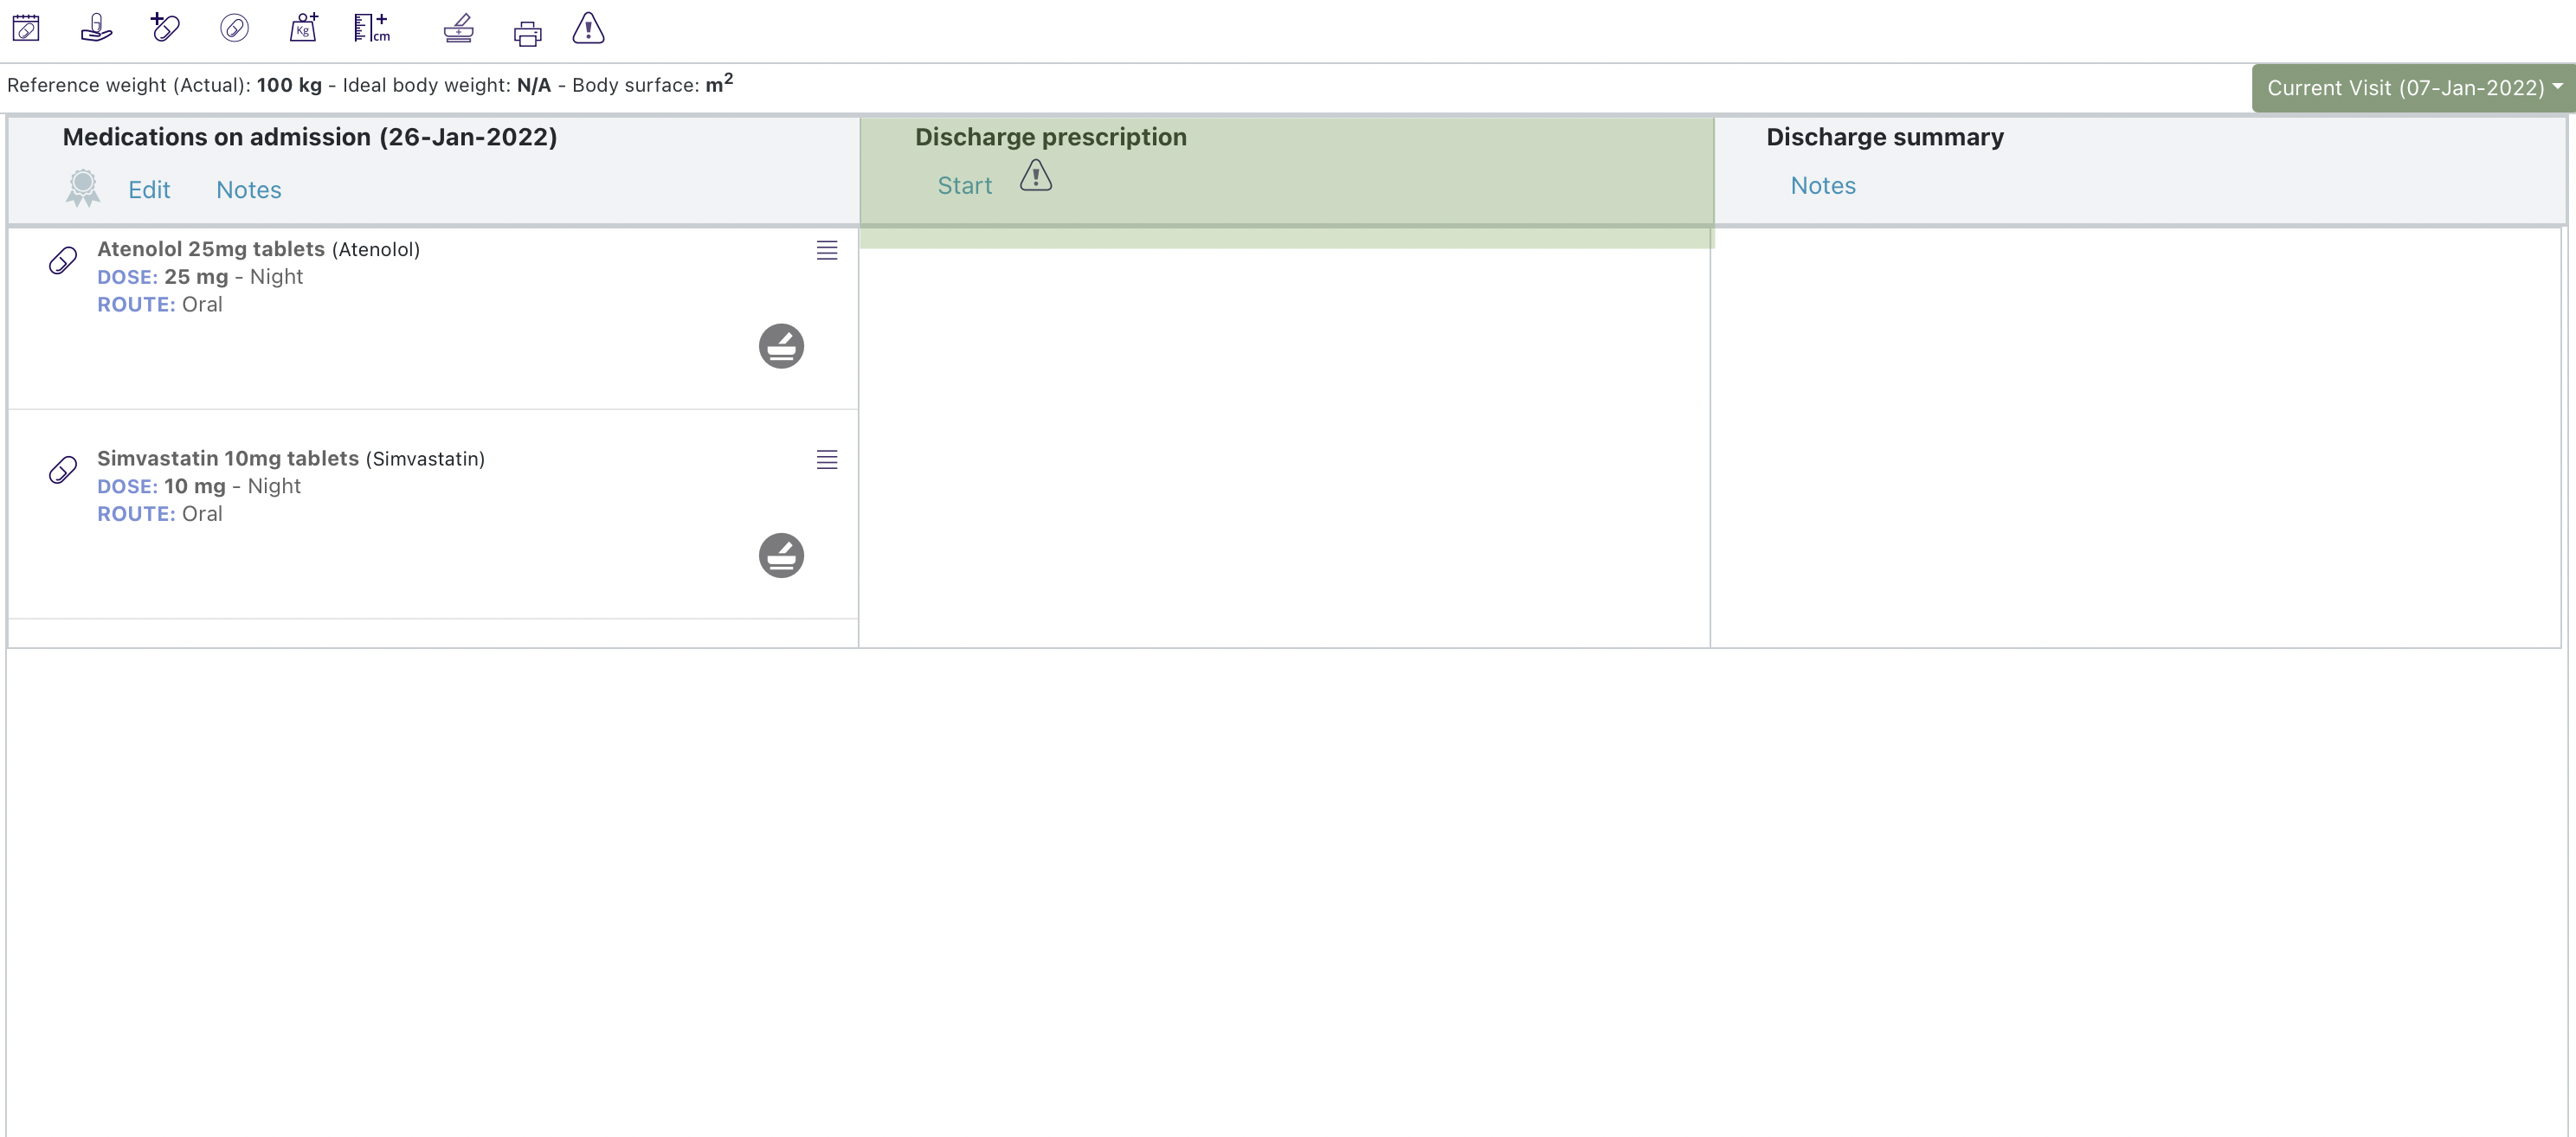
Select 'Start'.
Once you have confirmed you are sure - you will be able to add medicines to the discharge prescription. New medicines can be entered from the search bar from one of the pre-defined lists.
The search bar is displayed underneath the navigation icons and the patients reference weight. To search you need to enter at lest the first three letters of the medicine you are looking for:
If you enter 'Amoxi' the system will return all the medicines that contain those characters. The results are displayed in the VTM, VMP, AMP hierarchy (please refer to the latest NHS documentation for more details: https://simplifier.net/guide/DigitalMedicines/Medications).
Selecting the arrow icon to the left expands the hierarchy:
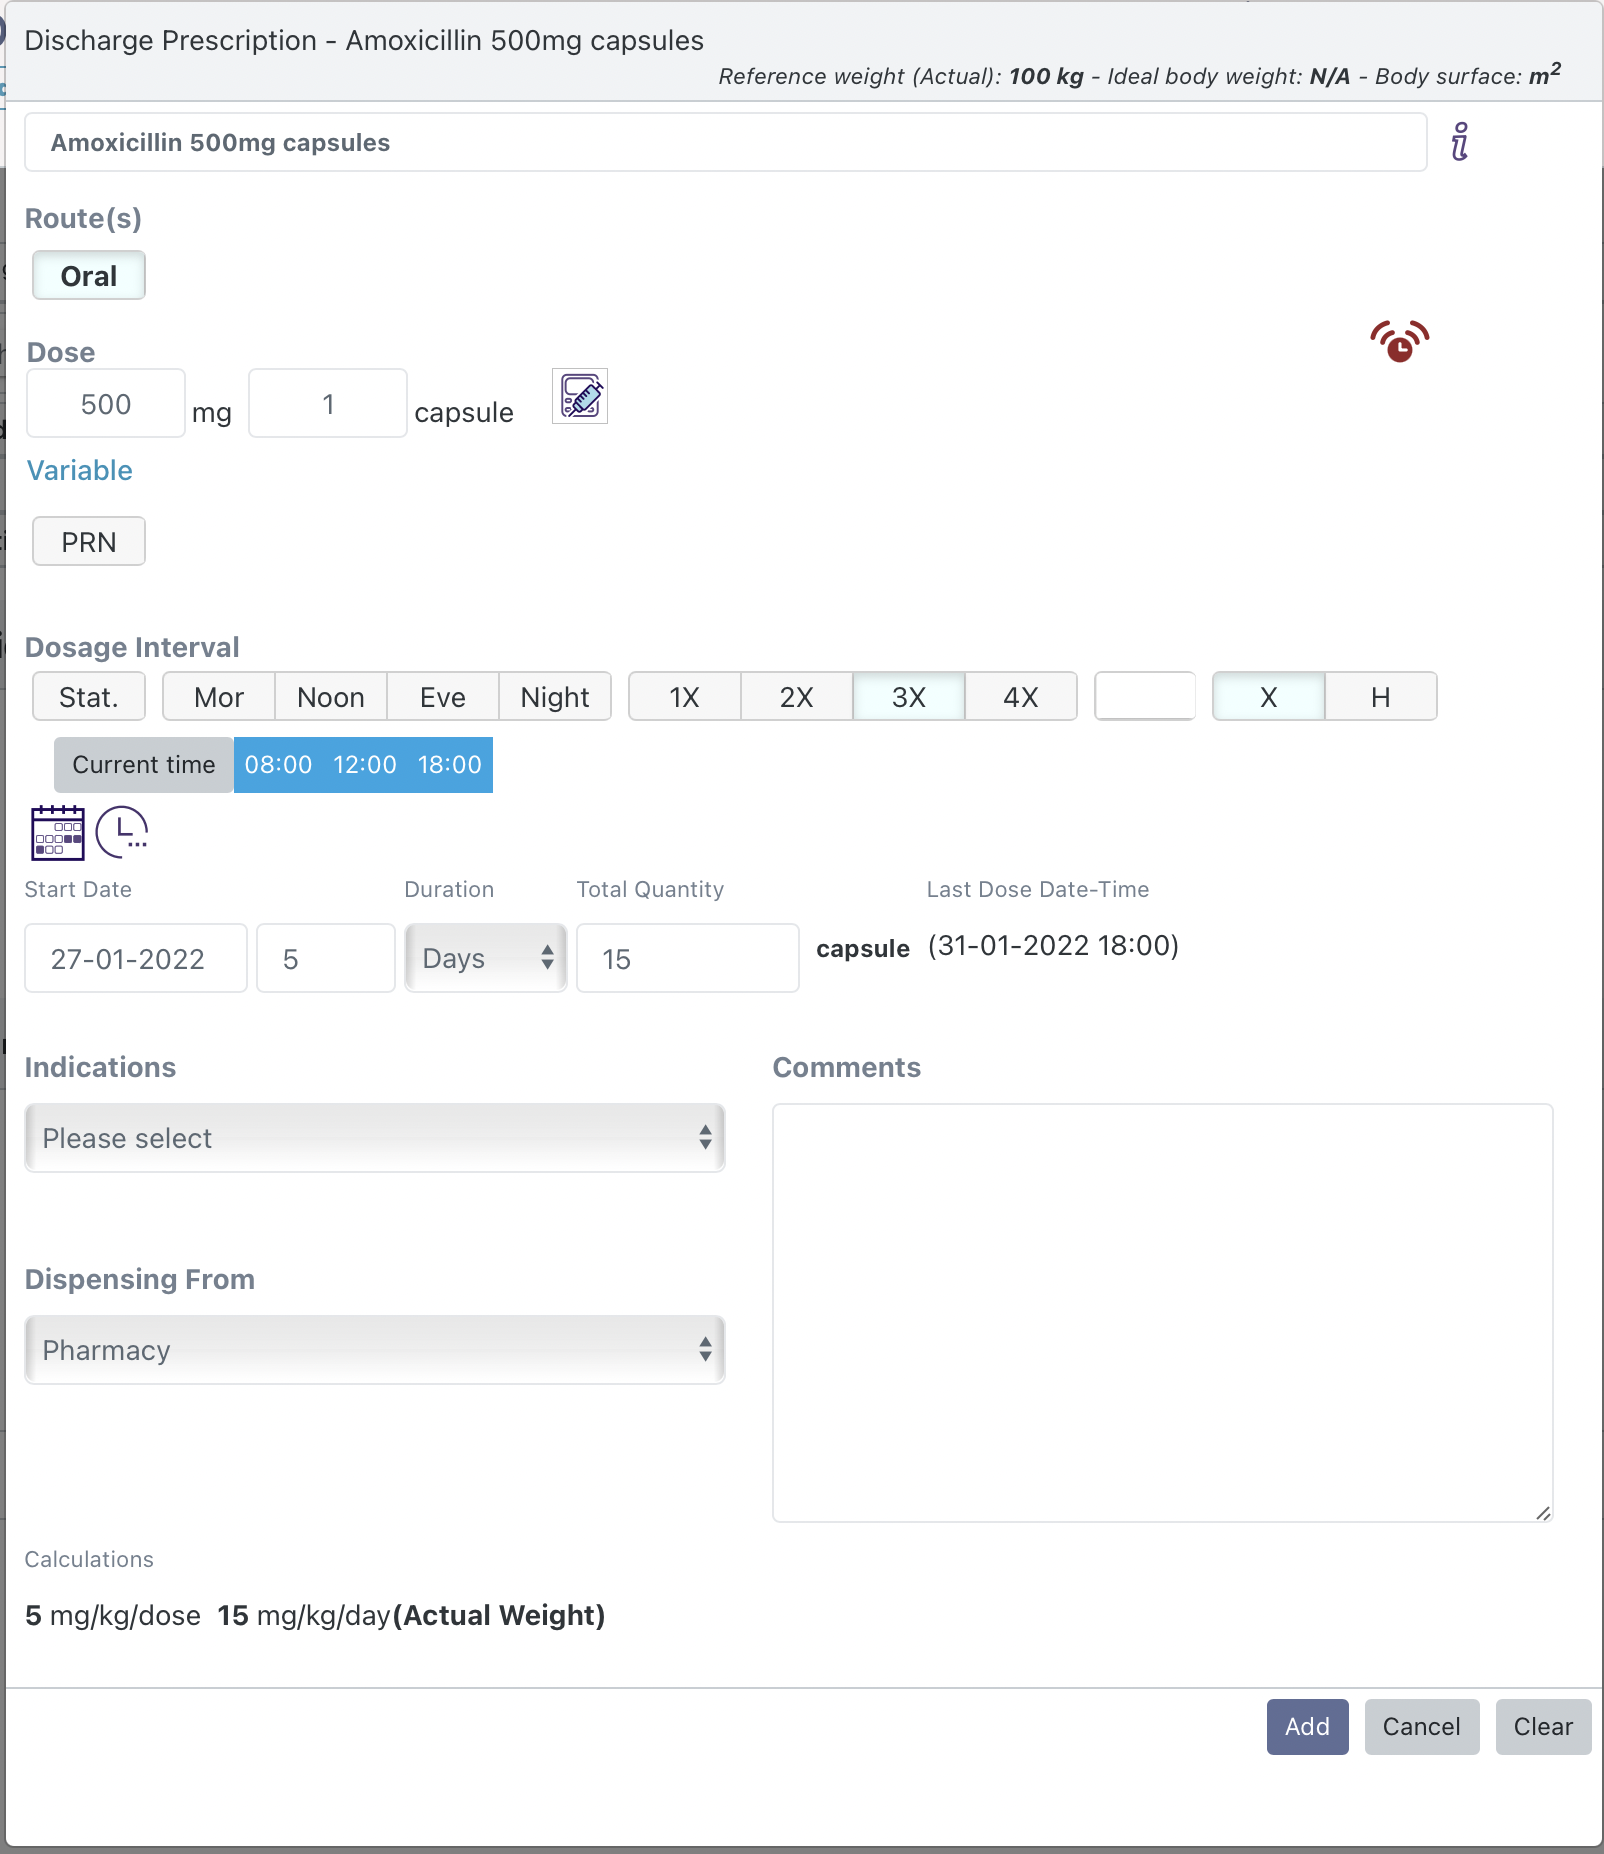
Select either the VTM or one of the VMPs to open the prescribing form. Here the route, dose, dosage interval, indications, prescription source and comments can be added. Notice in the discharge prescribing form instead of an end date, you are required to enter the Total Quantity the medicine the patient must be discharged with. For a VMP the system will automatically complete this if you enter the number of days. For a VTM prescription you will have to enter this yourself.
While it is possible to prescribe a discharge therapy from any of the pre-defined lists, the ones that are of most use will be the Patient lists.
The patient lists folder provides lists of medicines that have been created for the patient in the past, including previous MOA lists and Discharge Prescriptions. This list may also show lists of medicines from other connected systems (e.g. primary care, or from pre-operative assessment) if they are available.
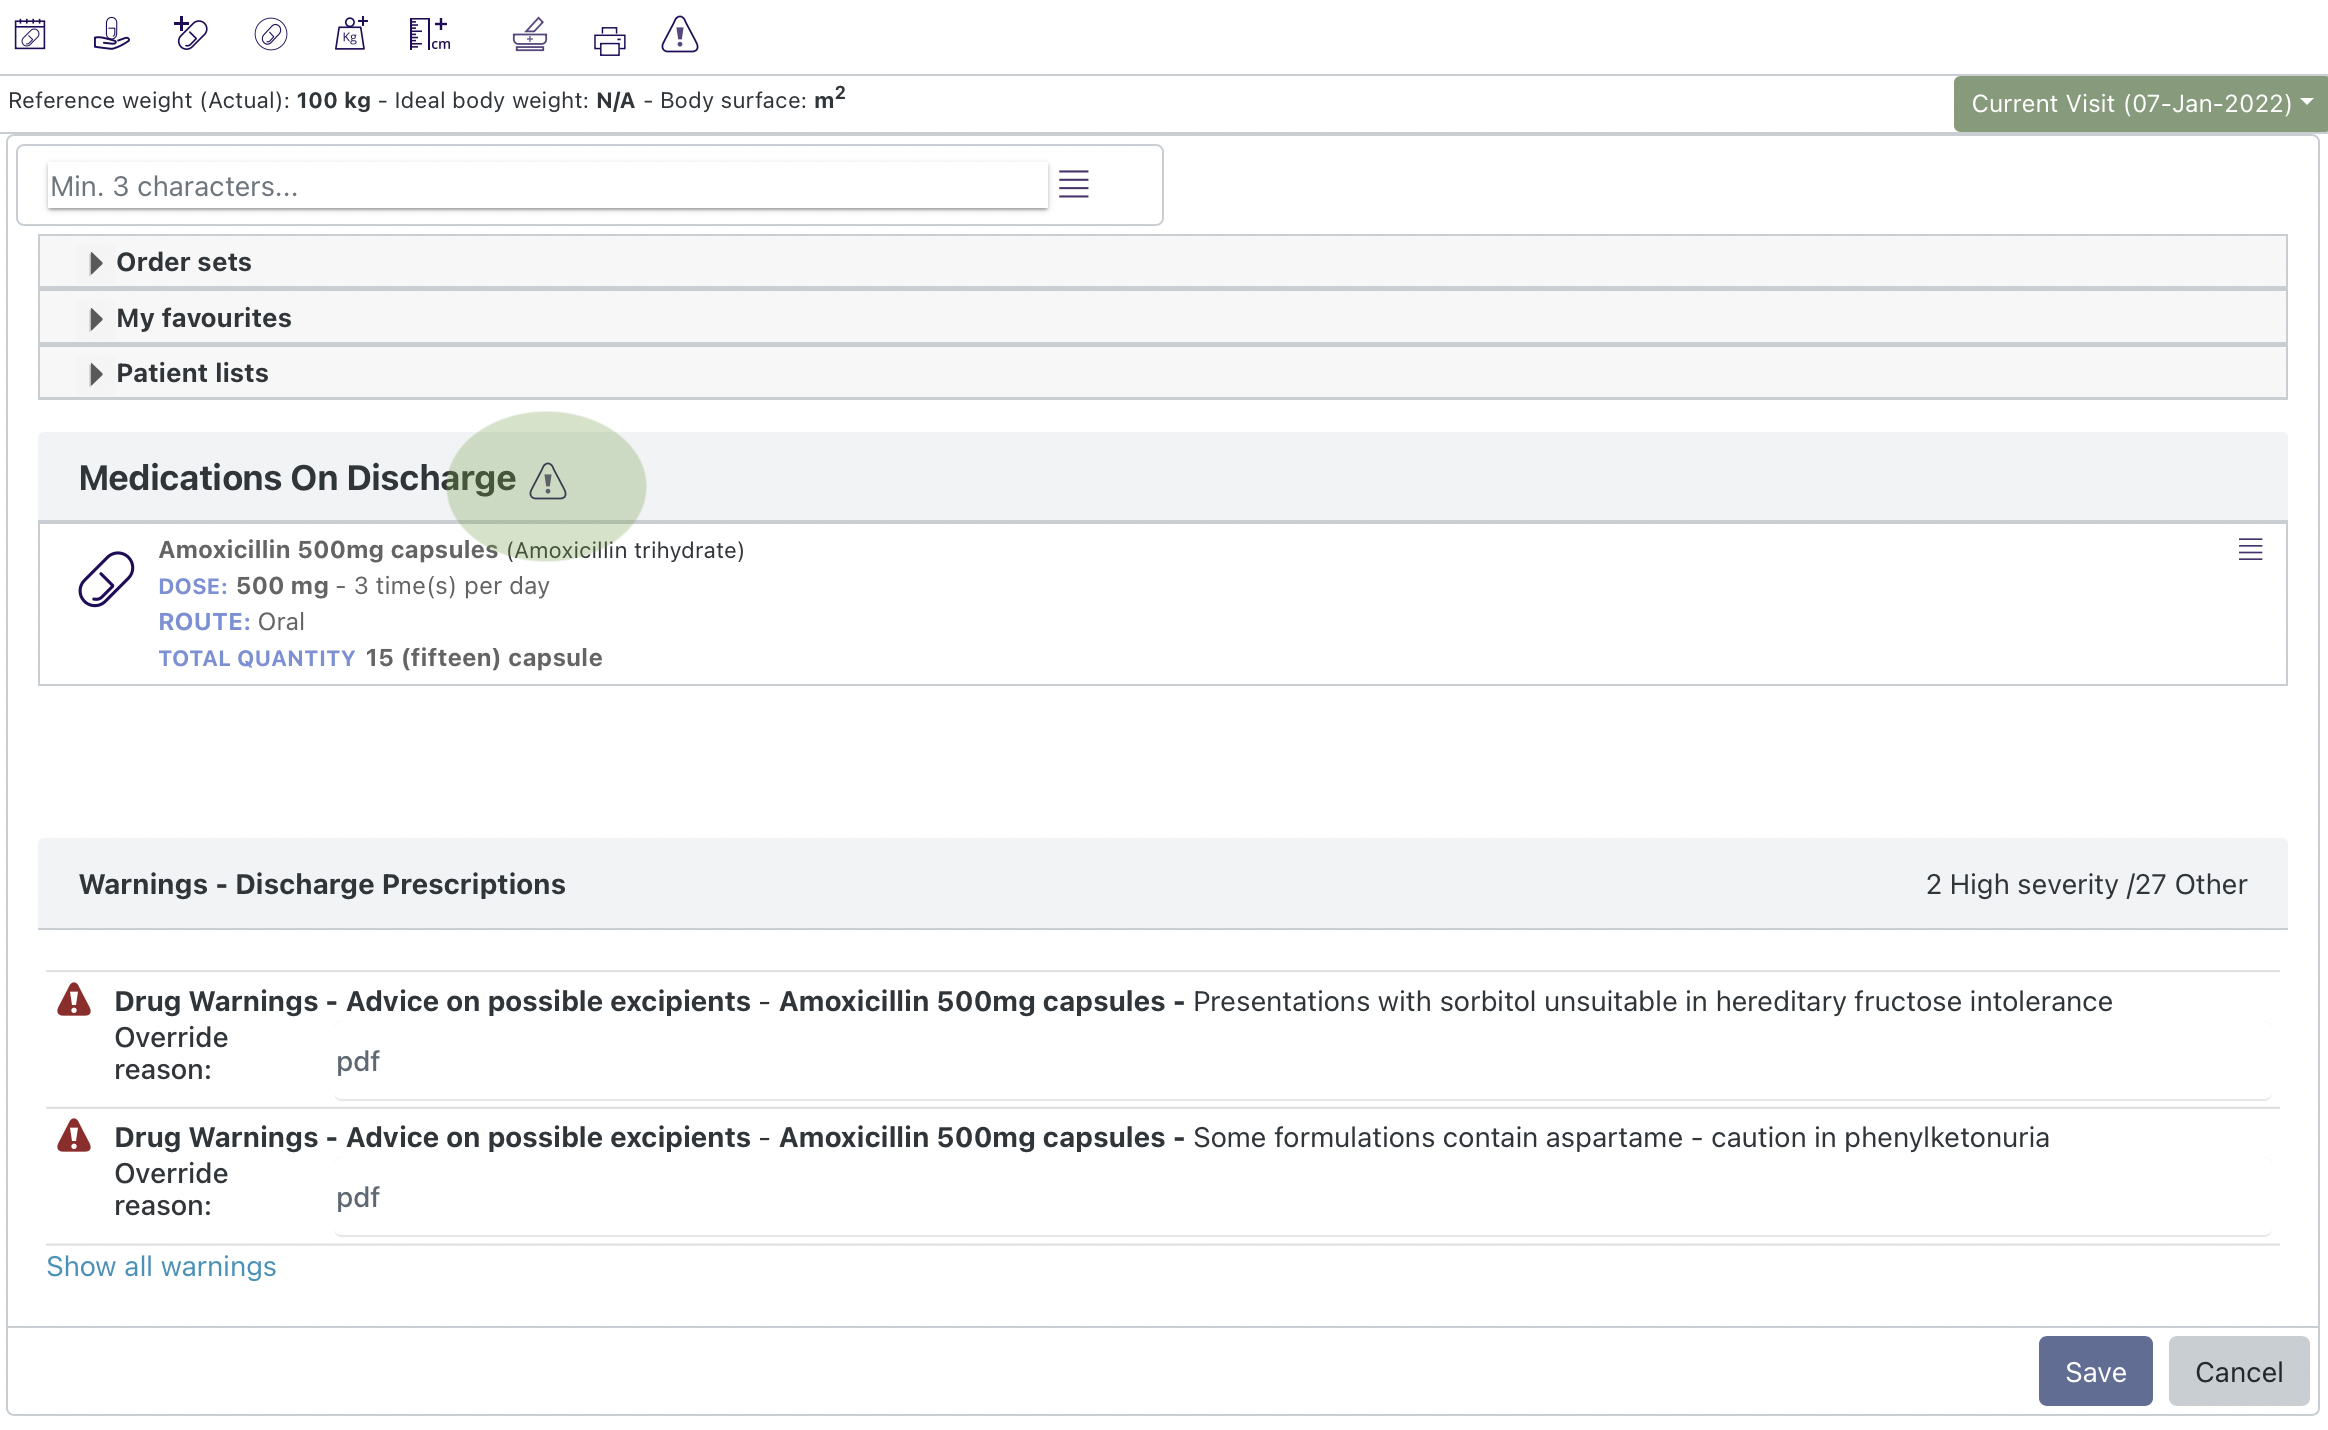
Once you add a therapy to the Discharge prescription the system may provide warnings (what you see will depend on how your organization has configured the system)
Once all the medicines have been added to the discharge prescription select 'Save'.
The Discharge Prescription is now displayed in the centre of the 'Medicines on Admission and Discharge' view. More medicines can be added by selecting "Edit" that has now replaced "Start". The warning icon now visible under the discharge prescription heading, can now be selected to view and address any warning relating to the discharge prescription:
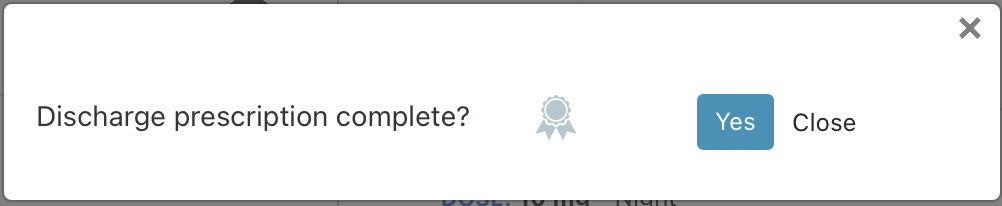
Users with appropriate permissions are able to mark the Discharge Prescription as complete by selecting the rosette icon at the top of the Discharge Prescription: ![]()
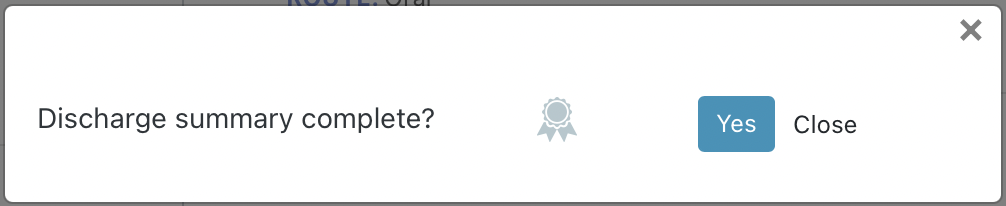
This brings up a dialogue that needs to be confirmed:
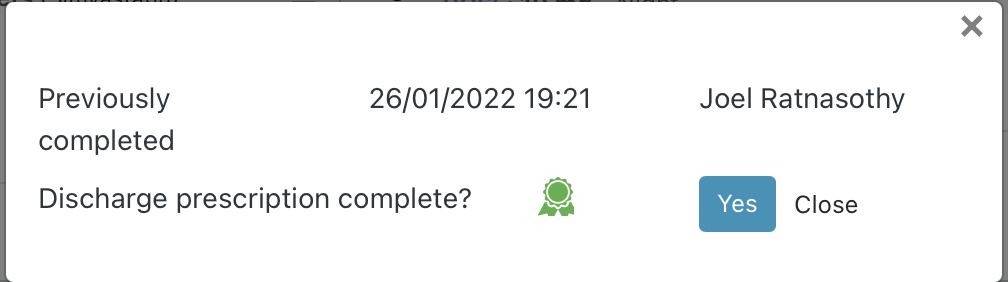
Once confirmed the rosette icon turns green: ![]()
Selecting the rosette again brings up the confirm dialogue and also a list of when the Discharge Prescription was previously completed and by whom:
Once completed the system generates the Discharge Summary.
To view the Discharge Summary select the 'Medicines on Admission & Discharge' icon within the navigation icons: ![]()
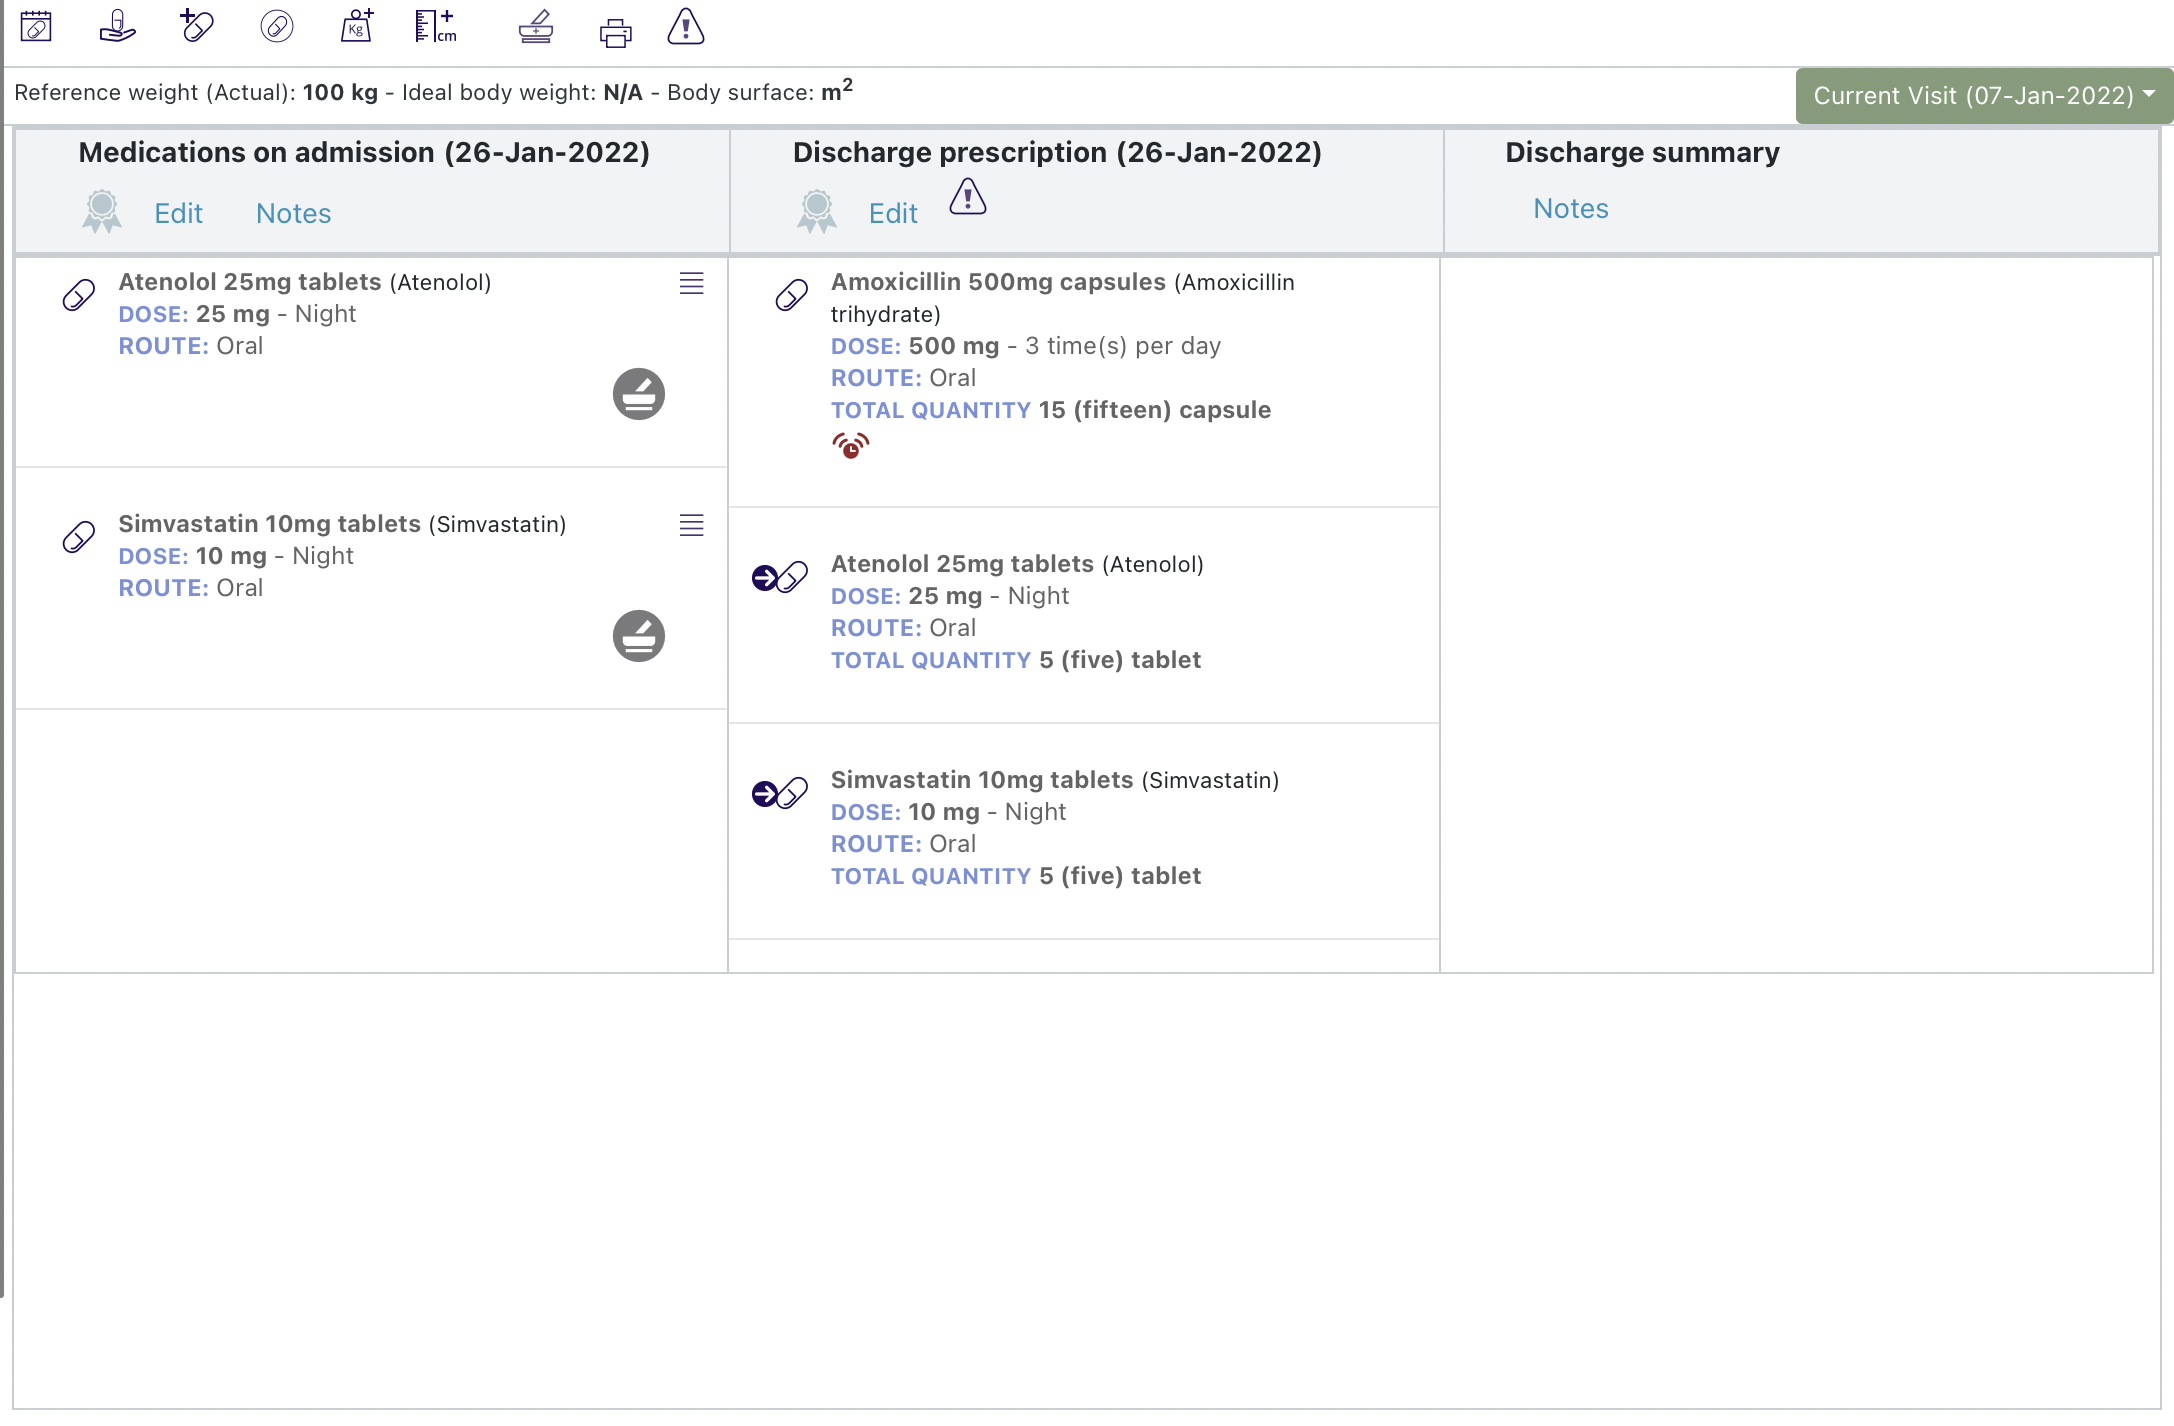
The Discharge Summary list is displayed on the right:
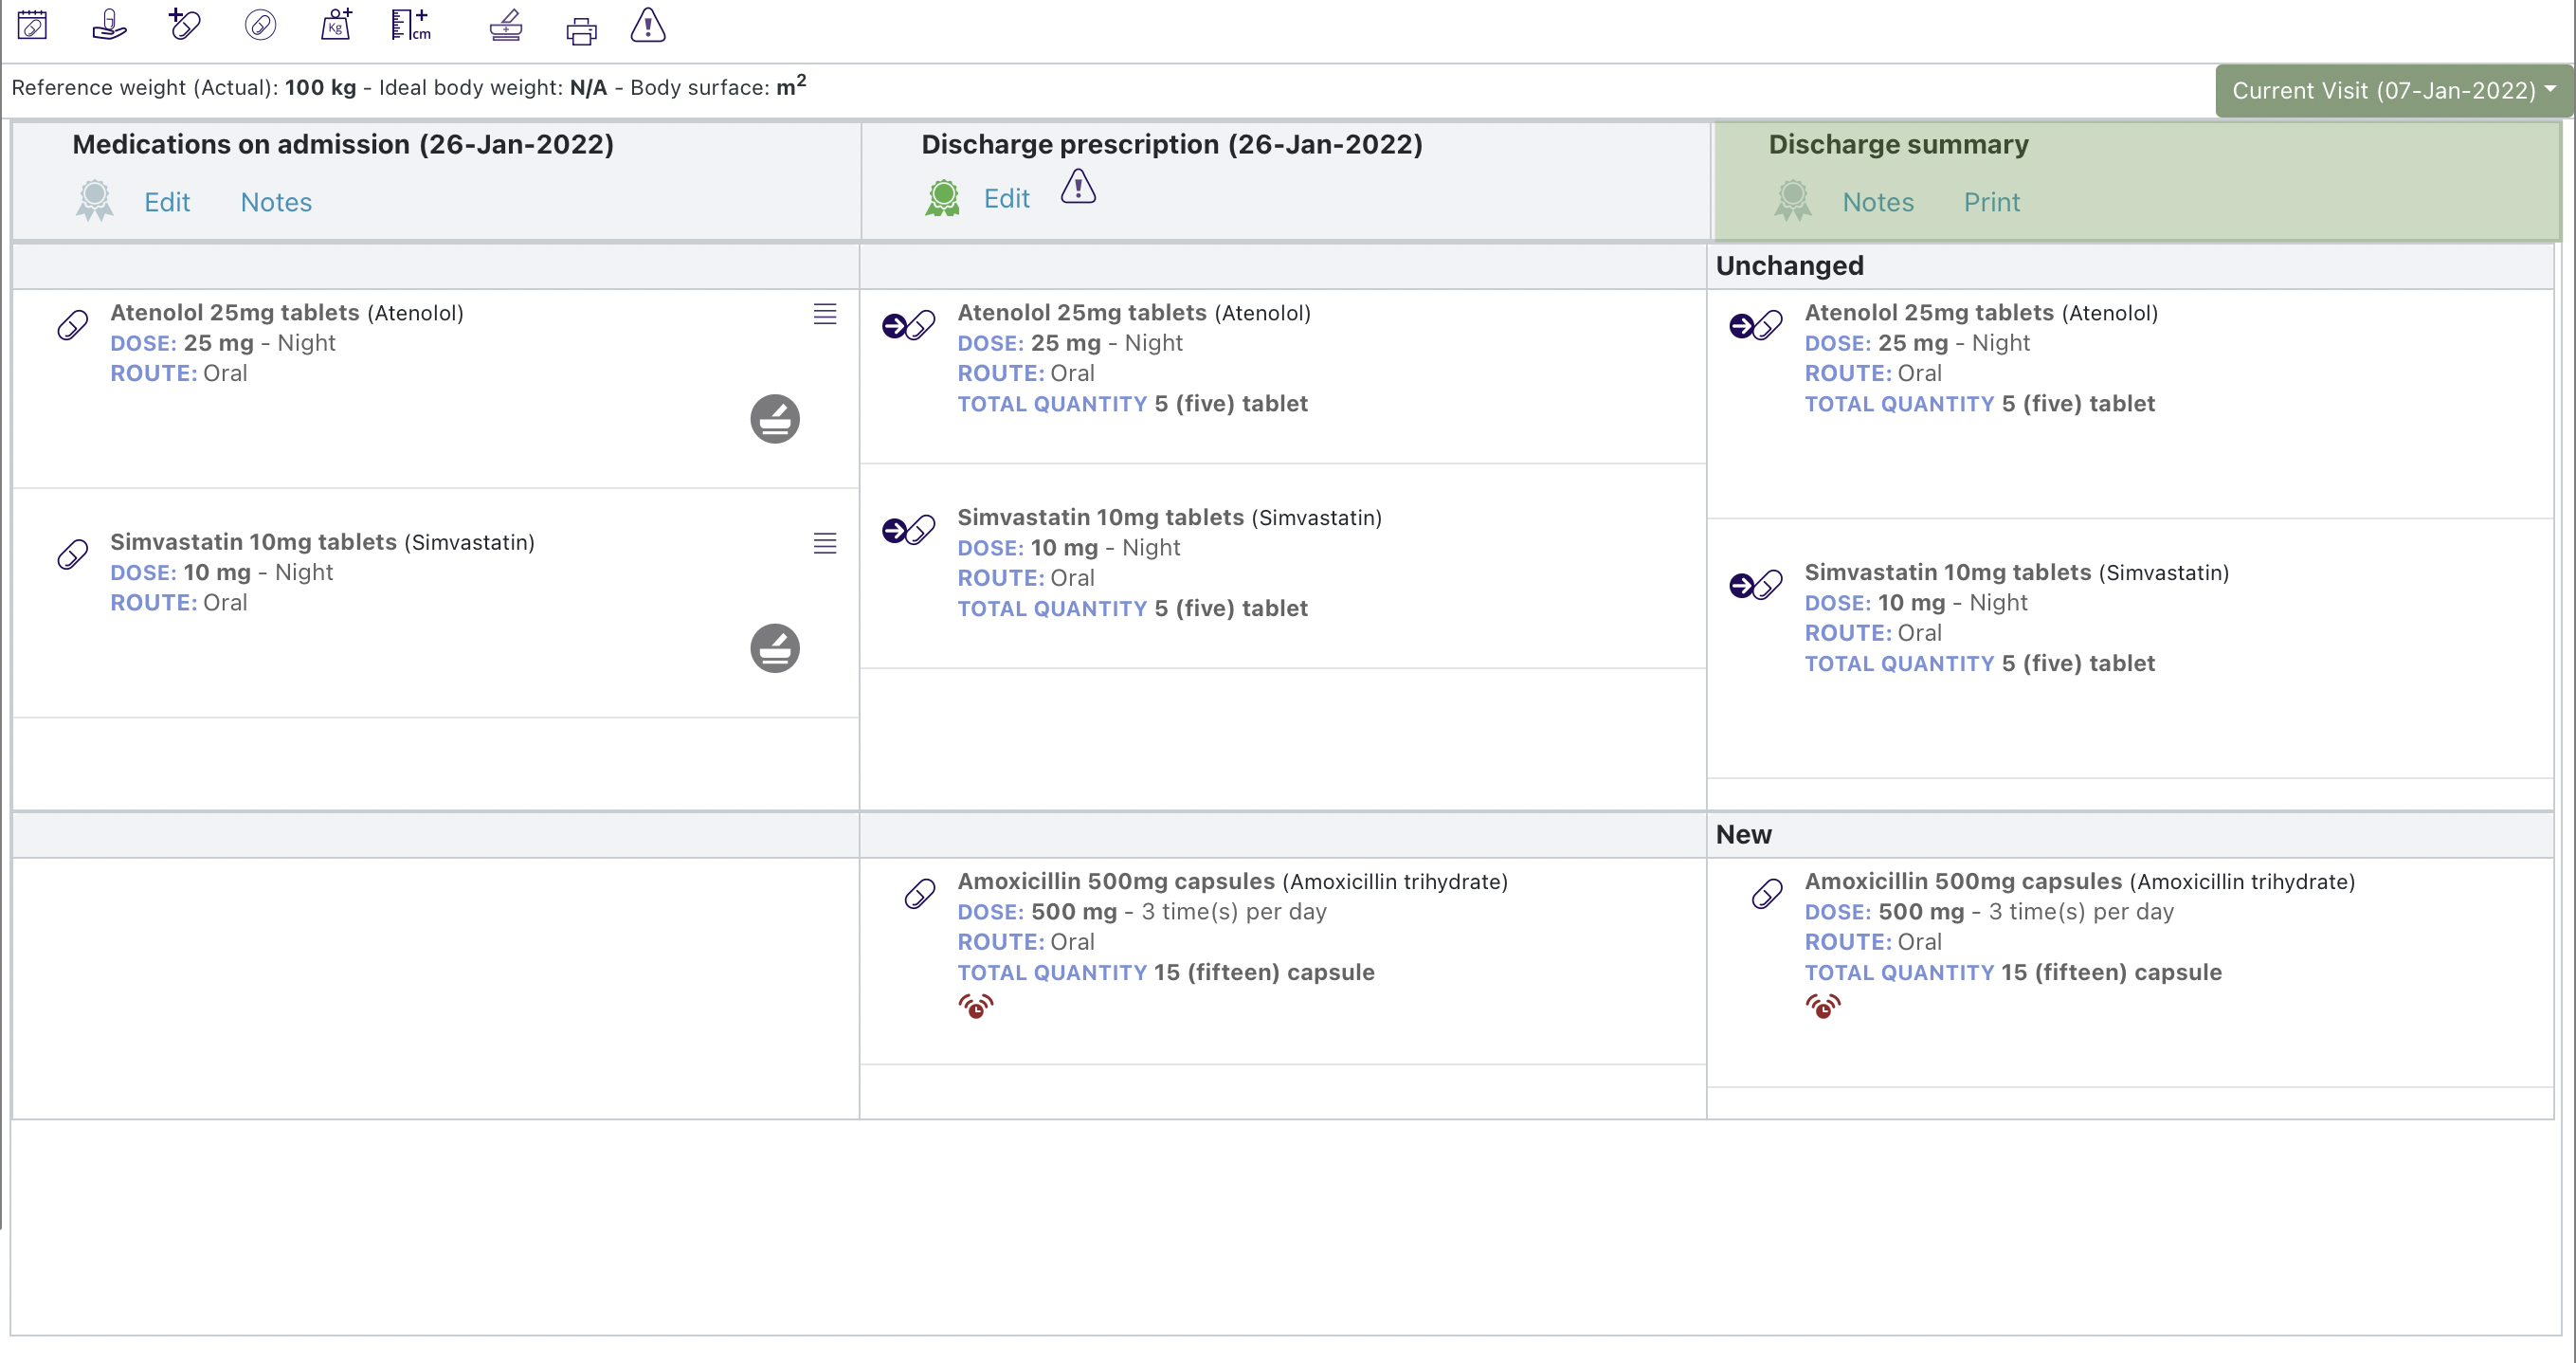
Please Note: The Discharge Summary is automatically generated by the system when the Discharge Prescription is completed. To edit the discharge summary you must either edit the Medicines on Admission list or the Discharge prescription.
There are three controls beneath the Discharge Summary heading: